

49 pages
No page found for this search term.
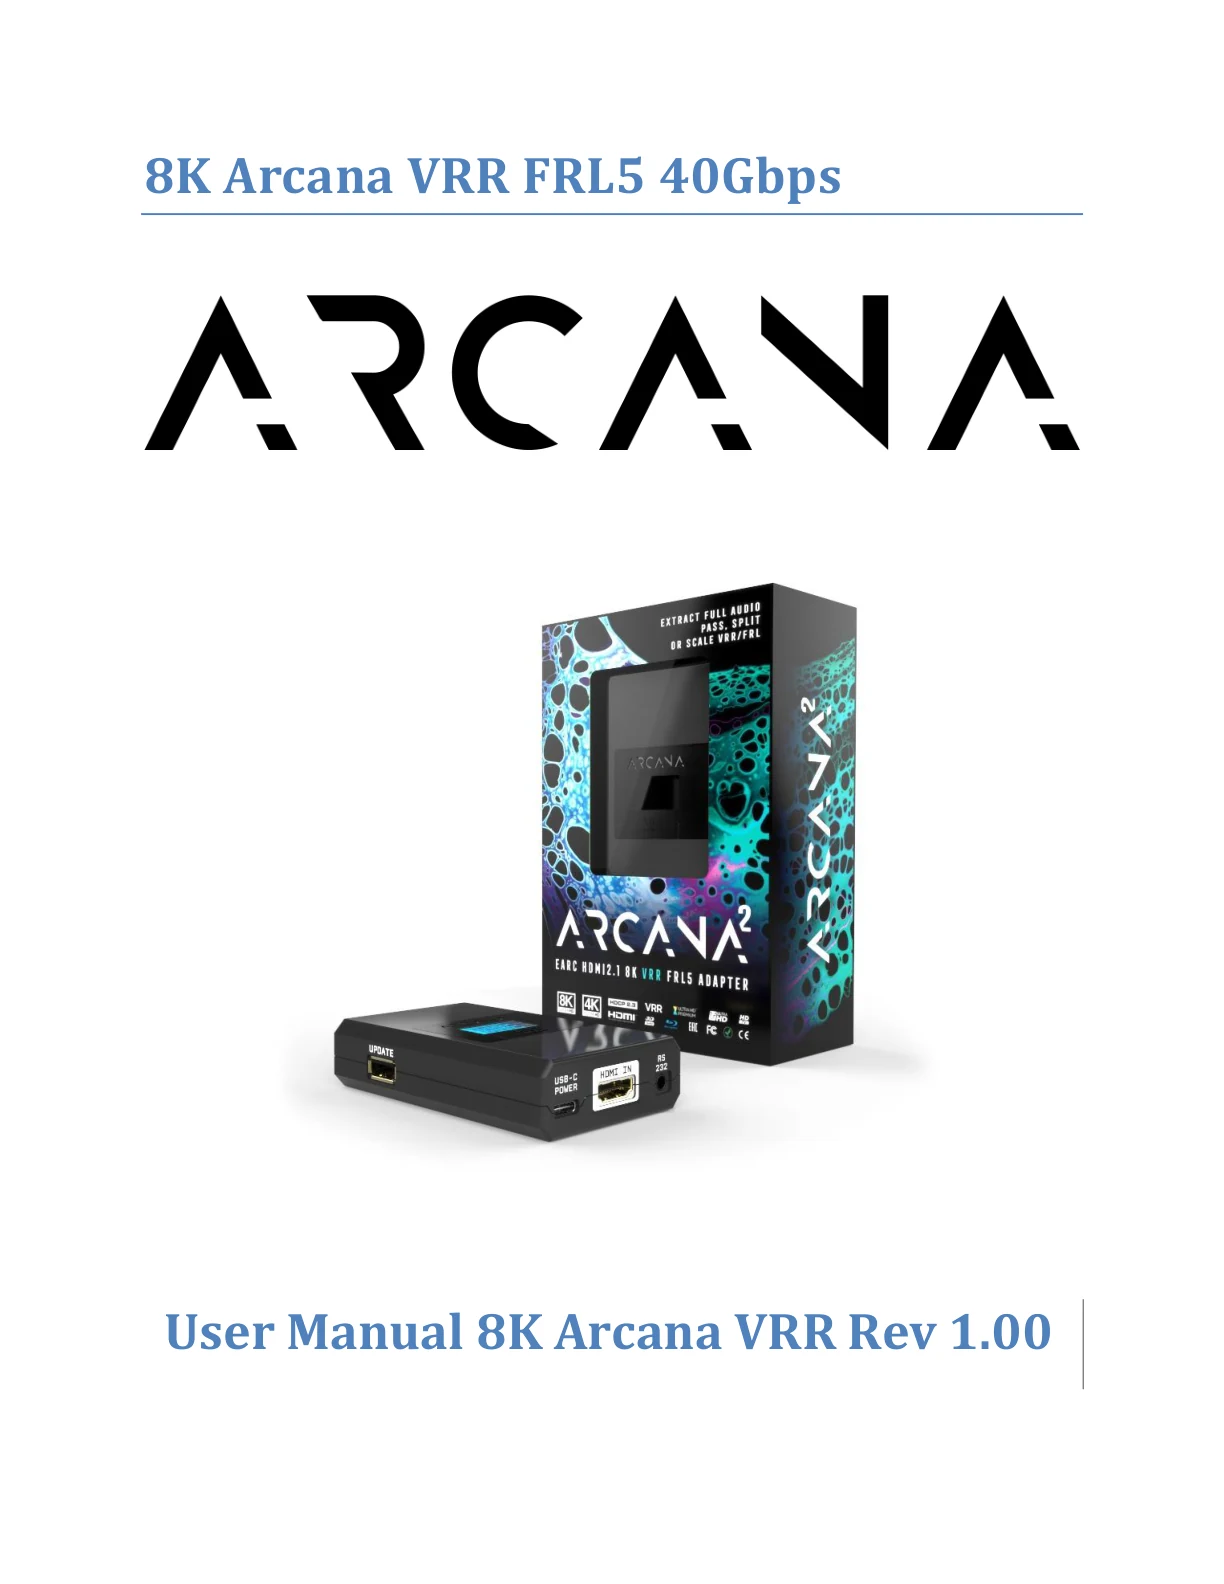
8K Arcana VRR FRL5 40Gbps
User Manual 8K Arcana VRR Rev 1.00
Disclaimer: 3rd party and/or custom firmware providing additional features are not covered in this manual.
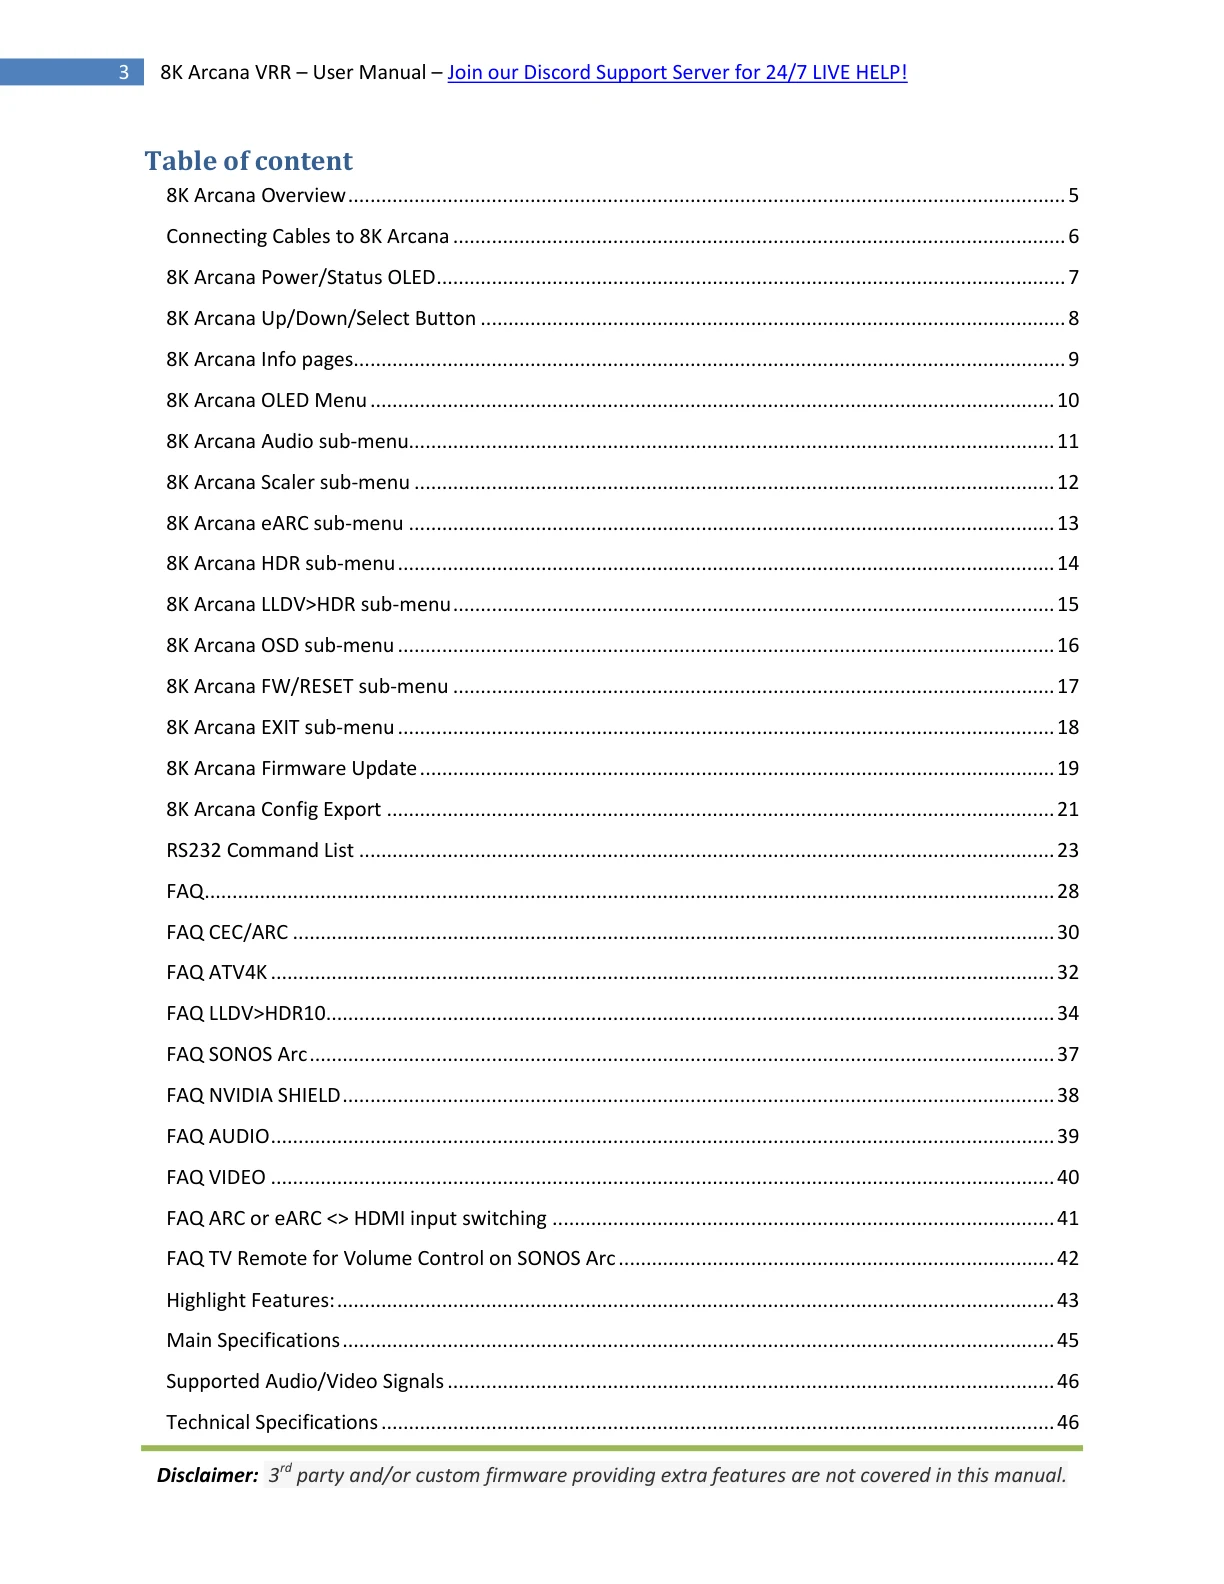
Table of content
8K Arcana Overview .................................................................................................................................. 5
Connecting Cables to 8K Arcana ............................................................................................................... 6
8K Arcana Power/Status OLED .................................................................................................................. 7
8K Arcana Up/Down/Select Button .......................................................................................................... 8
8K Arcana Info pages................................................................................................................................. 9
8K Arcana OLED Menu ............................................................................................................................ 10
8K Arcana Audio sub-menu..................................................................................................................... 11
8K Arcana Scaler sub-menu .................................................................................................................... 12
8K Arcana eARC sub-menu ..................................................................................................................... 13
8K Arcana HDR sub-menu ....................................................................................................................... 14
8K Arcana LLDV>HDR sub-menu ............................................................................................................. 15
8K Arcana OSD sub-menu ....................................................................................................................... 16
8K Arcana FW/RESET sub-menu ............................................................................................................. 17
8K Arcana EXIT sub-menu ....................................................................................................................... 18
8K Arcana Firmware Update ................................................................................................................... 19
8K Arcana Config Export ......................................................................................................................... 21
RS232 Command List .............................................................................................................................. 23
FAQ.......................................................................................................................................................... 28
FAQ CEC/ARC .......................................................................................................................................... 30
FAQ ATV4K .............................................................................................................................................. 32
FAQ LLDV>HDR10.................................................................................................................................... 34
FAQ SONOS Arc ....................................................................................................................................... 37
FAQ NVIDIA SHIELD ................................................................................................................................. 38
FAQ AUDIO .............................................................................................................................................. 39
FAQ VIDEO .............................................................................................................................................. 40
FAQ ARC or eARC <> HDMI input switching ........................................................................................... 41
FAQ TV Remote for Volume Control on SONOS Arc ............................................................................... 42
Highlight Features: .................................................................................................................................. 43
Main Specifications ................................................................................................................................. 45
Supported Audio/Video Signals .............................................................................................................. 46
Technical Specifications .......................................................................................................................... 46
Disclaimer: 3rd party and/or custom firmware providing extra features are not covered in this manual.
Certifications ........................................................................................................................................... 47 Pro Tips ................................................................................................................................................... 48 Disclaimer: 3rd party and/or custom firmware providing additional features are not covered in this manual.
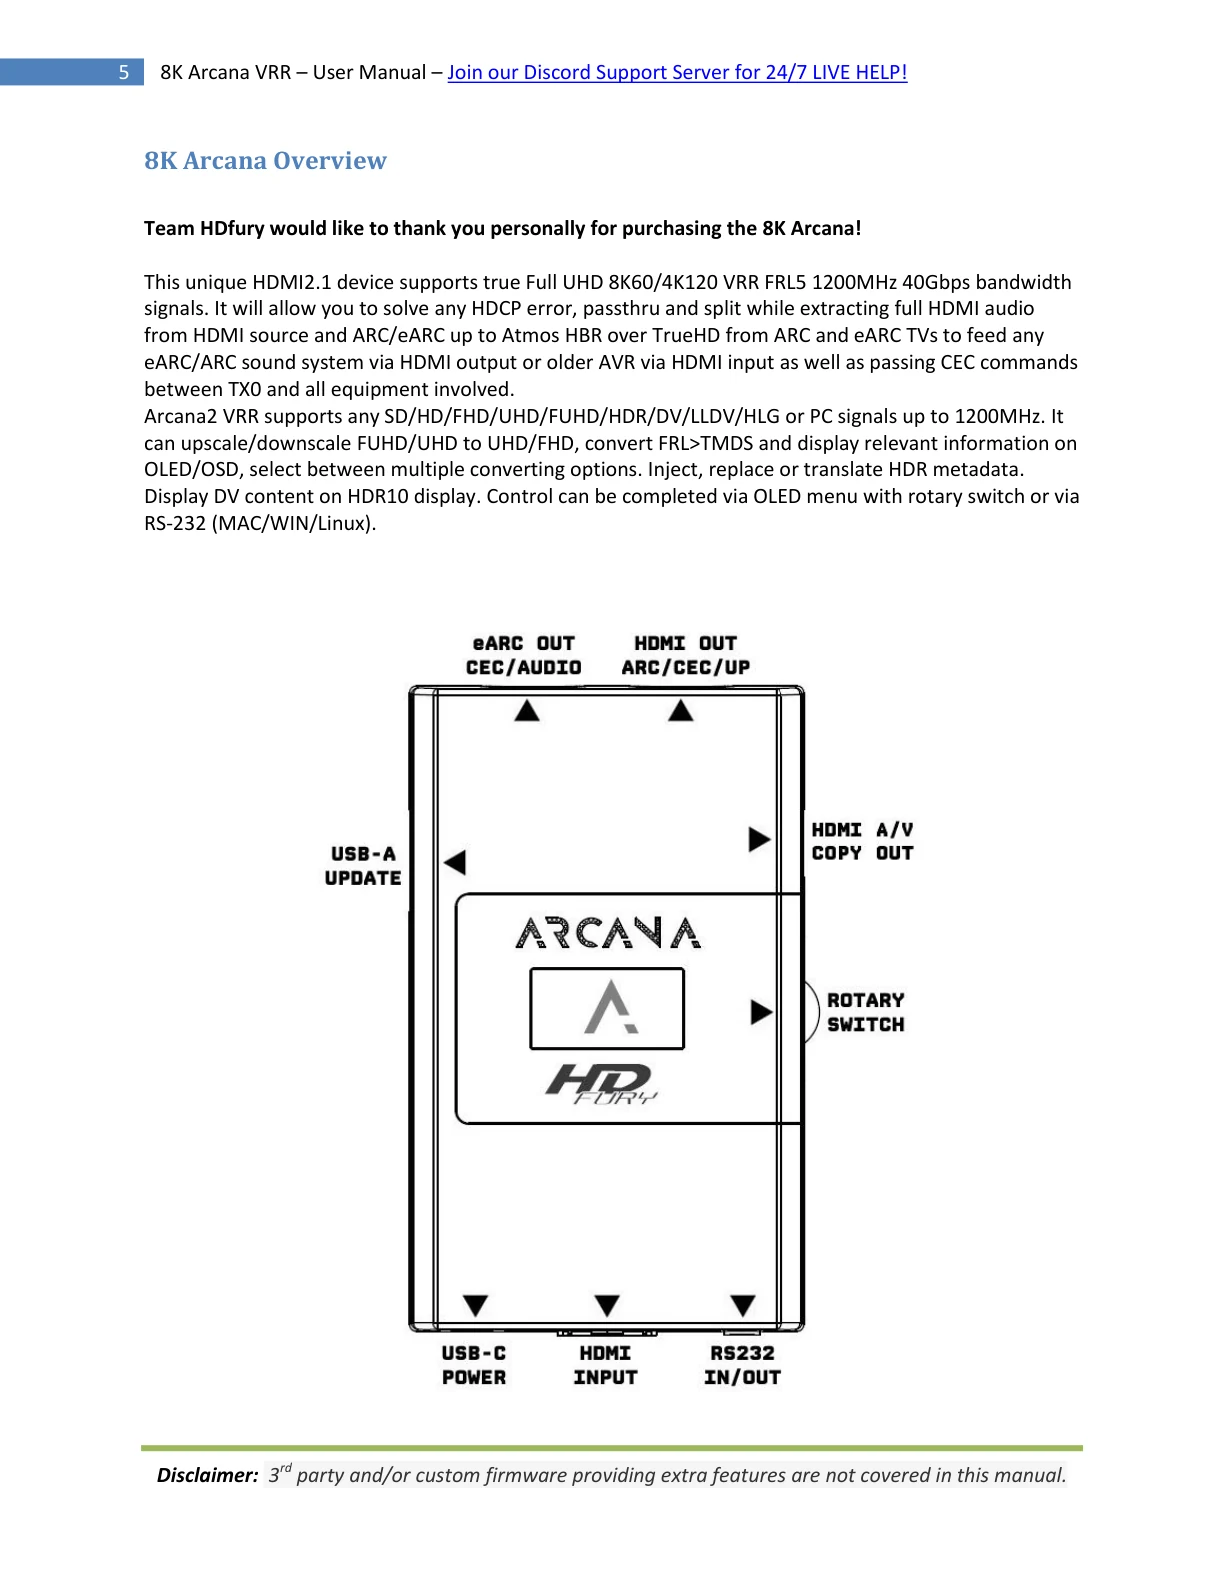
8K Arcana Overview
Team HDfury would like to thank you personally for purchasing the 8K Arcana!
This unique HDMI2.1 device supports true Full UHD 8K60/4K120 VRR FRL5 1200MHz 40Gbps bandwidth
signals. It will allow you to solve any HDCP error, passthru and split while extracting full HDMI audio
from HDMI source and ARC/eARC up to Atmos HBR over TrueHD from ARC and eARC TVs to feed any
eARC/ARC sound system via HDMI output or older AVR via HDMI input as well as passing CEC commands
between TX0 and all equipment involved.
Arcana2 VRR supports any SD/HD/FHD/UHD/FUHD/HDR/DV/LLDV/HLG or PC signals up to 1200MHz. It
can upscale/downscale FUHD/UHD to UHD/FHD, convert FRL>TMDS and display relevant information on
OLED/OSD, select between multiple converting options. Inject, replace or translate HDR metadata.
Display DV content on HDR10 display. Control can be completed via OLED menu with rotary switch or via
RS-232 (MAC/WIN/Linux).
Disclaimer: 3rd party and/or custom firmware providing extra features are not covered in this manual.
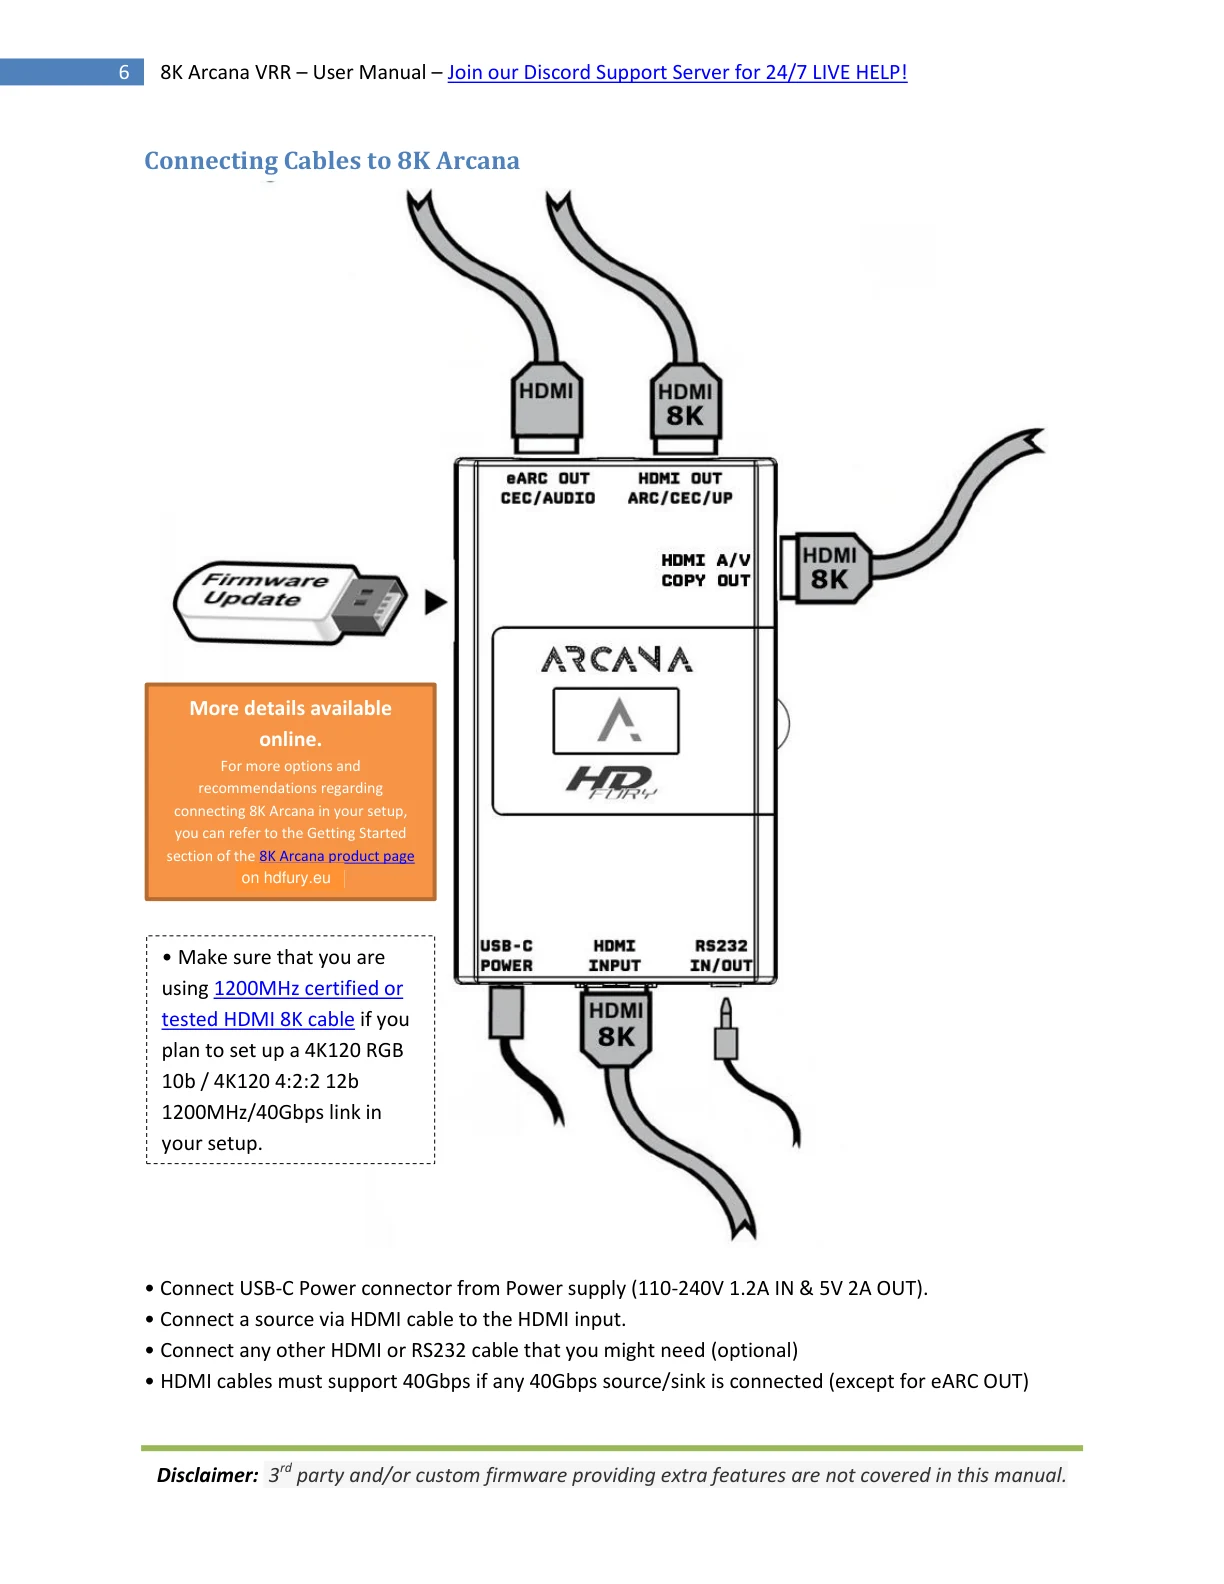
Connecting Cables to 8K Arcana
More details available
online.
For more options and
recommendations regarding
connecting 8K Arcana in your setup,
you can refer to the Getting Started
section of the 8K Arcana product page
on hdfury.eu
Direct Link here.
• Make sure that you are
using 1200MHz certified or
tested HDMI 8K cable if you
plan to set up a 4K120 RGB
10b / 4K120 4:2:2 12b
1200MHz/40Gbps link in
your setup.
• Connect USB-C Power connector from Power supply (110-240V 1.2A IN & 5V 2A OUT).
• Connect a source via HDMI cable to the HDMI input.
• Connect any other HDMI or RS232 cable that you might need (optional)
• HDMI cables must support 40Gbps if any 40Gbps source/sink is connected (except for eARC OUT)
Disclaimer: 3rd party and/or custom firmware providing extra features are not covered in this manual.
8K Arcana Power/Status OLED
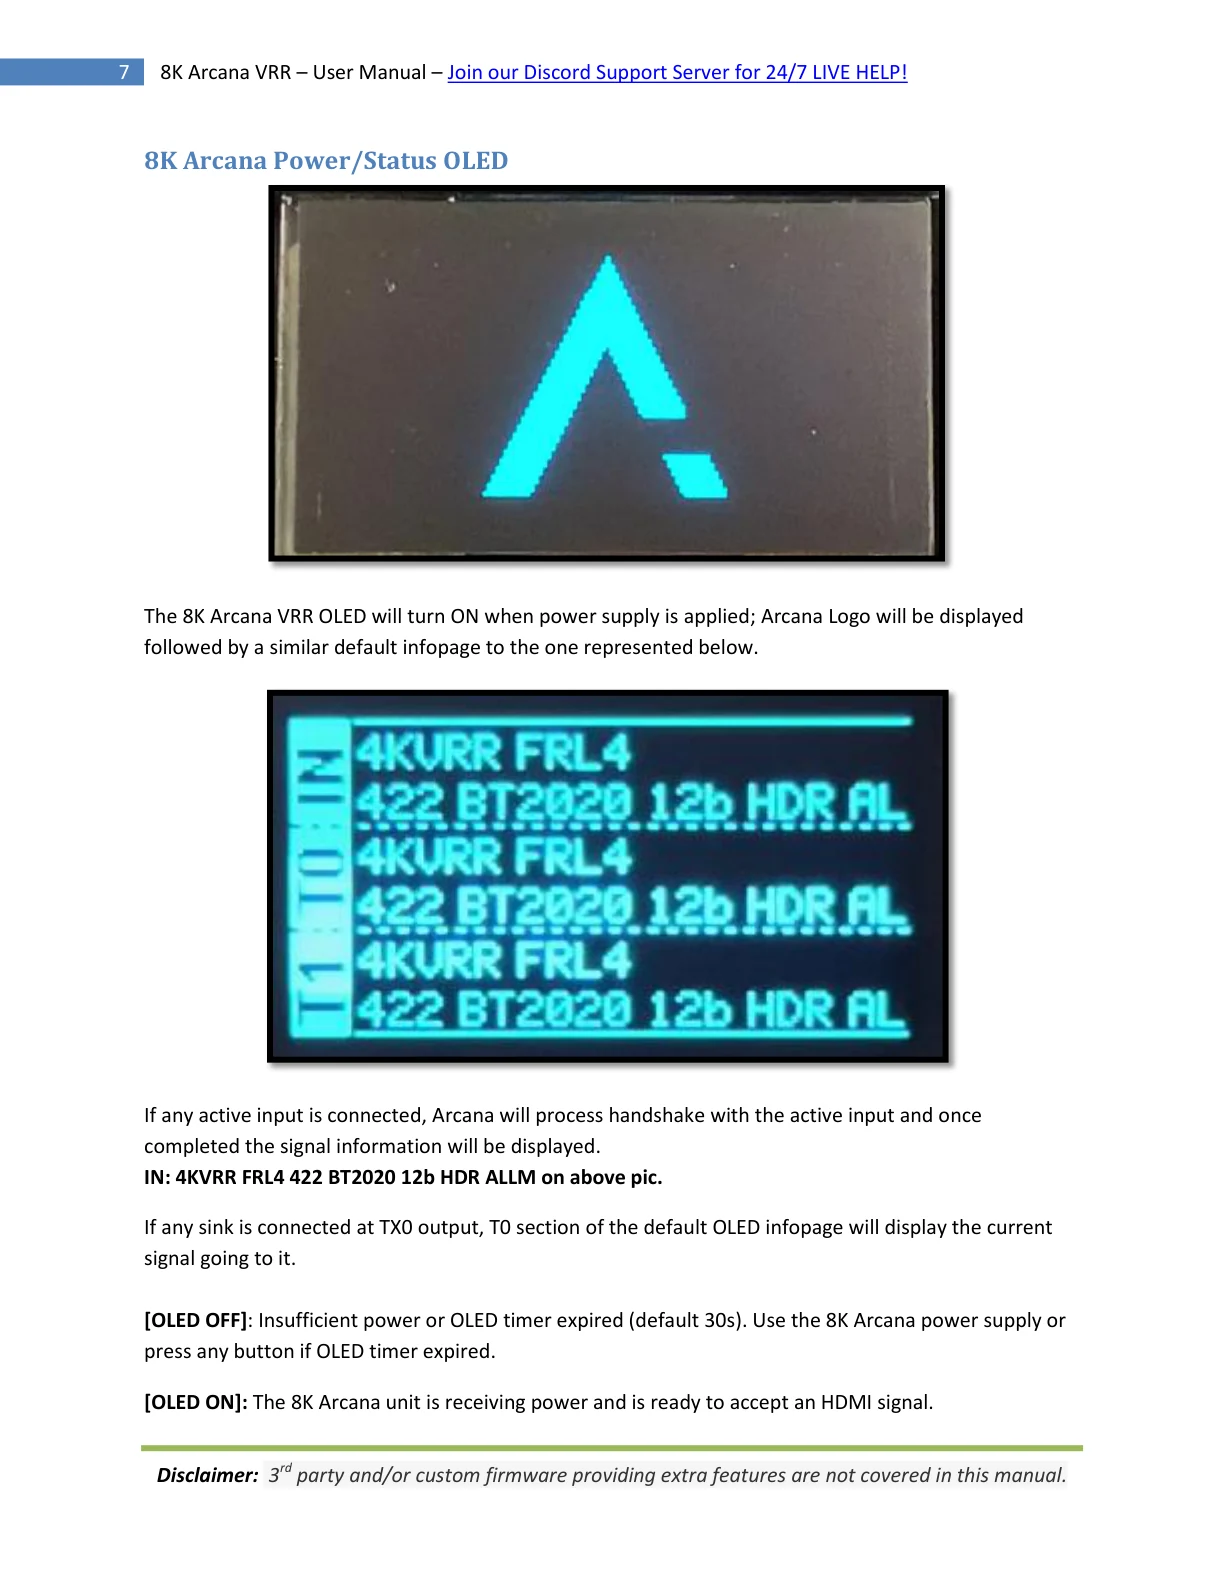
The 8K Arcana VRR OLED will turn ON when power supply is applied; Arcana Logo will be displayed
followed by a similar default infopage to the one represented below.
If any active input is connected, Arcana will process handshake with the active input and once
completed the signal information will be displayed.
IN: 4KVRR FRL4 422 BT2020 12b HDR ALLM on above pic.
If any sink is connected at TX0 output, T0 section of the default OLED infopage will display the current
signal going to it.
[OLED OFF]: Insufficient power or OLED timer expired (default 30s). Use the 8K Arcana power supply or
press any button if OLED timer expired.
[OLED ON]: The 8K Arcana unit is receiving power and is ready to accept an HDMI signal.
Disclaimer: 3rd party and/or custom firmware providing extra features are not covered in this manual.
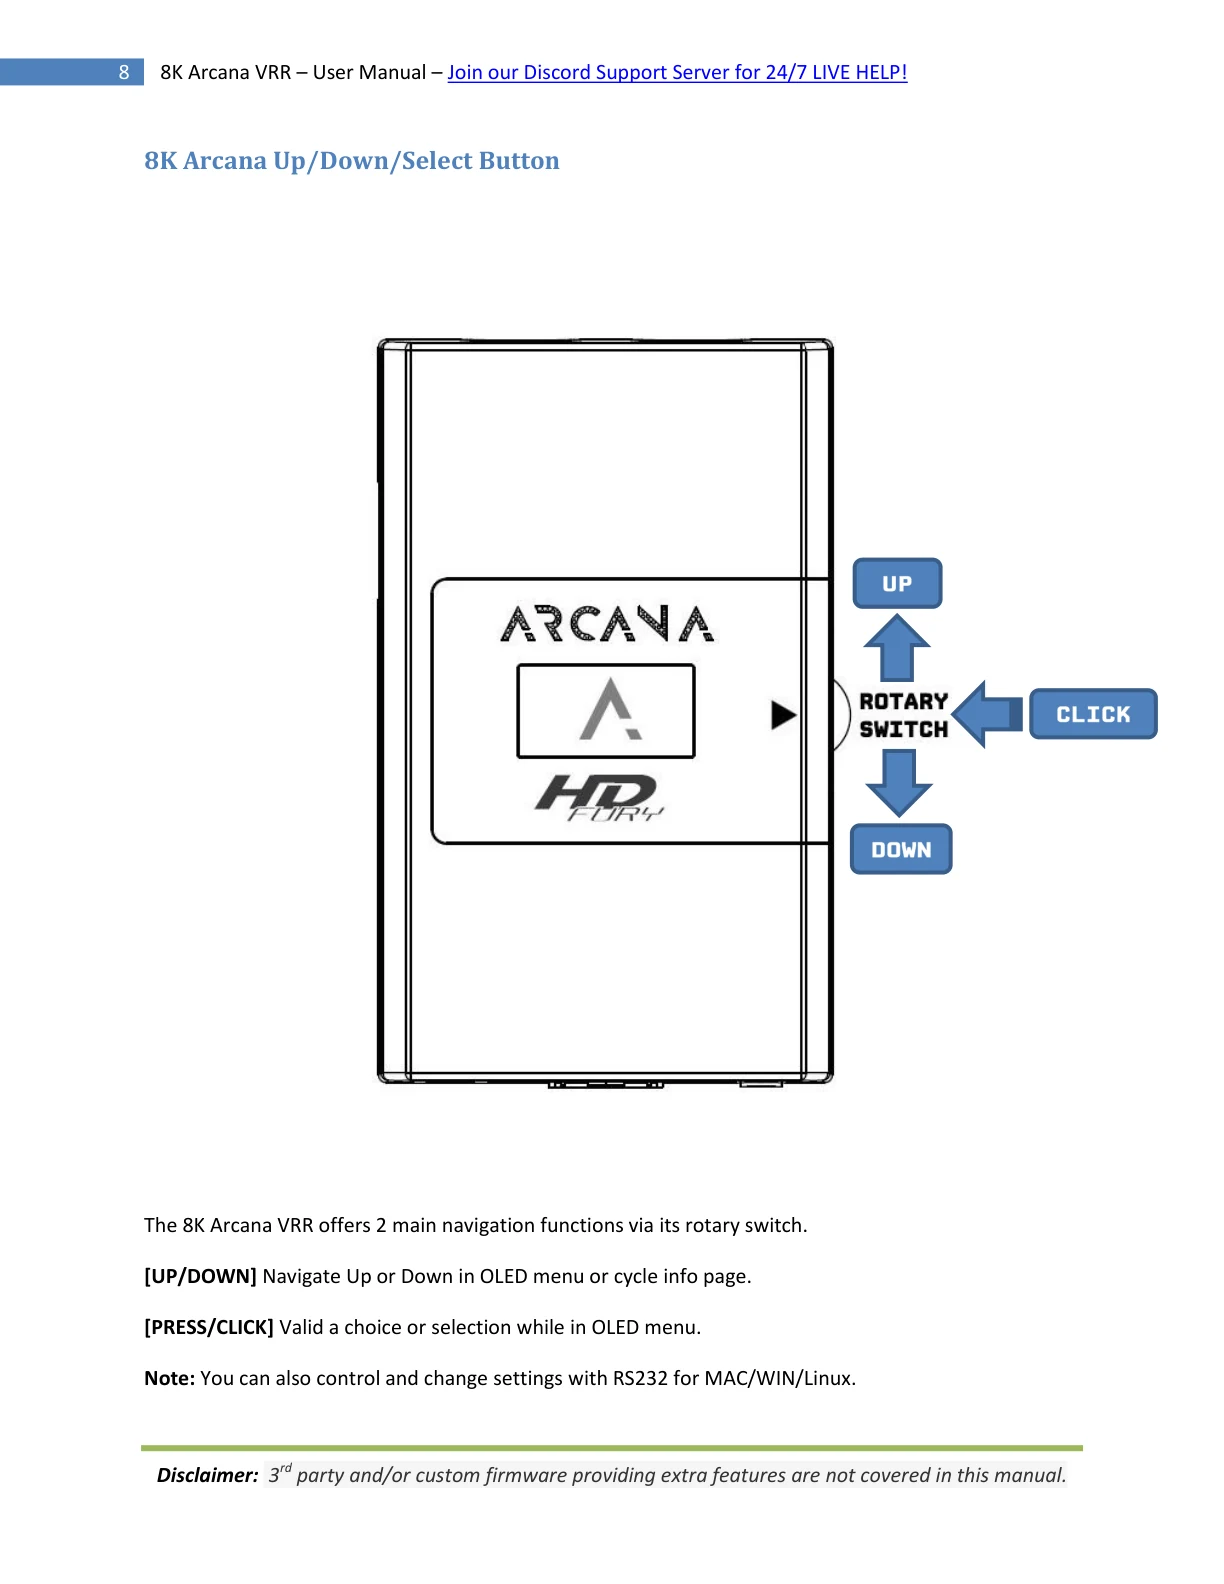
8K Arcana Up/Down/Select Button The 8K Arcana VRR offers 2 main navigation functions via its rotary switch. [UP/DOWN] Navigate Up or Down in OLED menu or cycle info page. [PRESS/CLICK] Valid a choice or selection while in OLED menu. Note: You can also control and change settings with RS232 for MAC/WIN/Linux. Disclaimer: 3rd party and/or custom firmware providing additional features are not covered in this manual.
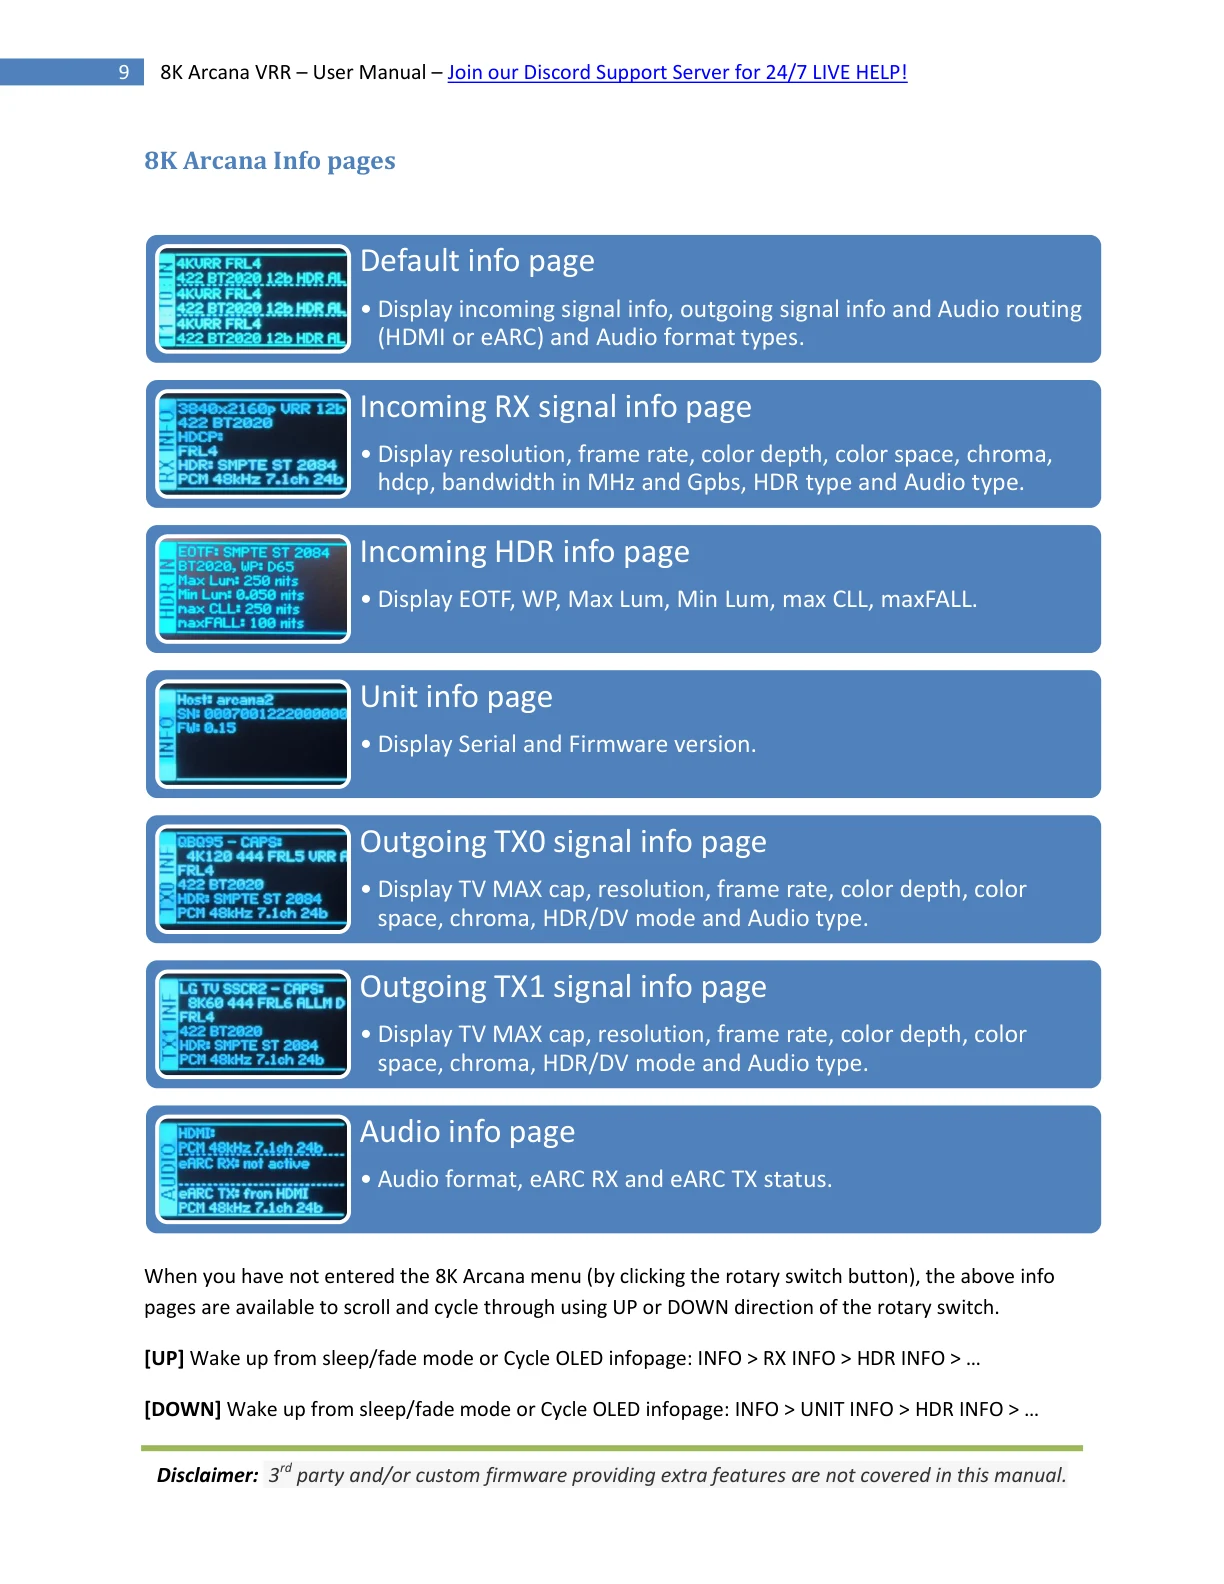
8K Arcana Info pages
Default info page
• Display incoming signal info, outgoing signal info and Audio routing
(HDMI or eARC) and Audio format types.
Incoming RX signal info page
• Display resolution, frame rate, color depth, color space, chroma,
hdcp, bandwidth in MHz and Gpbs, HDR type and Audio type.
Incoming HDR info page
• Display EOTF, WP, Max Lum, Min Lum, max CLL, maxFALL.
Unit info page
• Display Serial and Firmware version.
Outgoing TX0 signal info page
• Display TV MAX cap, resolution, frame rate, color depth, color
space, chroma, HDR/DV mode and Audio type.
Outgoing TX1 signal info page
• Display TV MAX cap, resolution, frame rate, color depth, color
space, chroma, HDR/DV mode and Audio type.
Audio info page
• Audio format, eARC RX and eARC TX status.
When you have not entered the 8K Arcana menu (by clicking the rotary switch button), the above info
pages are available to scroll and cycle through using UP or DOWN direction of the rotary switch.
[UP] Wake up from sleep/fade mode or Cycle OLED infopage: INFO > RX INFO > HDR INFO > …
[DOWN] Wake up from sleep/fade mode or Cycle OLED infopage: INFO > UNIT INFO > HDR INFO > …
Disclaimer: 3rd party and/or custom firmware providing extra features are not covered in this manual.
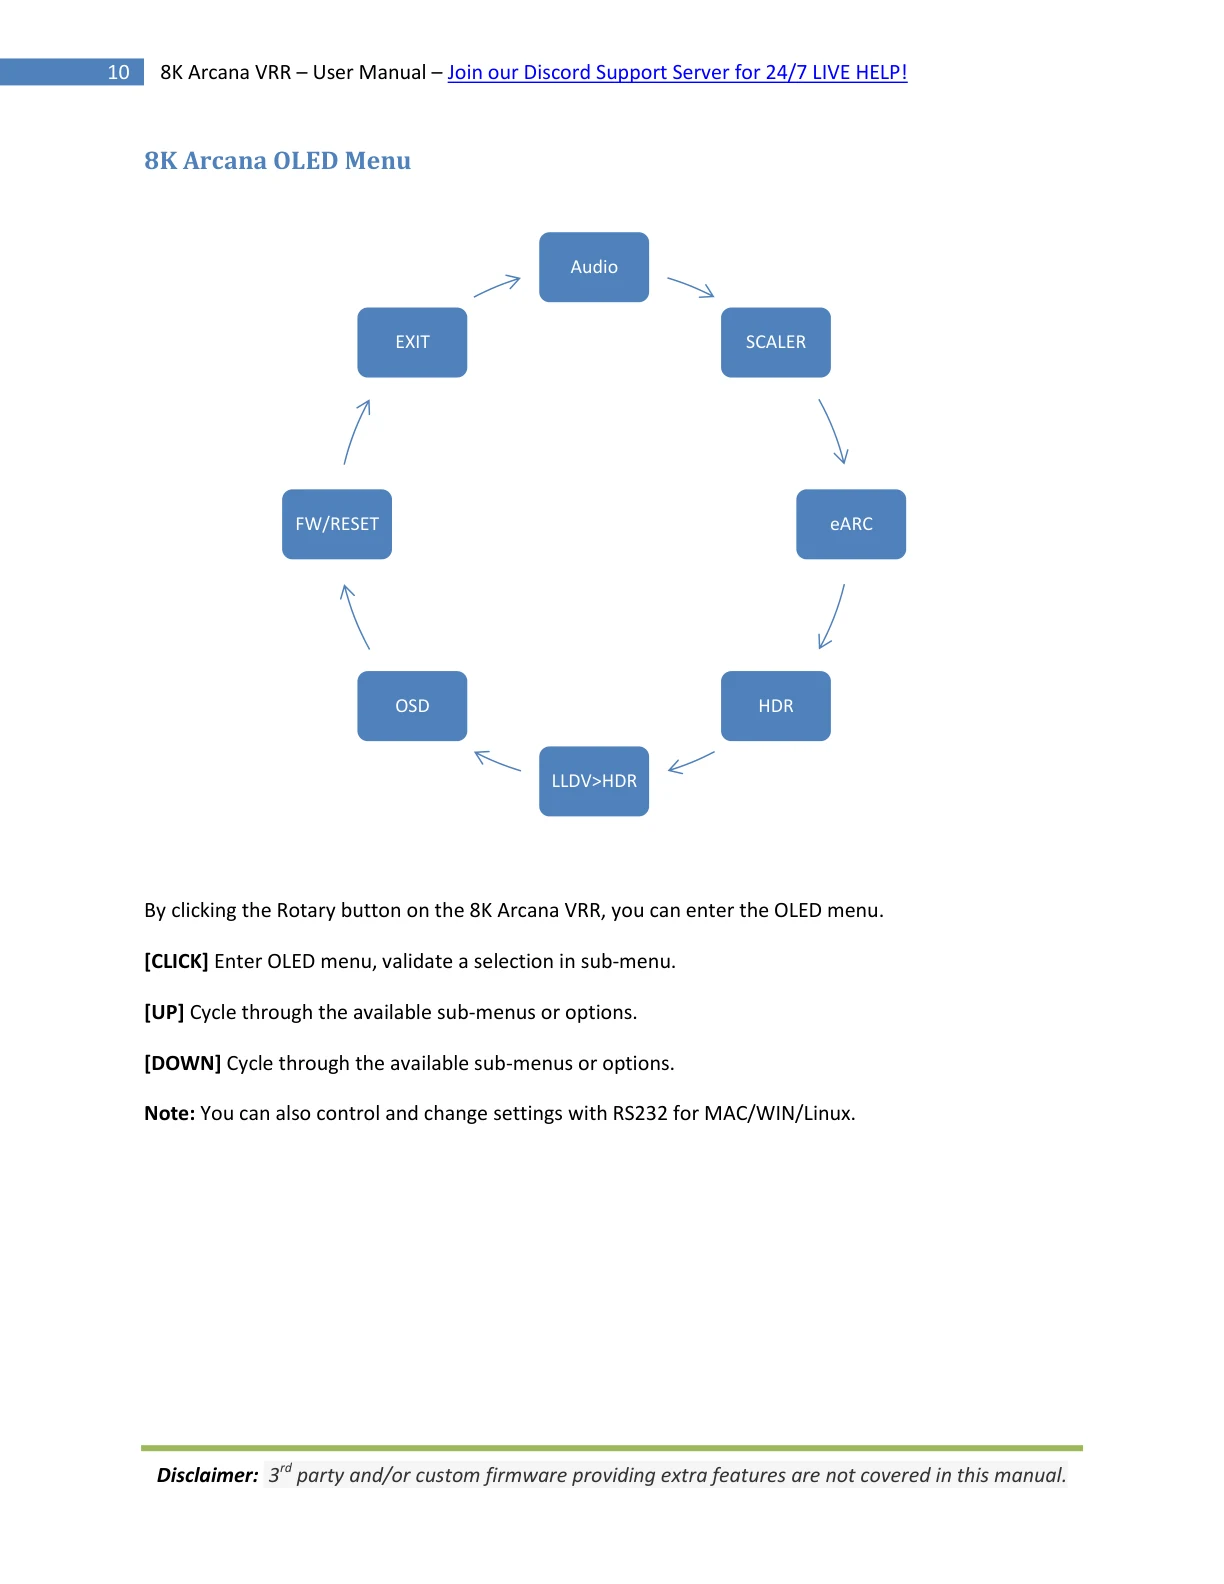
8K Arcana OLED Menu
Audio
EXIT SCALER
FW/RESET eARC
OSD HDR
LLDV>HDR
By clicking the Rotary button on the 8K Arcana VRR, you can enter the OLED menu.
[CLICK] Enter OLED menu, validate a selection in sub-menu.
[UP] Cycle through the available sub-menus or options.
[DOWN] Cycle through the available sub-menus or options.
Note: You can also control and change settings with RS232 for MAC/WIN/Linux.
Disclaimer: 3rd party and/or custom firmware providing extra features are not covered in this manual.

8K Arcana Audio sub-menu
Audio sub-menu entry
• Click rotary button to enter Audio sub-menu
eARC Only (default mode)
• By default after reset or firmware update, auto mode is selected.
• Arcana will only sound to eARC sound system such as SONOS Arc and not send any sound to the display.
Display+eARC
• By selecting this mode, Arcana will use eARC capabilities and send sound to eARC and Display.
• This mode can help with for ARC retrieval issues on some displays .
Display Only
• By selecting this mode, Arcana will send sound to the Display at TX0 Output.
Sonos BEAM1 / ARC OFF (default)
• If your sound system is ARC capable only, you can enable support by selecting this mode. This option is only
necessary for eARC/ARC output.
Add PCM 8ch ON (default)
• If your sound system support PCM 8ch, you can enable support by selecting this mode. This option is only necessary
for eARC output.
Add DTS:X / DTSMA OFF (default)
• If your sound system support DTS:X or DTSMA, you can enable support by selecting this mode. This option is only
necessary for eARC output.
TV eARC Routing AUTO (default)
• By selecting this mode, Arcana will allow eARC sound retrieval from display.
• This mode can be turned OFF if there is eARC retrieval issue in the setup.
Unmute delay OFF (default)
• By selecting this mode, Arcana will add extra delay between audio format change or source/signal switching.
• This mode can be turned ON if there is noise sound in your setup.
TV Standby mute OFF (default)
• By selecting this mode, Arcana will stop sending sound to eARC (SONOS Arc) when TV is turned off.
• By default, Arcana will continue sending sound to eARC sound system when TV is off.
Back
• To exit Audio sub-menu, click Rotary switch when "Back" is displayed
Disclaimer: 3rd party and/or custom firmware providing extra features are not covered in this manual.
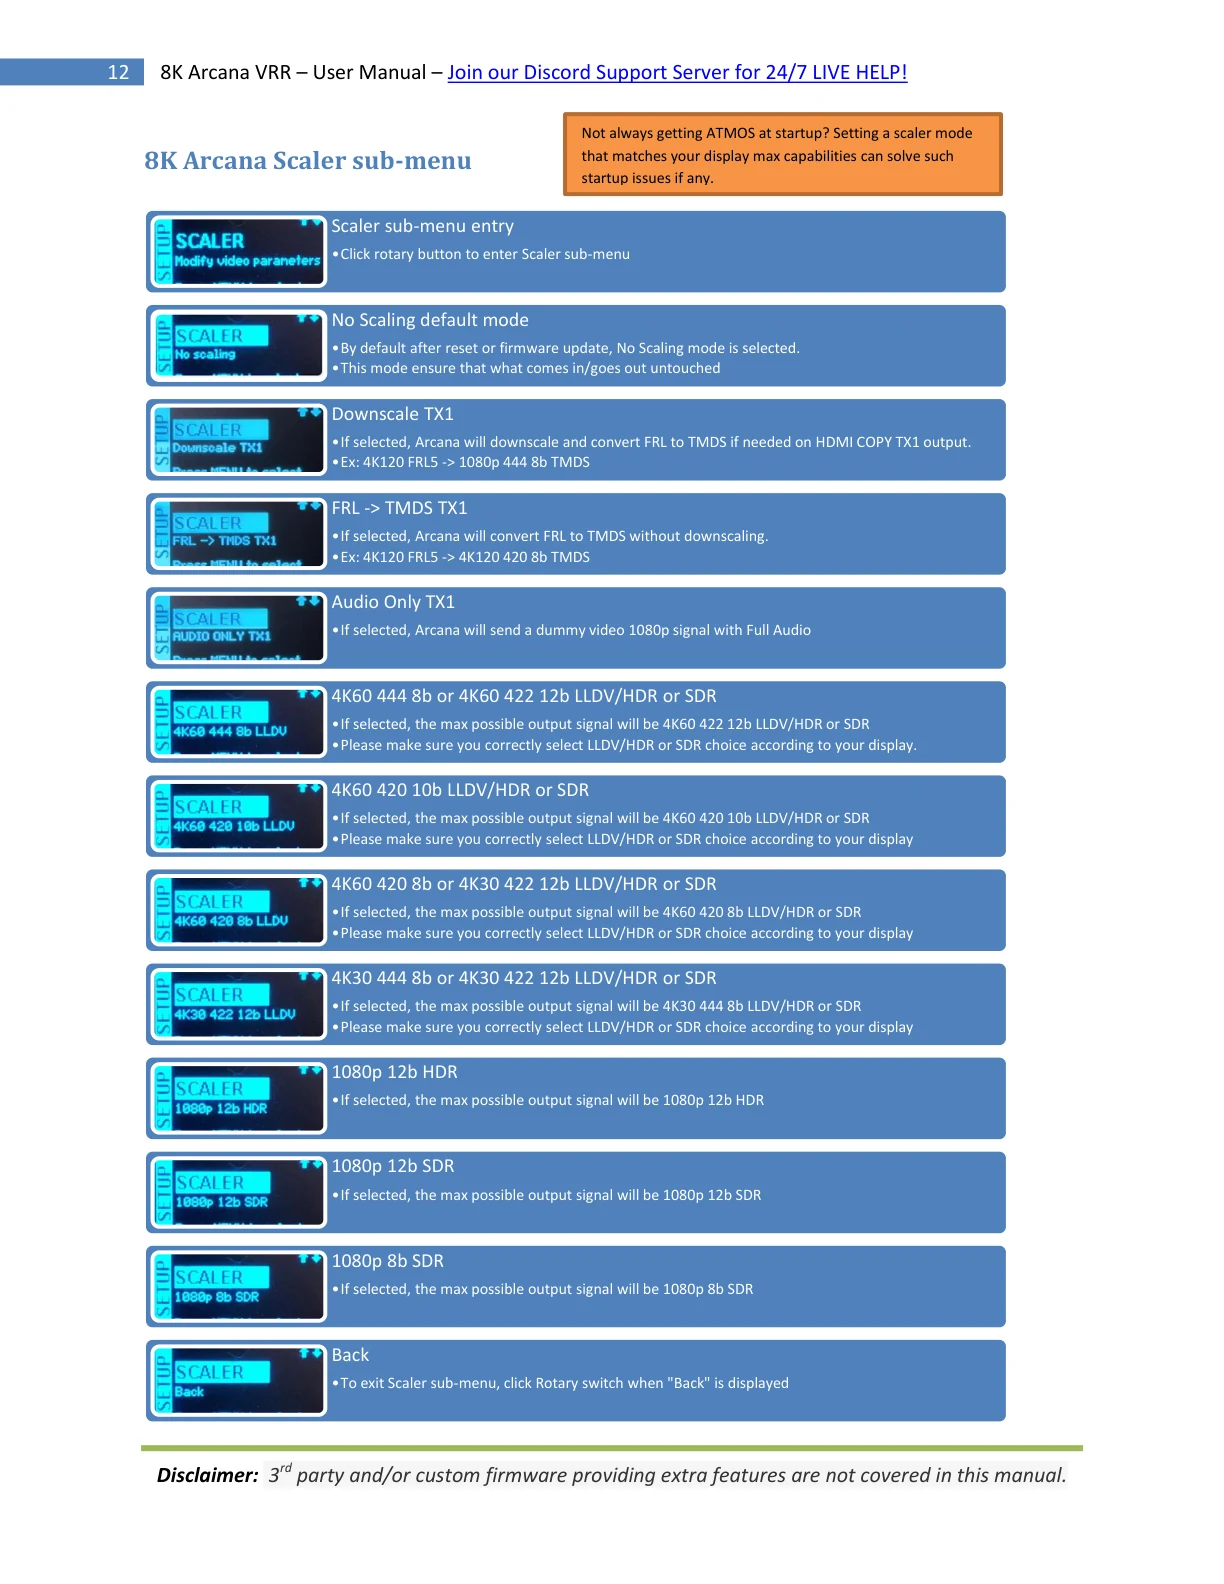
Not always getting ATMOS at startup? Setting a scaler mode
8K Arcana Scaler sub-menu that matches your display max capabilities can solve such
startup issues if any.
Scaler sub-menu entry
•Click rotary button to enter Scaler sub-menu
No Scaling default mode
•By default after reset or firmware update, No Scaling mode is selected.
•This mode ensure that what comes in/goes out untouched
Downscale TX1
•If selected, Arcana will downscale and convert FRL to TMDS if needed on HDMI COPY TX1 output.
•Ex: 4K120 FRL5 -> 1080p 444 8b TMDS
FRL -> TMDS TX1
•If selected, Arcana will convert FRL to TMDS without downscaling.
•Ex: 4K120 FRL5 -> 4K120 420 8b TMDS
Audio Only TX1
•If selected, Arcana will send a dummy video 1080p signal with Full Audio
4K60 444 8b or 4K60 422 12b LLDV/HDR or SDR
•If selected, the max possible output signal will be 4K60 422 12b LLDV/HDR or SDR
•Please make sure you correctly select LLDV/HDR or SDR choice according to your display.
4K60 420 10b LLDV/HDR or SDR
•If selected, the max possible output signal will be 4K60 420 10b LLDV/HDR or SDR
•Please make sure you correctly select LLDV/HDR or SDR choice according to your display
4K60 420 8b or 4K30 422 12b LLDV/HDR or SDR
•If selected, the max possible output signal will be 4K60 420 8b LLDV/HDR or SDR
•Please make sure you correctly select LLDV/HDR or SDR choice according to your display
4K30 444 8b or 4K30 422 12b LLDV/HDR or SDR
•If selected, the max possible output signal will be 4K30 444 8b LLDV/HDR or SDR
•Please make sure you correctly select LLDV/HDR or SDR choice according to your display
1080p 12b HDR
•If selected, the max possible output signal will be 1080p 12b HDR
1080p 12b SDR
•If selected, the max possible output signal will be 1080p 12b SDR
1080p 8b SDR
•If selected, the max possible output signal will be 1080p 8b SDR
Back
•To exit Scaler sub-menu, click Rotary switch when "Back" is displayed
Disclaimer: 3rd party and/or custom firmware providing extra features are not covered in this manual.
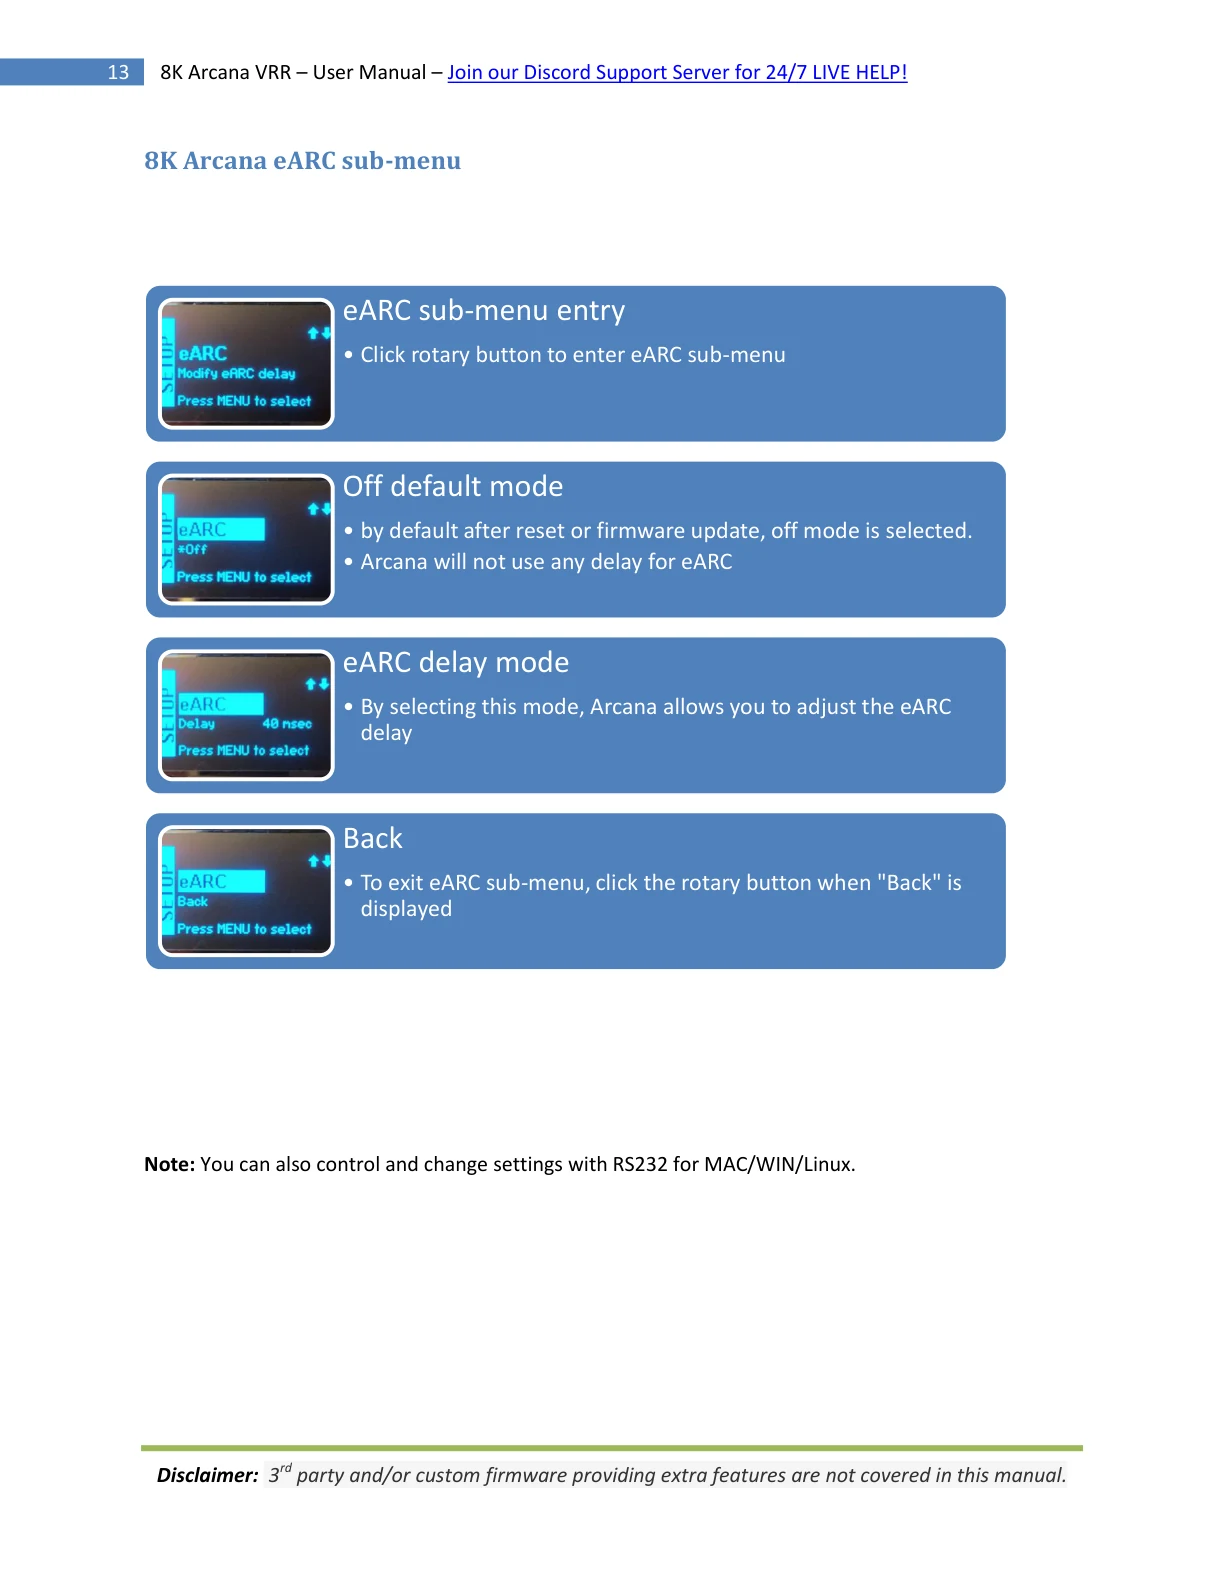
8K Arcana eARC sub-menu
eARC sub-menu entry
• Click rotary button to enter eARC sub-menu
Off default mode
• by default after reset or firmware update, off mode is selected.
• Arcana will not use any delay for eARC
eARC delay mode
• By selecting this mode, Arcana allows you to adjust the eARC
delay
Back
• To exit eARC sub-menu, click the rotary button when "Back" is
displayed
Note: You can also control and change settings with RS232 for MAC/WIN/Linux.
Disclaimer: 3rd party and/or custom firmware providing extra features are not covered in this manual.
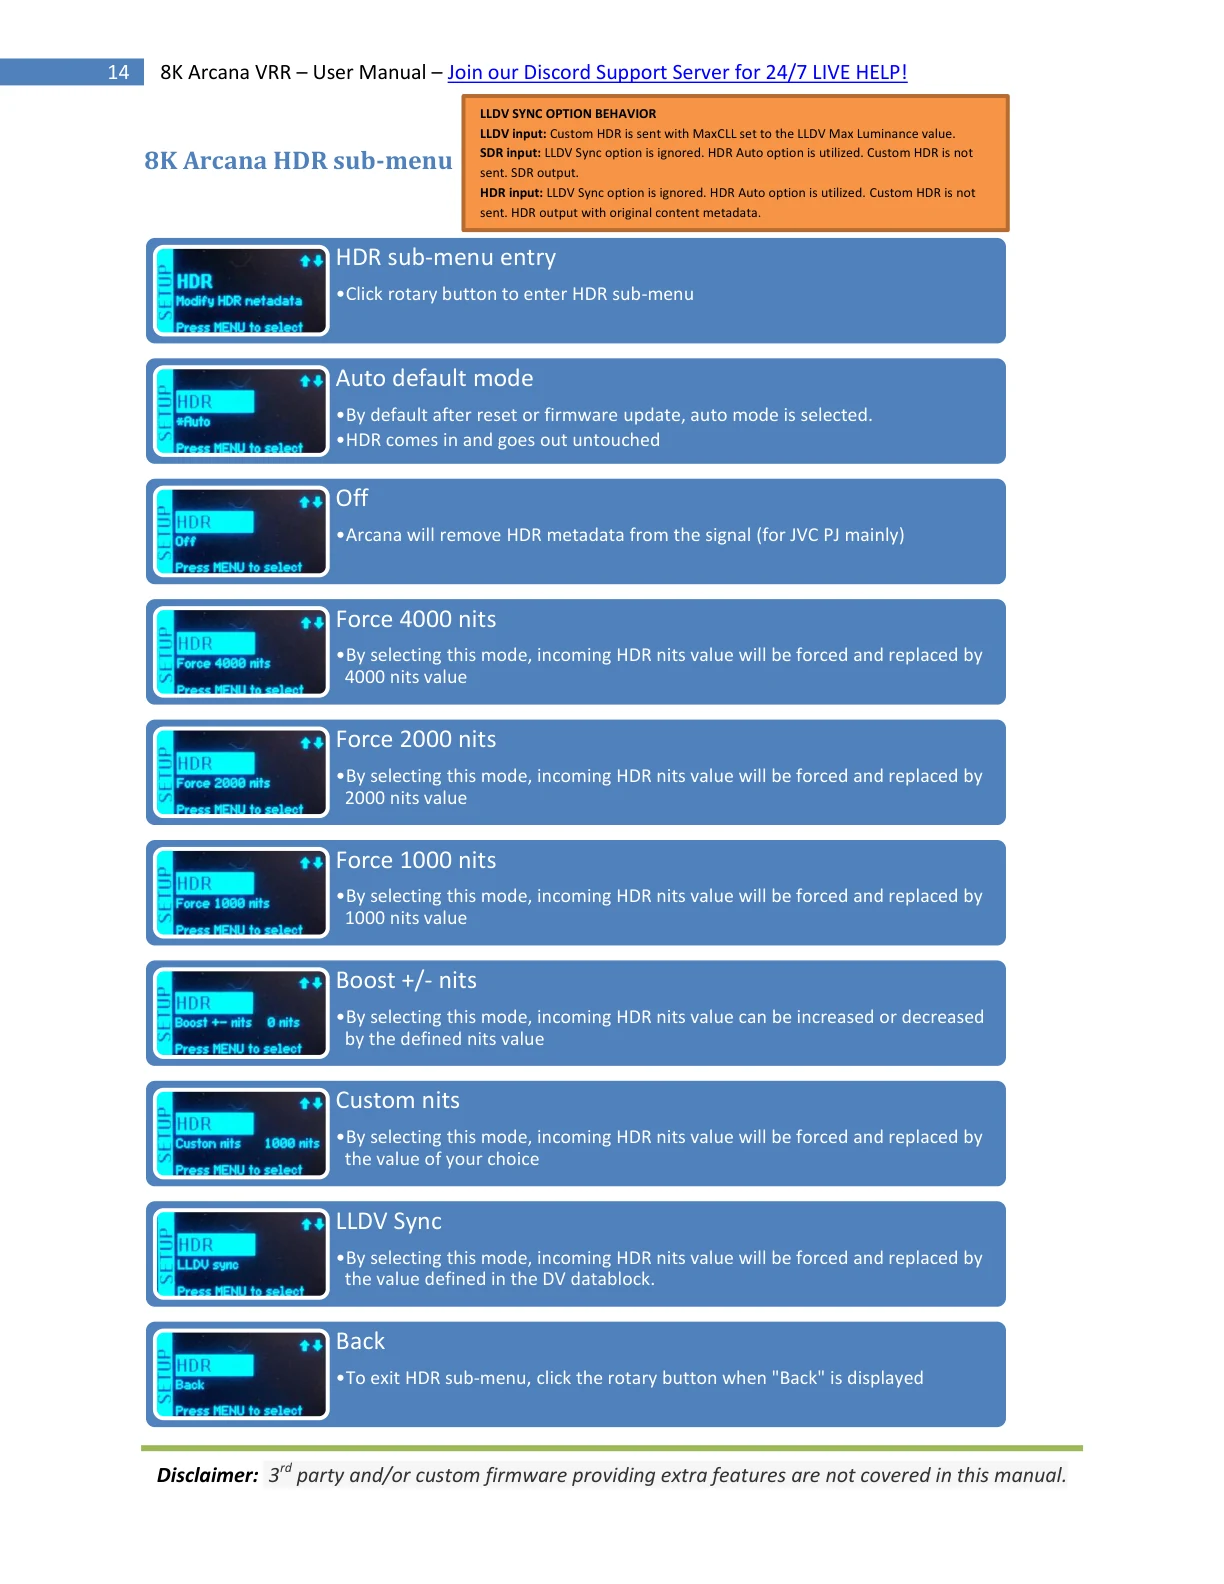
LLDV SYNC OPTION BEHAVIOR
LLDV input: Custom HDR is sent with MaxCLL set to the LLDV Max Luminance value.
8K Arcana HDR sub-menu SDR input: LLDV Sync option is ignored. HDR Auto option is utilized. Custom HDR is not
sent. SDR output.
HDR input: LLDV Sync option is ignored. HDR Auto option is utilized. Custom HDR is not
sent. HDR output with original content metadata.
HDR sub-menu entry
•Click rotary button to enter HDR sub-menu
Auto default mode
•By default after reset or firmware update, auto mode is selected.
•HDR comes in and goes out untouched
Off
•Arcana will remove HDR metadata from the signal (for JVC PJ mainly)
Force 4000 nits
•By selecting this mode, incoming HDR nits value will be forced and replaced by
4000 nits value
Force 2000 nits
•By selecting this mode, incoming HDR nits value will be forced and replaced by
2000 nits value
Force 1000 nits
•By selecting this mode, incoming HDR nits value will be forced and replaced by
1000 nits value
Boost +/- nits
•By selecting this mode, incoming HDR nits value can be increased or decreased
by the defined nits value
Custom nits
•By selecting this mode, incoming HDR nits value will be forced and replaced by
the value of your choice
LLDV Sync
•By selecting this mode, incoming HDR nits value will be forced and replaced by
the value defined in the DV datablock.
Back
•To exit HDR sub-menu, click the rotary button when "Back" is displayed
Disclaimer: 3rd party and/or custom firmware providing extra features are not covered in this manual.
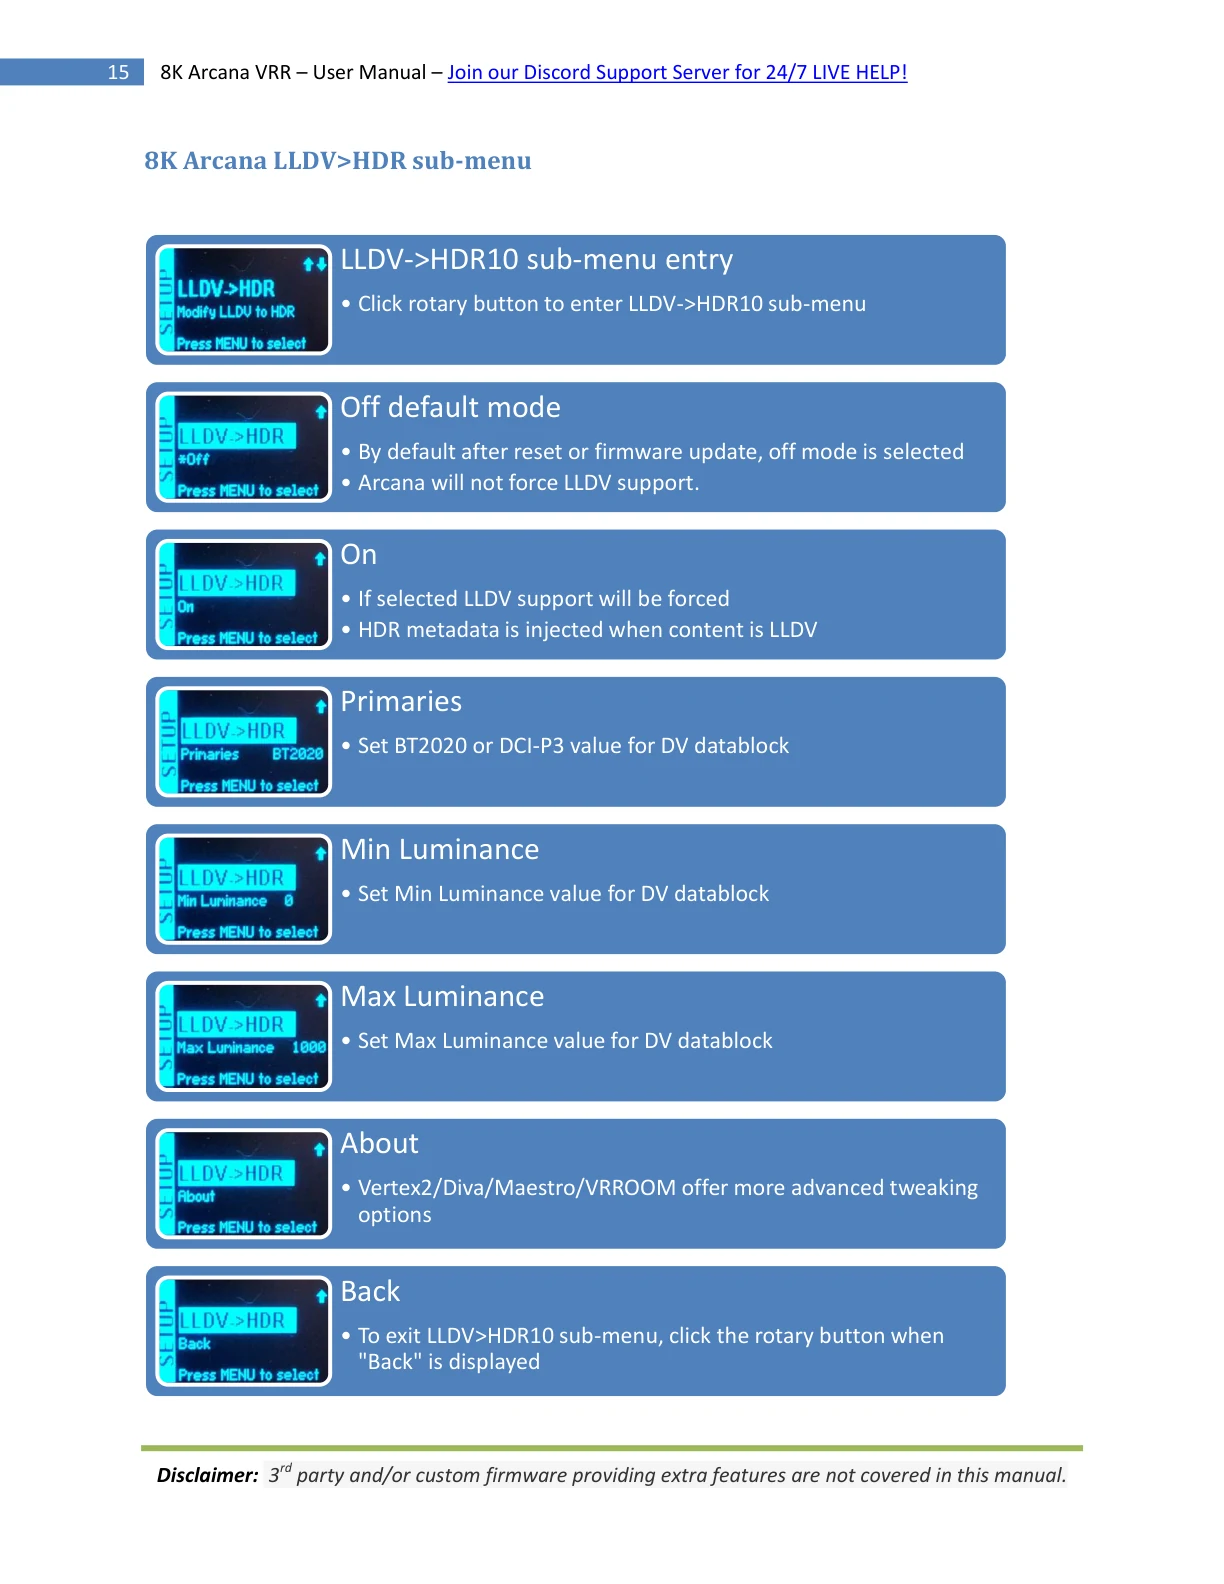
8K Arcana LLDV>HDR sub-menu
LLDV->HDR10 sub-menu entry
• Click rotary button to enter LLDV->HDR10 sub-menu
Off default mode
• By default after reset or firmware update, off mode is selected
• Arcana will not force LLDV support.
On
• If selected LLDV support will be forced
• HDR metadata is injected when content is LLDV
Primaries
• Set BT2020 or DCI-P3 value for DV datablock
Min Luminance
• Set Min Luminance value for DV datablock
Max Luminance
• Set Max Luminance value for DV datablock
About
• Vertex2/Diva/Maestro/VRROOM offer more advanced tweaking
options
Back
• To exit LLDV>HDR10 sub-menu, click the rotary button when
"Back" is displayed
Disclaimer: 3rd party and/or custom firmware providing extra features are not covered in this manual.
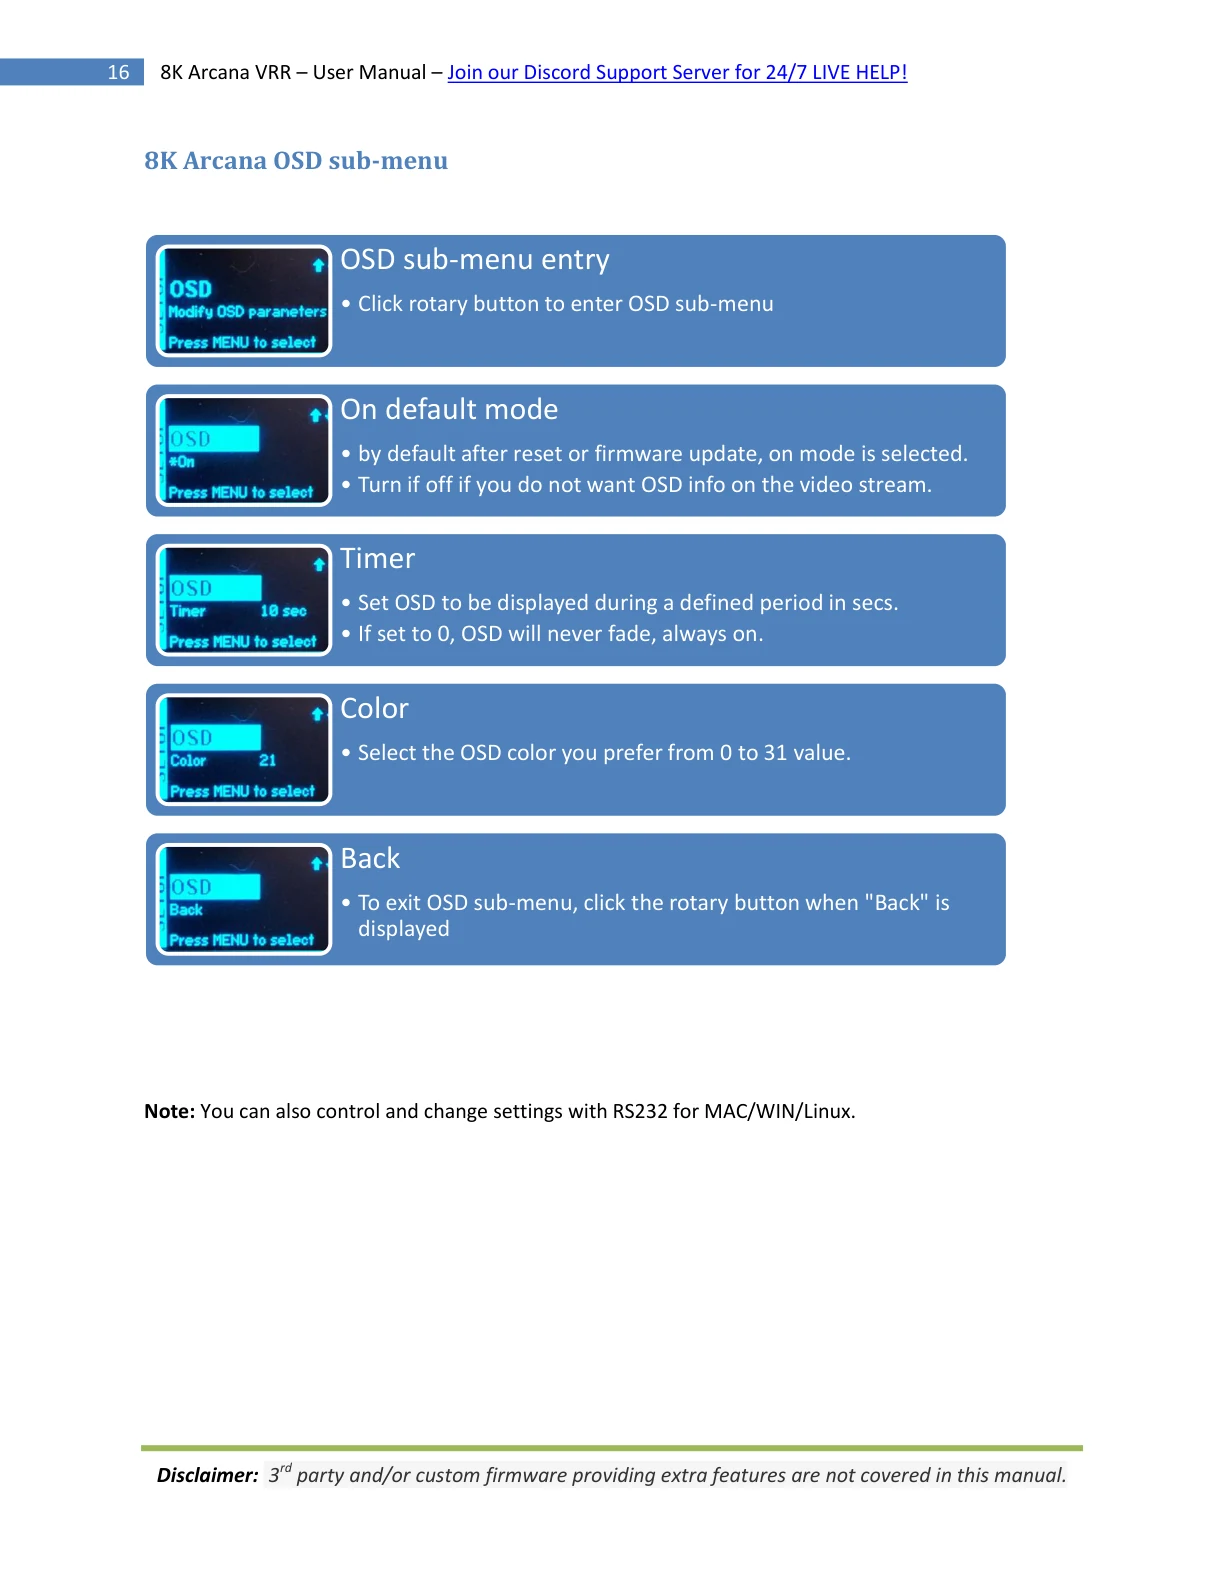
8K Arcana OSD sub-menu
OSD sub-menu entry
• Click rotary button to enter OSD sub-menu
On default mode
• by default after reset or firmware update, on mode is selected.
• Turn if off if you do not want OSD info on the video stream.
Timer
• Set OSD to be displayed during a defined period in secs.
• If set to 0, OSD will never fade, always on.
Color
• Select the OSD color you prefer from 0 to 31 value.
Back
• To exit OSD sub-menu, click the rotary button when "Back" is
displayed
Note: You can also control and change settings with RS232 for MAC/WIN/Linux.
Disclaimer: 3rd party and/or custom firmware providing extra features are not covered in this manual.
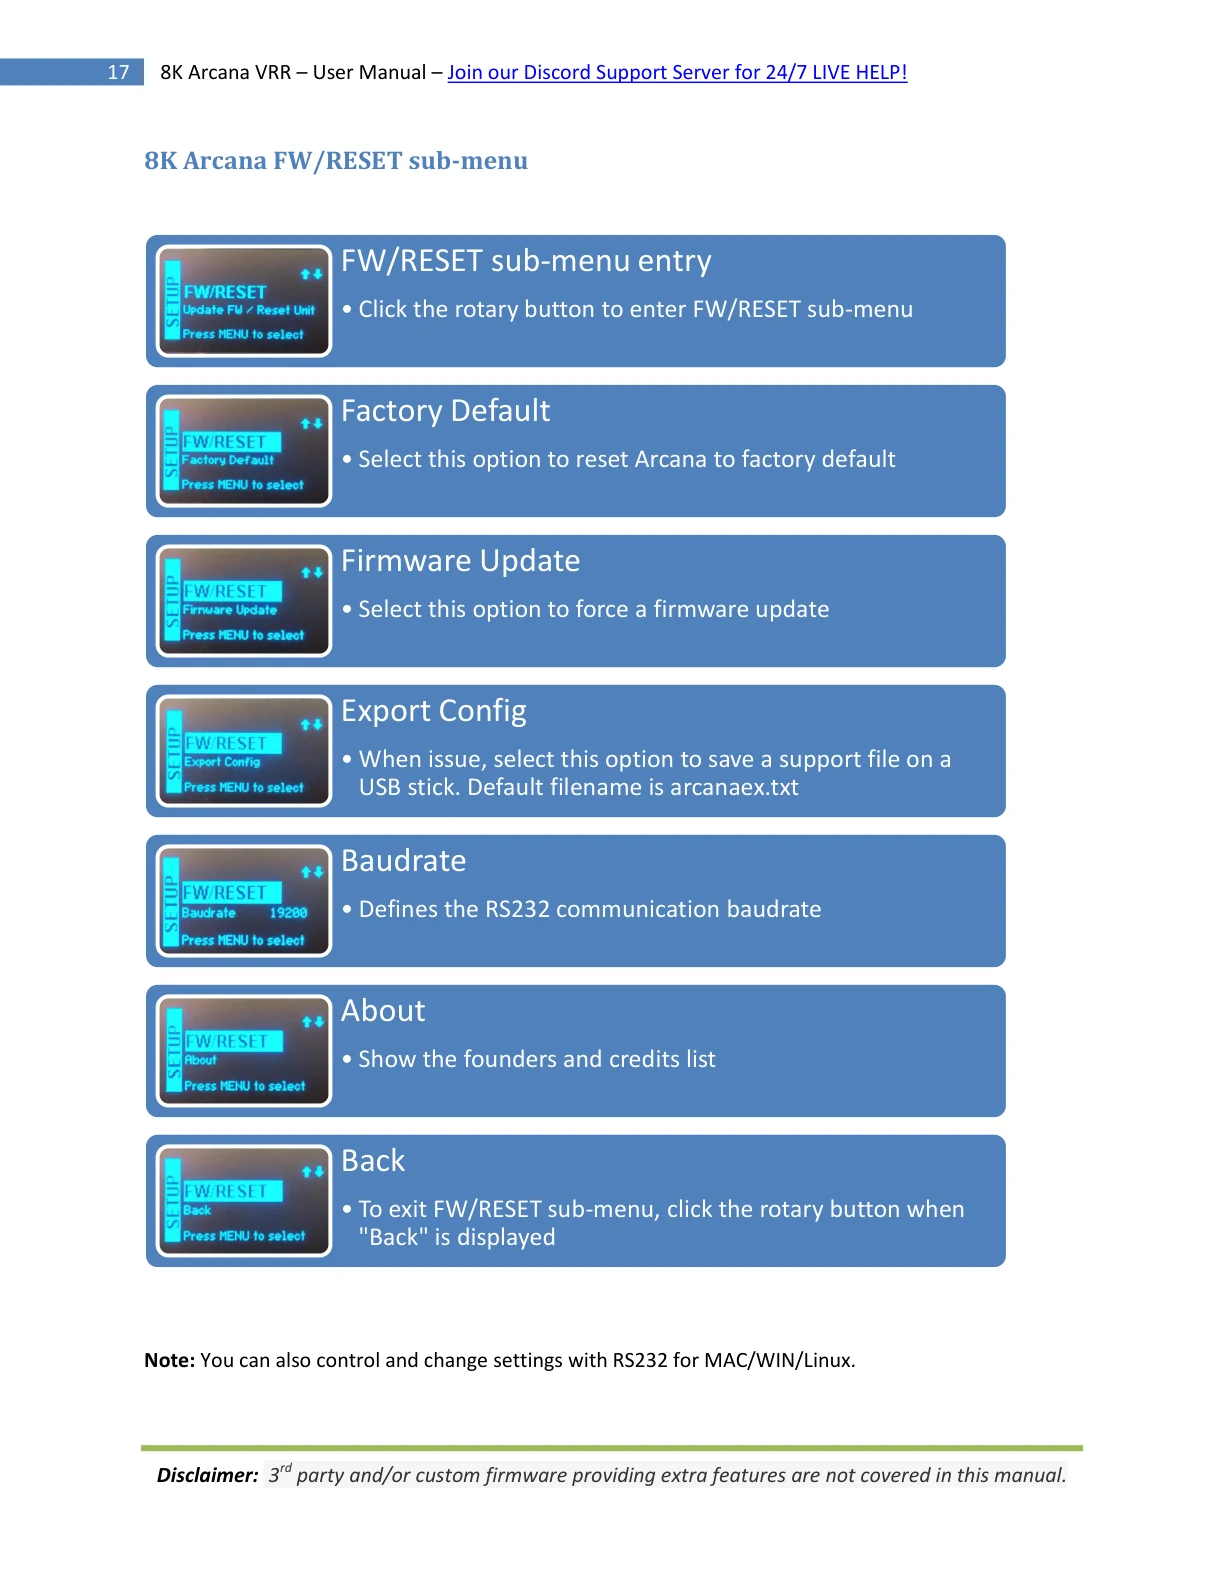
8K Arcana FW/RESET sub-menu
FW/RESET sub-menu entry
• Click the rotary button to enter FW/RESET sub-menu
Factory Default
• Select this option to reset Arcana to factory default
Firmware Update
• Select this option to force a firmware update
Export Config
• When issue, select this option to save a support file on a
USB stick. Default filename is arcanaex.txt
Baudrate
• Defines the RS232 communication baudrate
About
• Show the founders and credits list
Back
• To exit FW/RESET sub-menu, click the rotary button when
"Back" is displayed
Note: You can also control and change settings with RS232 for MAC/WIN/Linux.
Disclaimer: 3rd party and/or custom firmware providing extra features are not covered in this manual.
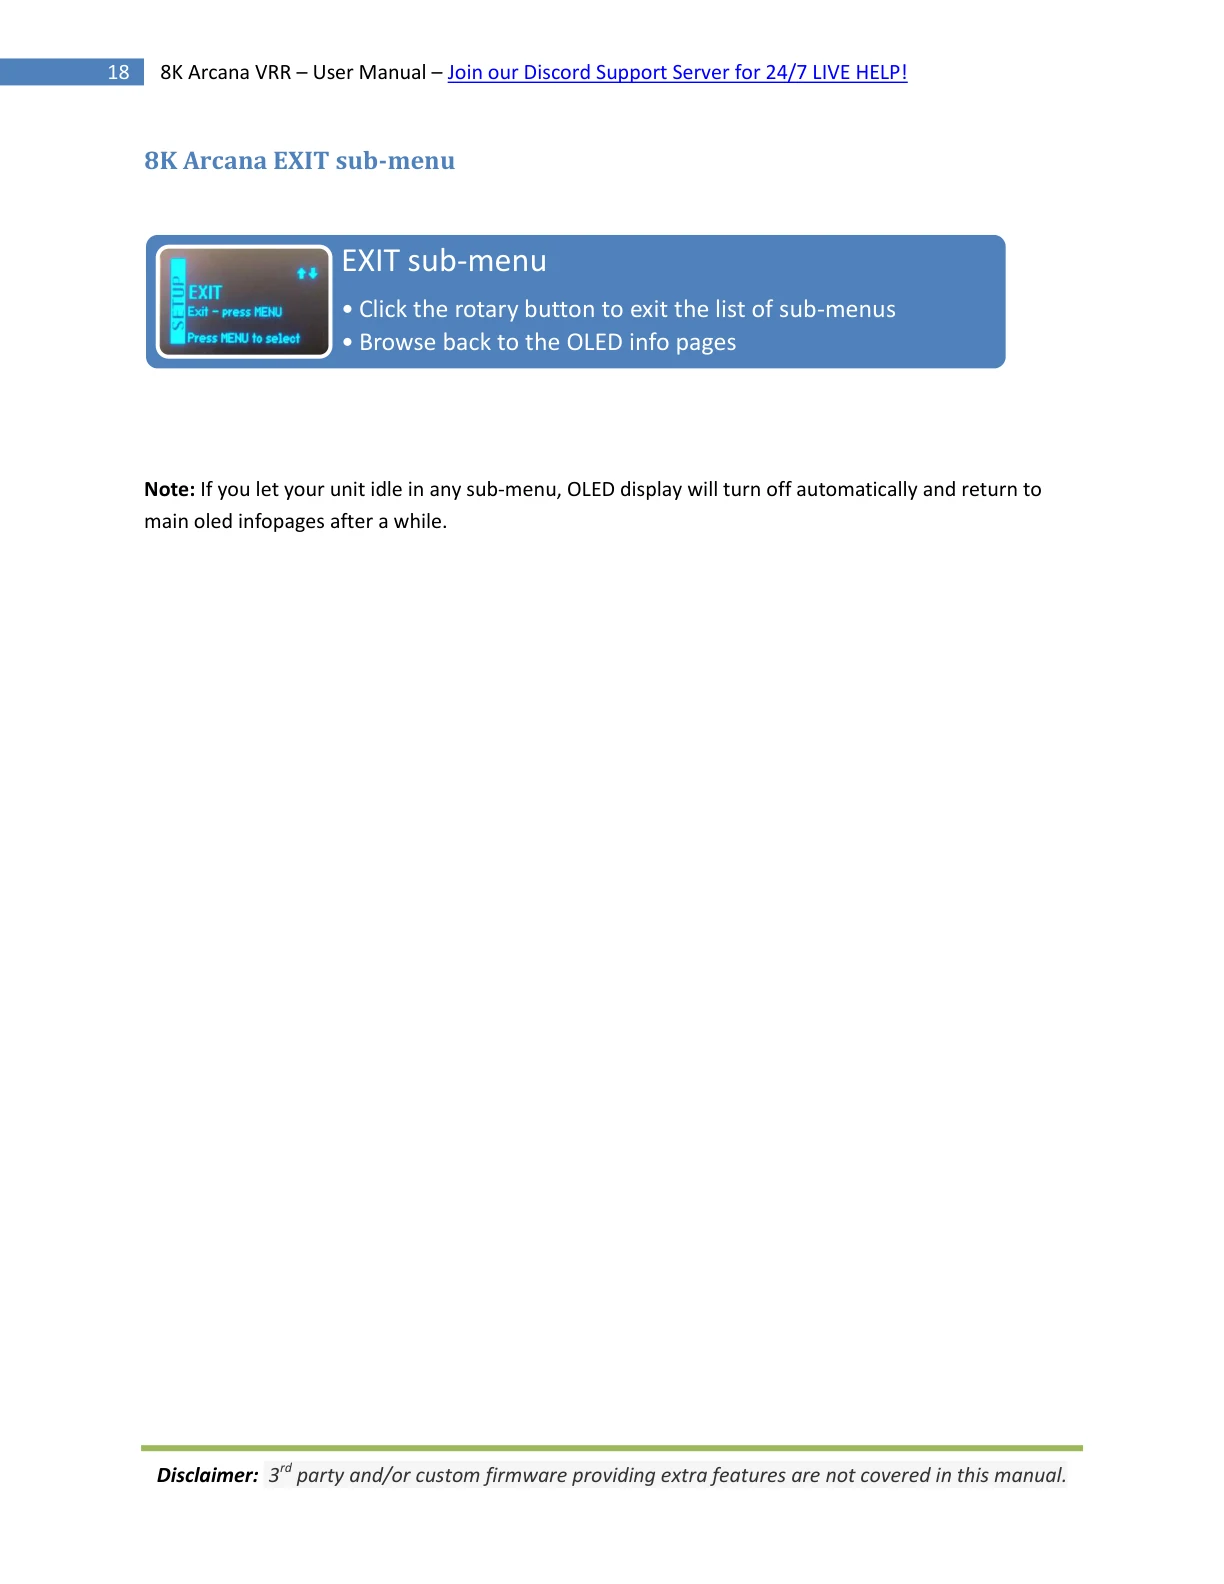
8K Arcana EXIT sub-menu EXIT sub-menu • Click the rotary button to exit the list of sub-menus • Browse back to the OLED info pages Note: If you let your unit idle in any sub-menu, OLED display will turn off automatically and return to main oled infopages after a while. Disclaimer: 3rd party and/or custom firmware providing additional features are not covered in this manual.
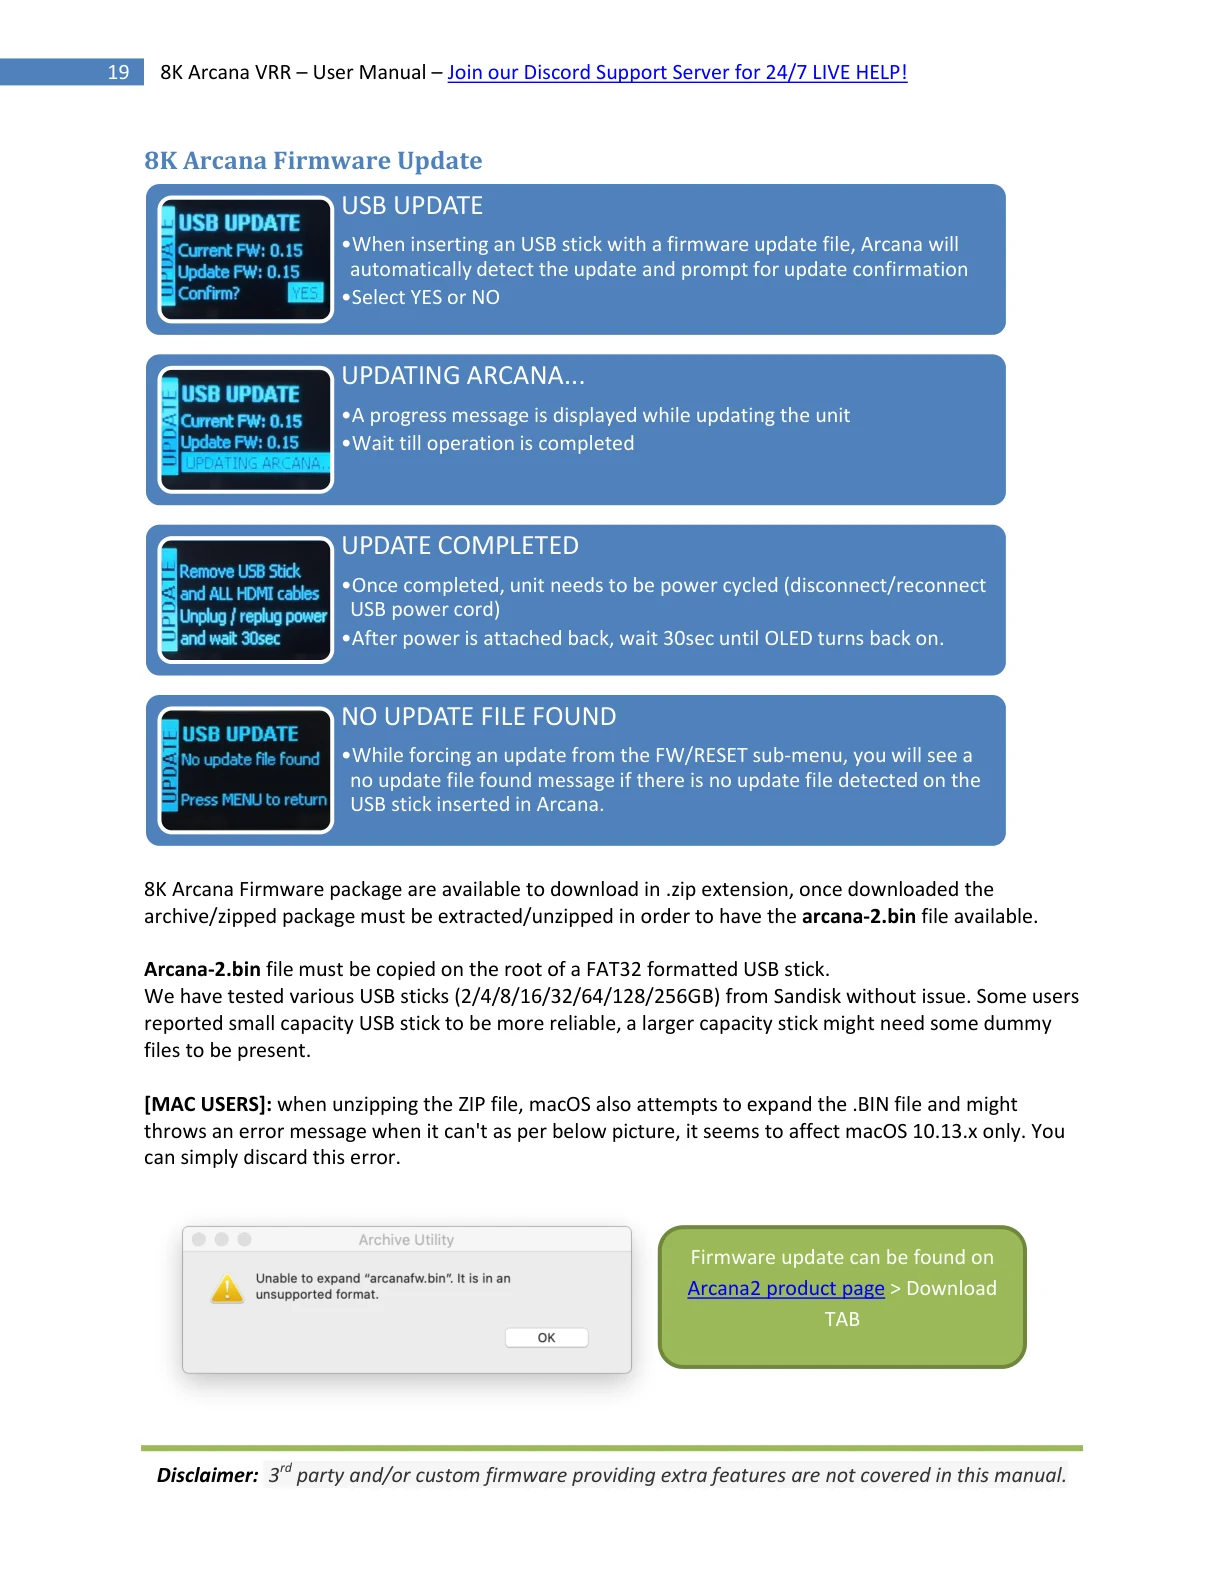
8K Arcana Firmware Update
USB UPDATE
•When inserting an USB stick with a firmware update file, Arcana will
automatically detect the update and prompt for update confirmation
•Select YES or NO
UPDATING ARCANA...
•A progress message is displayed while updating the unit
•Wait till operation is completed
UPDATE COMPLETED
•Once completed, unit needs to be power cycled (disconnect/reconnect
USB power cord)
•After power is attached back, wait 30sec until OLED turns back on.
NO UPDATE FILE FOUND
•While forcing an update from the FW/RESET sub-menu, you will see a
no update file found message if there is no update file detected on the
USB stick inserted in Arcana.
8K Arcana Firmware package are available to download in .zip extension, once downloaded the
archive/zipped package must be extracted/unzipped in order to have the arcana-2.bin file available.
Arcana-2.bin file must be copied on the root of a FAT32 formatted USB stick.
We have tested various USB sticks (2/4/8/16/32/64/128/256GB) from Sandisk without issue. Some users
reported small capacity USB stick to be more reliable, a larger capacity stick might need some dummy
files to be present.
[MAC USERS]: when unzipping the ZIP file, macOS also attempts to expand the .BIN file and might
throws an error message when it can't as per below picture, it seems to affect macOS 10.13.x only. You
can simply discard this error.
Firmware update can be found on
Arcana2 product page > Download
TAB
Disclaimer: 3rd party and/or custom firmware providing extra features are not covered in this manual.
Firmware Update In-System:
If you update unit "in-system" with all cables attached, please make an extra power cycle after firmware
is flashed, unit restarted, wait 30s for OLED to comes back on then make an extra power cycle (or simply
disconnect/reconnect a HDMI cord)
If you do not update with cables attached, then above step is not needed.
Instructions within Windows to fix ANY USB stick:
If you are having issues with an USB stick, make sure it is primary partition formatted. If you are not
confident with Windows, please try another USB stick instead of trying below method for advanced
users only.
1. Type diskpart into search and run
2. Type "list disk” and enter
3. Check which disk number your usb stick is seen as
4. Type “select disk X” and enter………….. X is whatever number disk USB stick is eg. 3
Double & Triple Check As If You Chose Wrong Drive You Will Wipe The Drive Selected With Next
Instruction!
5. Type “clean” and enter
6. Type “create part primary” and enter
7. Type “select part one” and enter
8. Type “active” and enter
9. Type “format fs=fat32 quick label=”Arcana_FW”
All ready for you to then copy the bin firmware file over and will work.
Above tip is courtesy of @mkd73
Disclaimer: 3rd party and/or custom firmware providing extra features are not covered in this manual.

8K Arcana Config Export By using the sub-menu [FW/RESET] > [EXPORT CONFIG] option, you will be able to save the current Arcana2 configuration and settings in a text file on the USB stick inserted in the update slot. The “arcanaex.txt” file can then be shared with the community or for support reason. Exported config file will present the active signal information, the EDID and options set on your unit as well as the below list of parameters. { "hostname":"arcana2", "serial":"0007001222000000", "version":"FW: 0.18", "rxvideo":" 4K23.976 297MHz 444 BT709 8b SDR ", "tx0video":" 4K23.976 295MHz 444 BT709 8b SDR ", "tx1video":" AUDIO ONLY - HDMI 1080P60", "tx0caps":" 4K120 444 FRL5 VRR ALLM DV HDR10 HLG BT2020 ", "tx1caps":" 1080P60 12b ", "rxaud":": PCM 48kHz 5.1ch 24b", "earcaud":"", "earcsel":"off", "arcsel":"off", "tx0edid":" 4K120 444 FRL5 VRR ALLM DV HDR10 HLG BT2020 ", "tx0edidaudio":"MAT Atmos, DD Atmos, DD, LPCM 2.0 192kHz 24b", "tx1edid":" 1080P60 12b ", "tx1edidaudio":"MAT Atmos, DD Atmos, DD, DTS:X+IMAX, DTSHD, DTS, LPCM 7.1 192kHz 24b", "beammode":"off", "addmultipcm":"on", "adddts":"off", "TVarcdisabled":"off", "rxspd":"", "rxin5v":"on", "tx0hpd":"on", "tx0rs":"on", "tx0tmds":"tmds", "tx1hpd":"on", "tx1rs":"on", "tx1tmds":"tmds", "earcdelaymode":"off", "earcdelayvalue":"40", "osd":"on", "osdtimervalue":"60", "osdcolorvalue":"21", "audiomode":"both" "scalemode":"hdmiaudiotx1" "hdrmode":"auto" "hdrcustomvalue":"1000" "hdrboostvalue":"0" "lldvtohdrmode":"off" "lldvtohdrprimmode":"bt2020" "lldvtohdrminlumvalue":"0" "lldvtohdrmaxlumvalue":"1000" "rxavi":"82:02:0d:75:52:a8:00:00:00:00:00:00:00:00:00:00:00", Disclaimer: 3rd party and/or custom firmware providing extra features are not covered in this manual.
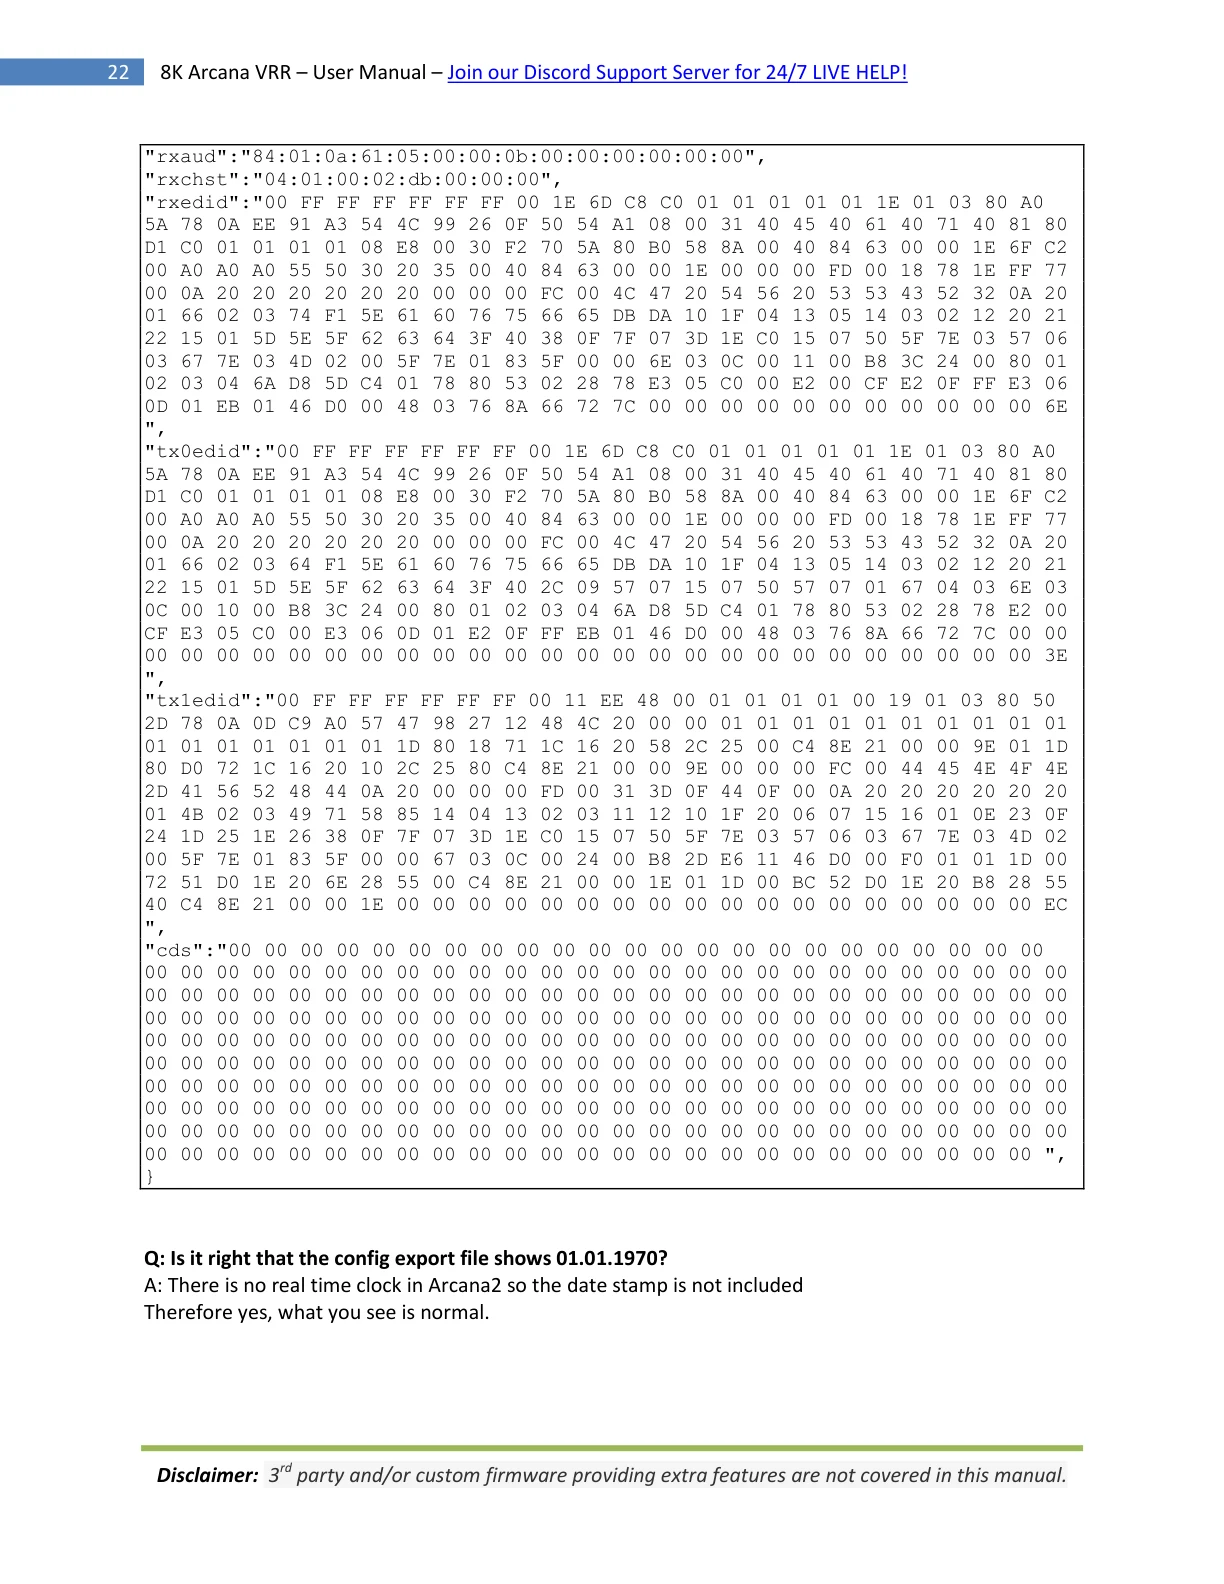
"rxaud":"84:01:0a:61:05:00:00:0b:00:00:00:00:00:00",
"rxchst":"04:01:00:02:db:00:00:00",
"rxedid":"00 FF FF FF FF FF FF 00 1E 6D C8 C0 01 01 01 01 01 1E 01 03 80 A0
5A 78 0A EE 91 A3 54 4C 99 26 0F 50 54 A1 08 00 31 40 45 40 61 40 71 40 81 80
D1 C0 01 01 01 01 08 E8 00 30 F2 70 5A 80 B0 58 8A 00 40 84 63 00 00 1E 6F C2
00 A0 A0 A0 55 50 30 20 35 00 40 84 63 00 00 1E 00 00 00 FD 00 18 78 1E FF 77
00 0A 20 20 20 20 20 20 00 00 00 FC 00 4C 47 20 54 56 20 53 53 43 52 32 0A 20
01 66 02 03 74 F1 5E 61 60 76 75 66 65 DB DA 10 1F 04 13 05 14 03 02 12 20 21
22 15 01 5D 5E 5F 62 63 64 3F 40 38 0F 7F 07 3D 1E C0 15 07 50 5F 7E 03 57 06
03 67 7E 03 4D 02 00 5F 7E 01 83 5F 00 00 6E 03 0C 00 11 00 B8 3C 24 00 80 01
02 03 04 6A D8 5D C4 01 78 80 53 02 28 78 E3 05 C0 00 E2 00 CF E2 0F FF E3 06
0D 01 EB 01 46 D0 00 48 03 76 8A 66 72 7C 00 00 00 00 00 00 00 00 00 00 00 6E
",
"tx0edid":"00 FF FF FF FF FF FF 00 1E 6D C8 C0 01 01 01 01 01 1E 01 03 80 A0
5A 78 0A EE 91 A3 54 4C 99 26 0F 50 54 A1 08 00 31 40 45 40 61 40 71 40 81 80
D1 C0 01 01 01 01 08 E8 00 30 F2 70 5A 80 B0 58 8A 00 40 84 63 00 00 1E 6F C2
00 A0 A0 A0 55 50 30 20 35 00 40 84 63 00 00 1E 00 00 00 FD 00 18 78 1E FF 77
00 0A 20 20 20 20 20 20 00 00 00 FC 00 4C 47 20 54 56 20 53 53 43 52 32 0A 20
01 66 02 03 64 F1 5E 61 60 76 75 66 65 DB DA 10 1F 04 13 05 14 03 02 12 20 21
22 15 01 5D 5E 5F 62 63 64 3F 40 2C 09 57 07 15 07 50 57 07 01 67 04 03 6E 03
0C 00 10 00 B8 3C 24 00 80 01 02 03 04 6A D8 5D C4 01 78 80 53 02 28 78 E2 00
CF E3 05 C0 00 E3 06 0D 01 E2 0F FF EB 01 46 D0 00 48 03 76 8A 66 72 7C 00 00
00 00 00 00 00 00 00 00 00 00 00 00 00 00 00 00 00 00 00 00 00 00 00 00 00 3E
",
"tx1edid":"00 FF FF FF FF FF FF 00 11 EE 48 00 01 01 01 01 00 19 01 03 80 50
2D 78 0A 0D C9 A0 57 47 98 27 12 48 4C 20 00 00 01 01 01 01 01 01 01 01 01 01
01 01 01 01 01 01 01 1D 80 18 71 1C 16 20 58 2C 25 00 C4 8E 21 00 00 9E 01 1D
80 D0 72 1C 16 20 10 2C 25 80 C4 8E 21 00 00 9E 00 00 00 FC 00 44 45 4E 4F 4E
2D 41 56 52 48 44 0A 20 00 00 00 FD 00 31 3D 0F 44 0F 00 0A 20 20 20 20 20 20
01 4B 02 03 49 71 58 85 14 04 13 02 03 11 12 10 1F 20 06 07 15 16 01 0E 23 0F
24 1D 25 1E 26 38 0F 7F 07 3D 1E C0 15 07 50 5F 7E 03 57 06 03 67 7E 03 4D 02
00 5F 7E 01 83 5F 00 00 67 03 0C 00 24 00 B8 2D E6 11 46 D0 00 F0 01 01 1D 00
72 51 D0 1E 20 6E 28 55 00 C4 8E 21 00 00 1E 01 1D 00 BC 52 D0 1E 20 B8 28 55
40 C4 8E 21 00 00 1E 00 00 00 00 00 00 00 00 00 00 00 00 00 00 00 00 00 00 EC
",
"cds":"00 00 00 00 00 00 00 00 00 00 00 00 00 00 00 00 00 00 00 00 00 00 00
00 00 00 00 00 00 00 00 00 00 00 00 00 00 00 00 00 00 00 00 00 00 00 00 00 00
00 00 00 00 00 00 00 00 00 00 00 00 00 00 00 00 00 00 00 00 00 00 00 00 00 00
00 00 00 00 00 00 00 00 00 00 00 00 00 00 00 00 00 00 00 00 00 00 00 00 00 00
00 00 00 00 00 00 00 00 00 00 00 00 00 00 00 00 00 00 00 00 00 00 00 00 00 00
00 00 00 00 00 00 00 00 00 00 00 00 00 00 00 00 00 00 00 00 00 00 00 00 00 00
00 00 00 00 00 00 00 00 00 00 00 00 00 00 00 00 00 00 00 00 00 00 00 00 00 00
00 00 00 00 00 00 00 00 00 00 00 00 00 00 00 00 00 00 00 00 00 00 00 00 00 00
00 00 00 00 00 00 00 00 00 00 00 00 00 00 00 00 00 00 00 00 00 00 00 00 00 00
00 00 00 00 00 00 00 00 00 00 00 00 00 00 00 00 00 00 00 00 00 00 00 00 00 ",
}
Q: Is it right that the config export file shows 01.01.1970?
A: There is no real time clock in Arcana2 so the date stamp is not included
Therefore yes, what you see is normal.
Disclaimer: 3rd party and/or custom firmware providing extra features are not covered in this manual.
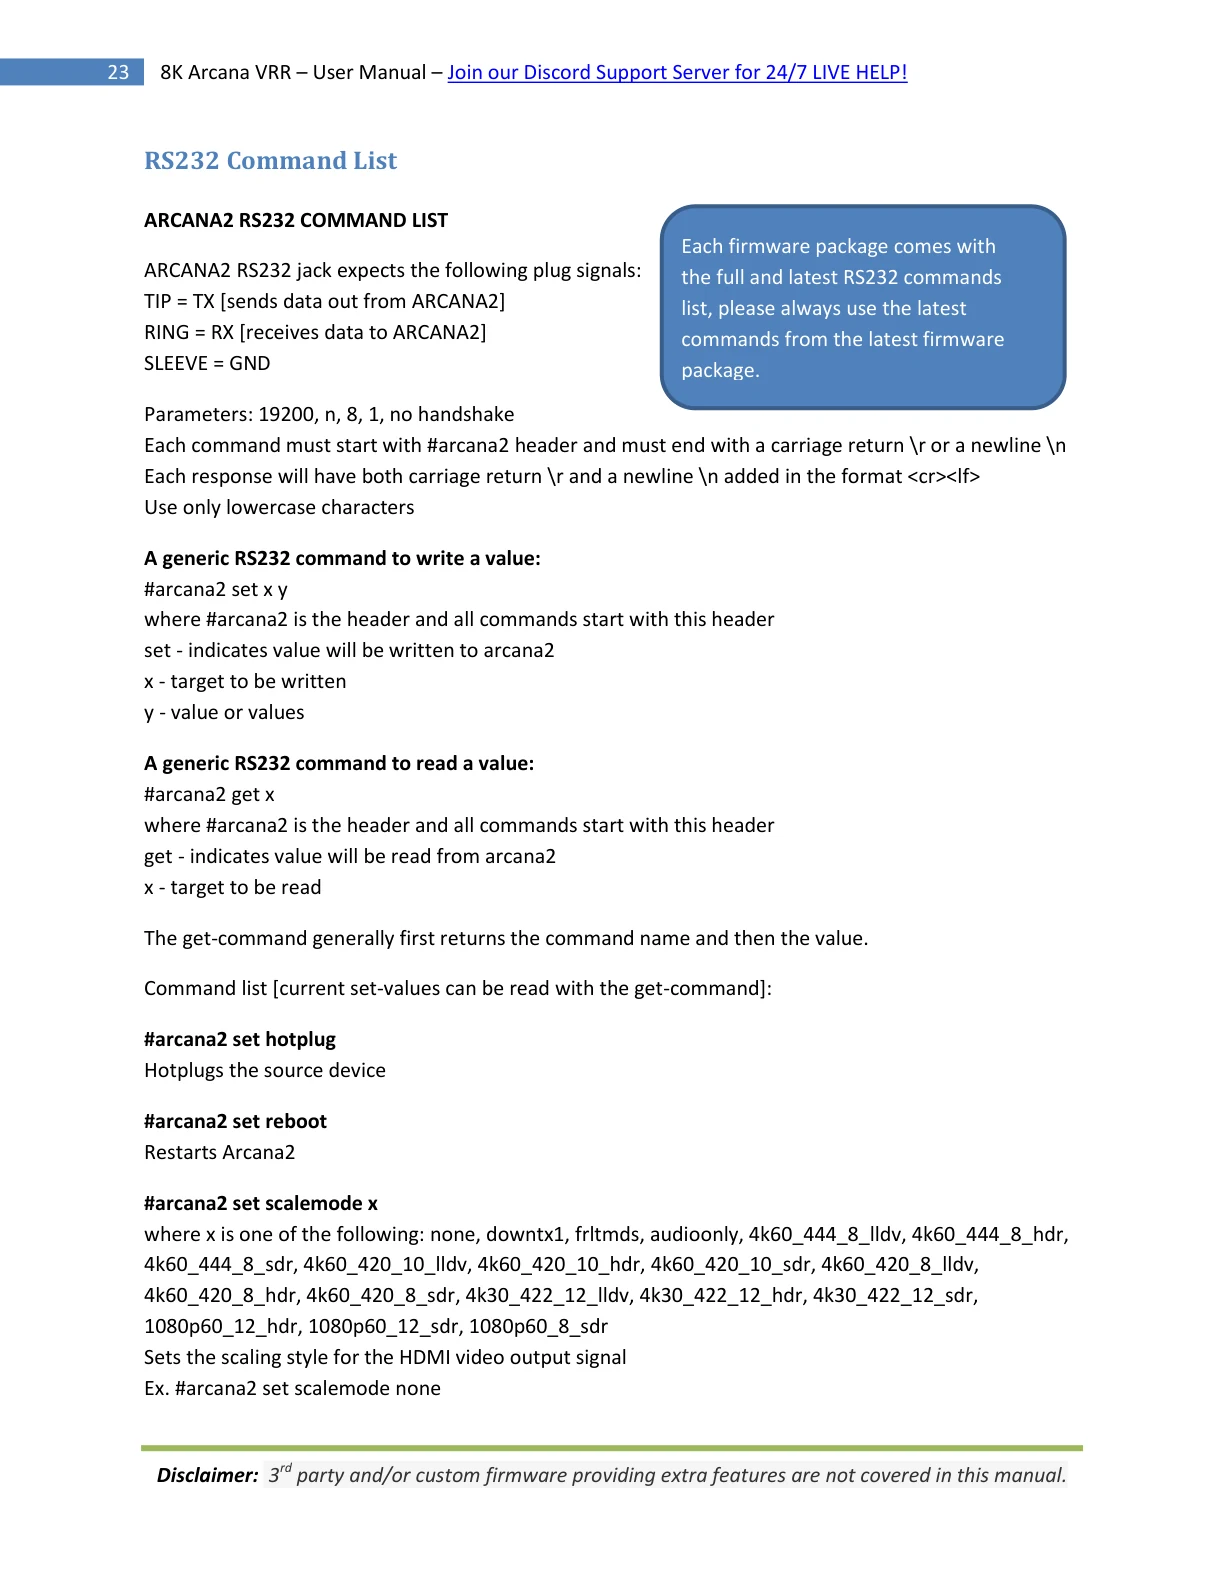
RS232 Command List
ARCANA2 RS232 COMMAND LIST
Each firmware package comes with
ARCANA2 RS232 jack expects the following plug signals: the full and latest RS232 commands
TIP = TX [sends data out from ARCANA2] list, please always use the latest
RING = RX [receives data to ARCANA2] commands from the latest firmware
SLEEVE = GND package.
Parameters: 19200, n, 8, 1, no handshake
Each command must start with #arcana2 header and must end with a carriage return \r or a newline \n
Each response will have both carriage return \r and a newline \n added in the format <cr><lf>
Use only lowercase characters
A generic RS232 command to write a value:
#arcana2 set x y
where #arcana2 is the header and all commands start with this header
set - indicates value will be written to arcana2
x - target to be written
y - value or values
A generic RS232 command to read a value:
#arcana2 get x
where #arcana2 is the header and all commands start with this header
get - indicates value will be read from arcana2
x - target to be read
The get-command generally first returns the command name and then the value.
Command list [current set-values can be read with the get-command]:
#arcana2 set hotplug
Hotplugs the source device
#arcana2 set reboot
Restarts Arcana2
#arcana2 set scalemode x
where x is one of the following: none, downtx1, frltmds, audioonly, 4k60_444_8_lldv, 4k60_444_8_hdr,
4k60_444_8_sdr, 4k60_420_10_lldv, 4k60_420_10_hdr, 4k60_420_10_sdr, 4k60_420_8_lldv,
4k60_420_8_hdr, 4k60_420_8_sdr, 4k30_422_12_lldv, 4k30_422_12_hdr, 4k30_422_12_sdr,
1080p60_12_hdr, 1080p60_12_sdr, 1080p60_8_sdr
Sets the scaling style for the HDMI video output signal
Ex. #arcana2 set scalemode none
Disclaimer: 3rd party and/or custom firmware providing extra features are not covered in this manual.
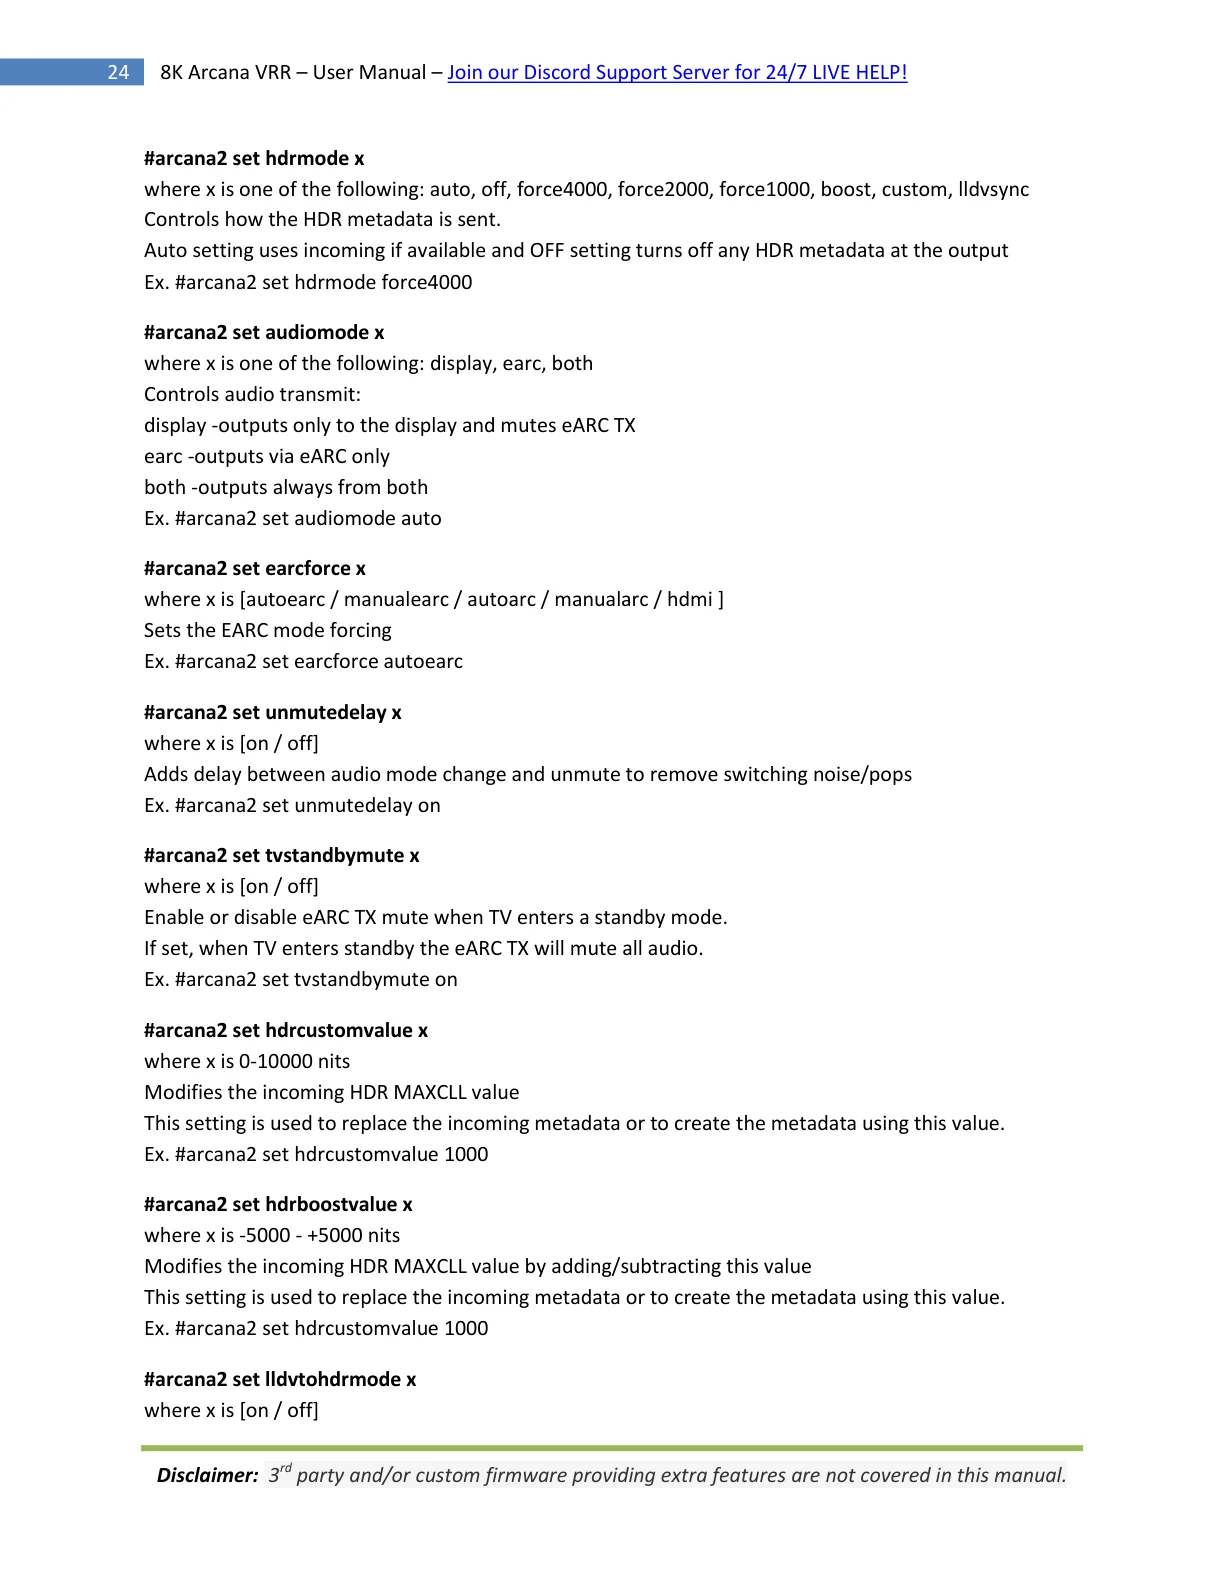
#arcana2 set hdrmode x where x is one of the following: auto, off, force4000, force2000, force1000, boost, custom, lldvsync Controls how the HDR metadata is sent. Auto setting uses incoming if available and OFF setting turns off any HDR metadata at the output Ex. #arcana2 set hdrmode force4000 #arcana2 set audiomode x where x is one of the following: display, earc, both Controls audio transmit: display -outputs only to the display and mutes eARC TX earc -outputs via eARC only both -outputs always from both Ex. #arcana2 set audiomode auto #arcana2 set earcforce x where x is [autoearc / manualearc / autoarc / manualarc / hdmi ] Sets the EARC mode forcing Ex. #arcana2 set earcforce autoearc #arcana2 set unmutedelay x where x is [on / off] Adds delay between audio mode change and unmute to remove switching noise/pops Ex. #arcana2 set unmutedelay on #arcana2 set TVstandbymute x where x is [on / off] Enable or disable eARC TX mute when TV enters a standby mode. If set, when TV enters standby the eARC TX will mute all audio. Ex. #arcana2 set TVstandbymute on #arcana2 set hdrcustomvalue x where x is 0-10000 nits Modifies the incoming HDR MAXCLL value This setting is used to replace the incoming metadata or to create the metadata using this value. Ex. #arcana2 set hdrcustomvalue 1000 #arcana2 set hdrboostvalue x where x is -5000 - +5000 nits Modifies the incoming HDR MAXCLL value by adding/subtracting this value This setting is used to replace the incoming metadata or to create the metadata using this value. Ex. #arcana2 set hdrcustomvalue 1000 #arcana2 set lldvtohdrmode x where x is [on / off] Disclaimer: 3rd party and/or custom firmware providing extra features are not covered in this manual.
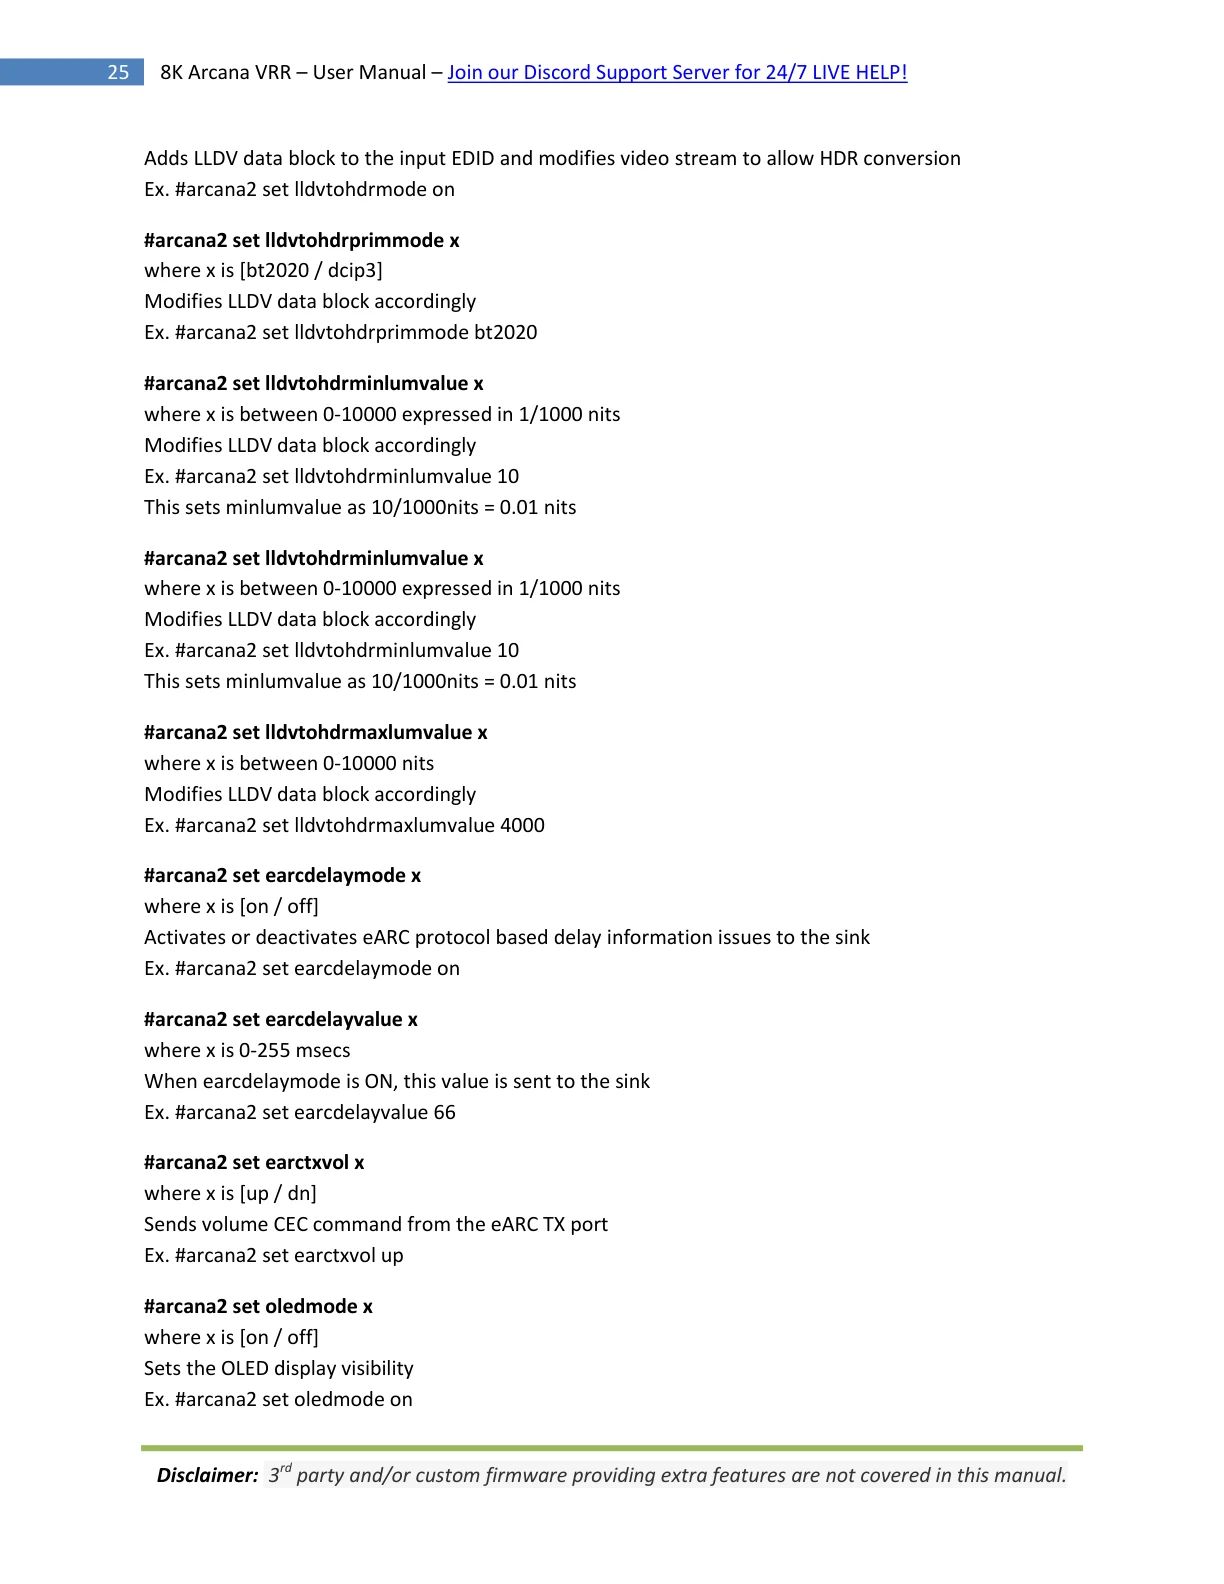
Adds LLDV data block to the input EDID and modifies video stream to allow HDR conversion
Ex. #arcana2 set lldvtohdrmode on
#arcana2 set lldvtohdrprimmode x
where x is [bt2020 / dcip3]
Modifies LLDV data block accordingly
Ex. #arcana2 set lldvtohdrprimmode bt2020
#arcana2 set lldvtohdrminlumvalue x
where x is between 0-10000 expressed in 1/1000 nits
Modifies LLDV data block accordingly
Ex. #arcana2 set lldvtohdrminlumvalue 10
This sets minlumvalue as 10/1000nits = 0.01 nits
#arcana2 set lldvtohdrminlumvalue x
where x is between 0-10000 expressed in 1/1000 nits
Modifies LLDV data block accordingly
Ex. #arcana2 set lldvtohdrminlumvalue 10
This sets minlumvalue as 10/1000nits = 0.01 nits
#arcana2 set lldvtohdrmaxlumvalue x
where x is between 0-10000 nits
Modifies LLDV data block accordingly
Ex. #arcana2 set lldvtohdrmaxlumvalue 4000
#arcana2 set earcdelaymode x
where x is [on / off]
Activates or deactivates eARC protocol based delay information issues to the sink
Ex. #arcana2 set earcdelaymode on
#arcana2 set earcdelayvalue x
where x is 0-255 msecs
When earcdelaymode is ON, this value is sent to the sink
Ex. #arcana2 set earcdelayvalue 66
#arcana2 set earctxvol x
where x is [up / dn]
Sends volume CEC command from the eARC TX port
Ex. #arcana2 set earctxvol up
#arcana2 set oledmode x
where x is [on / off]
Sets the OLED display visibility
Ex. #arcana2 set oledmode on
Disclaimer: 3rd party and/or custom firmware providing extra features are not covered in this manual.

#arcana2 set oledfade x
where x is [0-255]
Sets the OLED display fade timer in seconds. After this time OLED goes blank
0 = no fade
Ex. #arcana2 set oledfade 60
#arcana2 set osdmode x
where x is [on / off]
Enables / disables osd
Ex. #arcana2 set osdmode on
#arcana2 set osdfade x
where x is [0-255]
Sets the OSD display fade timer in seconds. After this time OSD fades out
0 = no fade
Ex. #arcana2 set osdfade 30
#arcana2 set osdcolorvalue x
where x is [1 - 31]
Sets the OSD foreground color
Ex. #arcana2 set osdcolorvalue 20
#arcana2 set factoryreset 3
ERASE and overwrite default on all settings
Ex. #arcana2 set factoryreset 3
-----------------------
The status of the above set commands can be fetched using "#arcana2 get ..". In addition these
commands can be used
#arcana2 get serial
Returns the Arcana2 unit serial number
#arcana2 get ver
Returns the Arcana2 unit current version number
#arcana2 get status x
where x is [rx, tx0, tx1, tx0caps, tx1caps, tx0aud, tx1aud, rxaud, eaud, spd]
rx indicate the input video stream received from the HDMI input
tx0/1 indicate the outgoing video stream from the HDMI output port
tx0/1caps indicate EDID capabilities of the connected sink on the HDMI output
tx0/1aud indicate the audio stream type going to the sink connected to the HDMI output port
rxaud indicate the current received audio format
eaud indicate the current received audio from the display eARC
Disclaimer: 3rd party and/or custom firmware providing extra features are not covered in this manual.
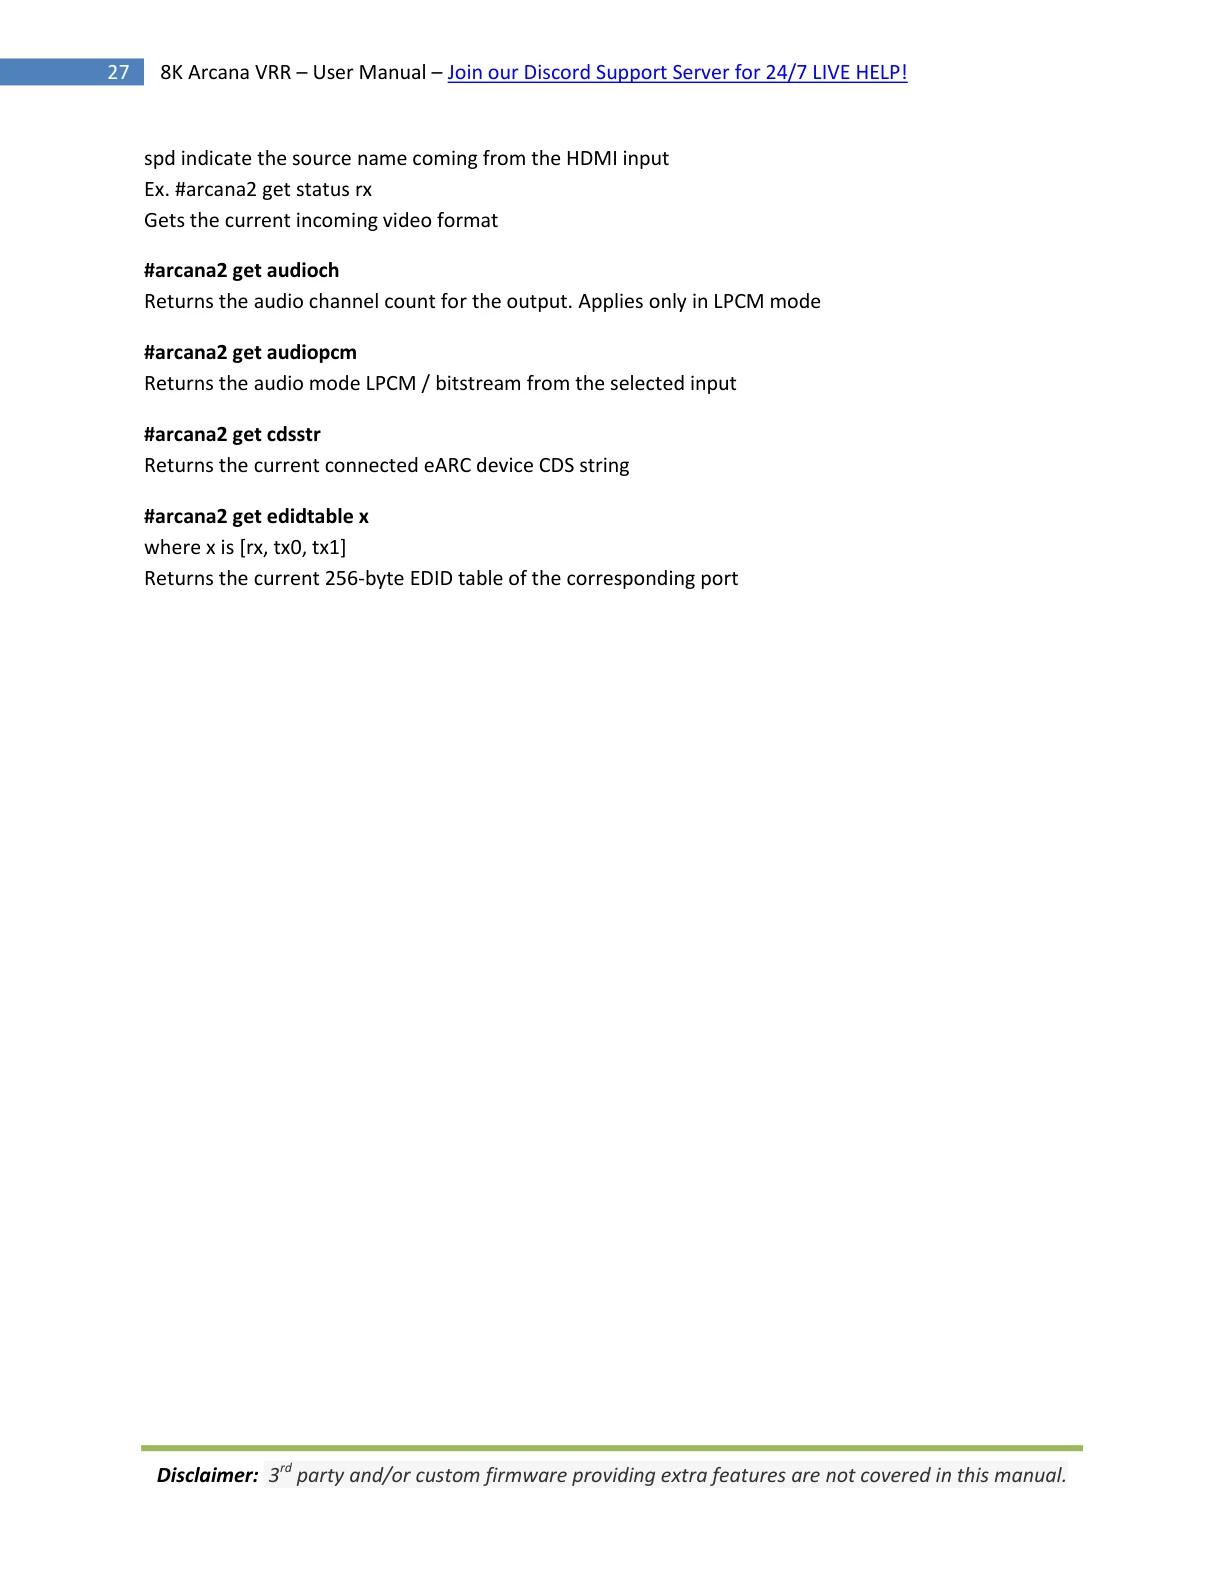
spd indicate the source name coming from the HDMI input
Ex. #arcana2 get status rx
Gets the current incoming video format
#arcana2 get audioch
Returns the audio channel count for the output. Applies only in LPCM mode
#arcana2 get audiopcm
Returns the audio mode LPCM / bitstream from the selected input
#arcana2 get cdsstr
Returns the current connected eARC device CDS string
#arcana2 get edidtable x
where x is [rx, tx0, tx1]
Returns the current 256-byte EDID table of the corresponding port
Disclaimer: 3rd party and/or custom firmware providing extra features are not covered in this manual.
FAQ
Can Arcana2 accept 4K60 4:4:4 or any HDR signal and have the output at lower resolution?
Yes, when connected correctly to the right downscale output port (TX1), Arcana2 will automatically scale
down UHD to FHD if required by the connected SINK (Display, AVR or others).
My display is supposed to accept 4K60 4:4:4 signals but it does not work?
For most UHD TV set we tried, there are always extra configuration options to active in order to achieve
a 4K60 4:4:4 600MHz link. For ex, on samsung: in order to enable the 444 colorspace for 4k in Samsung
TV’s you must go to "settings" and "hdmi" and "UHD color" and enable it. Then also you must assign the
HDMI port1 as "PC" in the tools menu. Only after these two steps will 600MHz be accepted. Similar
activation tricks are required on most UHD TV’s. Additionally, most UHD TV’s only have specific ports
that are 600MHz capable.
I have a PC mode on my TV (or a PC monitor) what resolutions are supported for graphics mode?
All PC graphics mode within the 1200MHz bandwidth are supported, including ultra-high resolution such
as WQSXGA, QUXGA, QFHD, WQUXGA, 4K and 8K.
What input/output resolution does the Arcana support in HDTV mode?
All known SD, HD, Full HD and UHD formats are supported including: 480i50,480i60, 480p50, 480p60,
576p50, 576p60, 720p50, 720p60, 720p100, 720p120, 1080i25, 1080i30, 1080p24, 1080p25, 1080p30,
1080p48, 1080p50, 1080p60, 1080p72, 1080p75, 1080p96, 1440p50, 1440p60, 2160p24, 2160p25,
2160p30, 2160p50, 2160p60 (these are examples only, anything within the 1200MHz bandwidth is
supported.)
What version of HDMI does the Arcana2 work with? Do I need HDMI 1.3/1.4a/2.0a/2.0b/2.1? Does it
matter?
It does not matter. HDfury Arcana2 works with any version of HDMI from 1.0 and up.
Do I need to set anything special in my HDMI source device to set the resolution correctly?
No. The HDfury Arcana2 will be detected as 2160p120 4:4:4 10b or 8K60 4:2:0 10b capable device by the
source and it will always accept and process the highest quality stream from your source devices. There
is no need to set the HDMI source to any specific resolution.
Is there any latency (delay) introduced to the signal?
Virtually none. The latency added is in the order of a few pixel clocks only. Nothing noticeable at all.
What about long HDMI cable runs? Can I expect issues?
For 600MHz users must use "high speed" cables, or 600MHz/18Gbps certified, ideally the length should
be between 6ft and 12ft for proper 600MHz/18Gbps pass-thru. For 4K30, 1080p or less almost all cables
are ok. HDfury Arcana acts as a HDMI repeater device. So having HDfury Arcana in the path will amplify
and recover the signal. You should not need any passive (or active) HDMI amplifiers, especially if you put
the HDfury Arcana in the middle of your cable run. If you previously had to use an amplifier, the HDfury
Arcana can most likely take its place. The HDfury Arcana has been used with 50 foot (and longer) HDMI
cables without issues including copper, active or fiber solutions.
For 1200MHz, make sure that you are using 1200MHz certified or tested HDMI 8K cable in copper or
fiber tech if you plan to set up a 1200MHz/40Gbps link in your setup.
Disclaimer: 3rd party and/or custom firmware providing extra features are not covered in this manual.
How are the new lossless audio formats via HDMI input handled? E.g. DTS-HD/MA and DD/E-AC3: Are
they stripped down to DTS core or Dolby Digital respectively to fit the requirements of the S/PDIF
standard?
HDfury Arcana2 does not compress or otherwise down convert the incoming audio.
I notice a short black screen / resync when starting a content that i didn't have or noticed when
connected direct to TV?
All that is normal, you will have the same if you insert any device in between, like an AVR, splitter,
matrix, switcher, video processor, and the more device you have in the same chain, the longer this will
take, the only way to have that nearly not noticeable is SOURCE > DISPLAY direct since signal goes
straight to panel driver.
if menu is 60Hz and content 24Hz then there will be a resync like for any video format change, if you
have SOURCE > TV, then sure you never noticed it but insert any device in between and you will have
the exact same, just normal, HDMI resync
Can i power Arcana from USB port to avoid another ac plug?
There is no exact answer to that, power consumption depends on signal bandwidth, to be optimal 5V2A
is best (we always recommend higher specs than real consumption, so everything runs cool). In reality
you need around 5V 1.5A to operate perfectly at max capabilities.
A classic/single USB port as per specs is 5V 0.5A max normally, in such case, unit won't get enough
power.
However, USB ports are usually built and implemented using 4 ports USB HUB chipset, and most of the
time, the power is shared thru all of them, that means that if you only use 1 of them, then you can get
up to 5V 2A from it. So, if you have a device with 4 USB ports and you only use one of them for 8K
Arcana, then it should work just fine.
Disclaimer: 3rd party and/or custom firmware providing extra features are not covered in this manual.
FAQ CEC/ARC
Make sure your TV audio format is set to Bitstream or Dolby Digital until SONOS Arc support multi-
channel PCM on upcoming release.
ARC/CEC features added during development due to people request are not yet flawless on all display
brands/models and will need many updates to become anywhere close to perfect simply because CEC is
25 years old coming from old scart age in Europe. There is no standard for it and every manufacturer
implements it as they want it.
If ARC is not working well yet out of the box, you can turn OFF option called TV ARC ROUTING in AUDIO
menu or turn off TV ARC and/or CEC or not use TV ARC input till there is a next update available and you
can retry.
There might be several different settings to try, example on Sony TVs: some got their displays ARC sound
working after using the Sony CEC reset commands listed.
eARC ONLY option might need to be changed to TV+Display or Auto for ARC/HDMI selection to work on
some display, so make sure you tried that too.
For any CEC/ARC issues, you can try the below:
1) Turn TV OFF / wait a few minutes / Turn ON.
2) Unplug / wait a few minutes / Replug TV powercord.
3) Turn TV CEC OFF then back ON (if many source at TV inputs, try adding them one by one slowly)
4) Unplug/Replug HDMI cable going to SONOS Arc.
5) Turn OFF and then back ON, Arcana and Source.
6) FACTORY RESET ARCANA (Click rotary button to enter menu and go to FW/RESET, click again to
enter sub-menu, then go to FACTORY RESET and confirm by clicking)
HDMI cables need to be good enough, that's why first step is not VOLUME CONTROL or CEC or ARC. First
step is to make sure SOURCE > ARCANA2 > DISPLAY play any content correctly without issue to make
sure the HDMI LINK is SOLID, then only people should consider volume control / CEC / ARC stuff.
Samsung CEC/ARC help: Visit here.
Vizio TV CEC/ARC help:
1. From the AUDIO menu on your TV, change the Digital Audio Setting to Dolby Digital or Bitstream.
2. From the AUDIO menu, disable the TV’s internal speakers.
3. From the SYSTEM menu, enable CEC Function.
4. From the CEC menu, select Device Discovery to register the sound bar with the TV.
The following steps are for use with a VIZIO TV, steps may differ by TV manufacturer. See your TV’s user
manual for more information.
If you want to use the volume buttons on the TV remote control to control the sound bar, enable
System Audio Control from the CEC menu
Disclaimer: 3rd party and/or custom firmware providing extra features are not covered in this manual.
To enable, disable, or adjust CEC settings:
1. Press the MENU button on the remote. The on-screen menu is displayed.
2. Use the Arrow buttons on the remote to highlight System and press OK. The SYSTEM menu is
displayed.
3. Use the Arrow buttons on the remote to highlight CEC and press OK. The CEC menu is displayed.
4. Use the Arrow and OK buttons to adjust each setting:
• CEC - Select Enable to use the TV remote to control CEC devices connected to HDMI. Select ARC Only
for plug and play of an audio device connected to the HDMI ARC input. The ARC setting does not support
video devices connected to the audio device (Select Enable to enable support for these devices).
Select Disable to turn CEC off.
• Device Discovery - Use this function to determine if your device is connected and supports CEC.
(Required for Enable option only)
5. Press the EXIT button on the remote
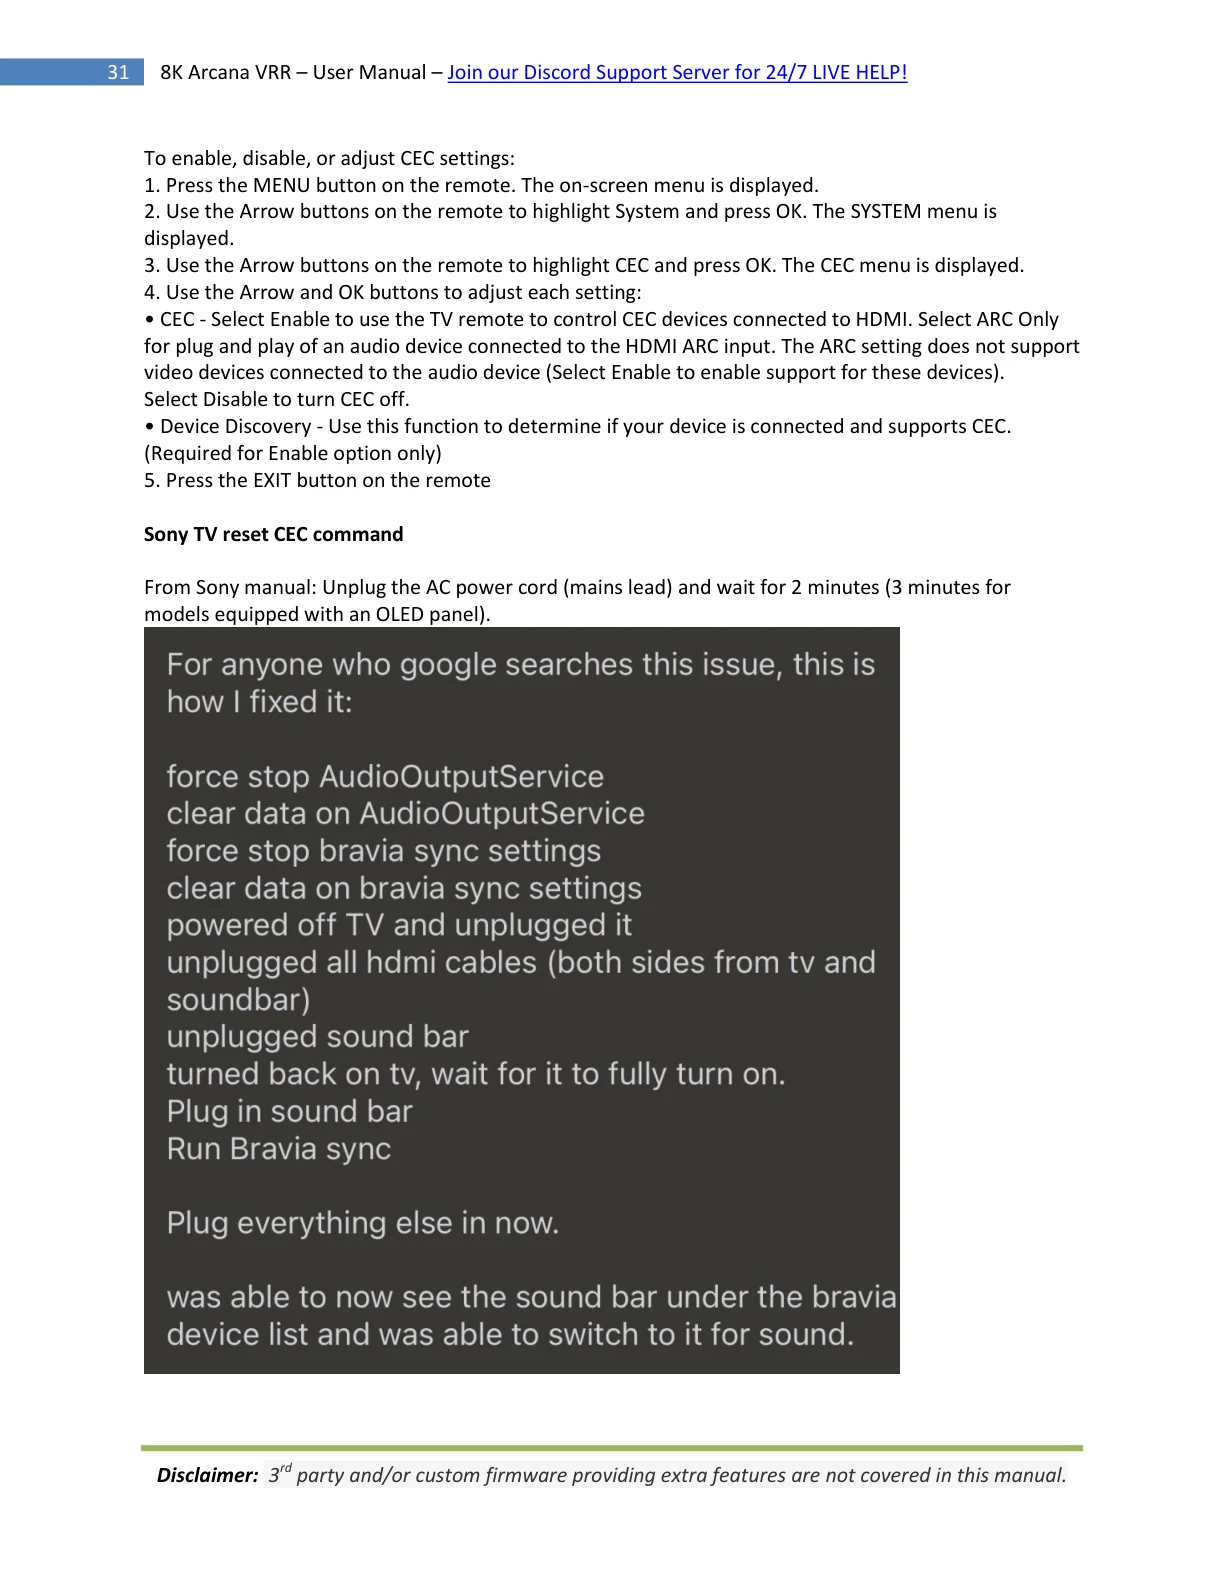
Sony TV reset CEC command
From Sony manual: Unplug the AC power cord (mains lead) and wait for 2 minutes (3 minutes for
models equipped with an OLED panel).
Disclaimer: 3rd party and/or custom firmware providing extra features are not covered in this manual.
FAQ ATV4K
How should I set ATV4K if I’m trying to display DV content from LLDV source to a HDR10 display?
Video set to 4K Dolby Vision.
Match Range set to Off.
Results in everything being output in DV, when you have an HDFury device spoofing an LLDV display.
Video set to 4K SDR.
Match Range set to On.
SDR is output as SDR, HDR as HDR, and DV as DV (with the spoofing).
Note that when you start up the ATV4K the first time after configuring the LLDV EDID in the HDfury
device, the ATV4K should bring up a prompt asking if you want to test for Dolby Vision compatibility.
You need to pass this test before any LLDV would be output. Passing the DV test will set video to 4K
Dolby VIsion, so you would need to reset it to 4K SDR if that is your preferred option.
Also, if you ever change the configured EDID, the ATV4K will notice and ask you to test for Dolby VIsion
compatibility again. Once you pass the test with a particular EDID, the ATV4K will remember the next
time you configure that EDID and not ask to test Dolby Vision again.
There is an additional option: Match Frame Rate that will output the same frame rate as the source is
encoded rather than always upscaling to 4K60. Although the ATV4K currently does not support content
encoded at true 24P. It will output true 24P as 23P that results in frame drops that may or may not be
noticeable.
Netflix on ATV4K only show 5.1 titles?
One tip to save other Apple TV users some confusion, it may not say Atmos in the menu of the app (ex
5.1 in Netflix) you’re using at first, but as long as you see Atmos under audio settings, just begin playing
content you know supports Atmos and the app will adjust. Prime Video and Netflix seems similar in this
regard. As for titles we know have Atmos, Prime video has Jack Ryan, Netflix The Old Guard and Disney +
the Mandalorian. Each of those is platform original and there for should be available in every region.
If you verify audio format with SONOS APP, make sure to restart it fully before checking.
After having installed Arcana2, i am no longer able to control the SONOS Arc volume when using the
ATV4K remote?
A: Re-sync the ATV4K remote with the SONOS Arc.
From within the app, settings -> system -> under products select your arc setup -> near the bottom
there is “remote control setup” then follow the onscreen instructions
TV does not turn off when i turn off ATV4K and/or sound continue to play when i turn off ATV4K
Arcana2 will stop sending sound if display at output is turned off. It is an user selectable option under
OLED MENU>AUDIO>TV STANDBY MUTE ON (OFF by default).
First verify in ATV4K Settings > Remotes and Devices > make sure Control TV and Receivers is on and
Volume Control is set to via HDMI (Auto via HDMI)
Then make sure that ATV4K is NOT set to NEVER SLEEP!
Disclaimer: 3rd party and/or custom firmware providing extra features are not covered in this manual.
Some users also reported success by toggling above ATV4K option OFF>ON and some had success by
toggling TV CEC OFF>ON.
Actually there is an interesting caveat. With Sleep set to any time period and you are on the Apple TV
homescreen, using the TV remote will turn the Apple TV off. If you have something playing with sound
(ex. Channels TV app or Plex) the Apple TV won't turn off. ATV4K behavior
Alternatively, if TV does not turn OFF from ATV4K, you can try this trick/tips:
Here’s the deal with HDMI CEC on my LG OLED. The Apple TV will send the ‘On’ command through
HDMI. But the TV will not accept any ‘Off’ commands through HDMI therefore the Apple TV will send an
‘Off’ command through the remotes IR. When turning off your ATV, keep holding the remote towards
the TV and it will turn off the TV. Works every time.
I cannot get Atmos from ATV4K but I can from other source.
Make sure your Apple TV 4K Audio setting Change Format is turned off. If you had it turned on to get at
least Dolby Digital 5.1 out of your TV before you got 8K Arcana. Turn Change Format off, ATV4K will then
detect the Arcana as Atmos compatible.
I can get Atmos from all sources and all apps but not from Netflix on Shield 2019 or ATV4K?
If you can get Atmos on Prime and Disney + from both devices no problem but never better than 5.1
from Netflix – simply go into your Netflix account setting on a Laptop and check your audio payback
setting and make sure it is set to high and not any lower and restart your source.
My ATV4K remote is not working for SONOS Arc volume control?
ATV4K source remote is different because it just waits if there is “audio system” device on the network
that it can control. If there is then it shown in the remote menu “hdmi control(via receiver)”
That will only work if the source sees an audio system in the CEC network.
It is just ATV4K trying to discover if audio system is present or waiting for Sonos to advertise it is there.
Of course sometimes when there is no audio then Sonos is not active and then volume doesn’t do
anything, if no sound going then volume doesn’t blink it (white led on SONOS Arc)
Disclaimer: 3rd party and/or custom firmware providing extra features are not covered in this manual.
FAQ LLDV>HDR10
What is LLDV and why is it used?
Dolby Labs created LLDV for Sony Dolby Vision TVs. HDfury enables the sending of LLDV to HDR10 TVs
and projectors
How to turn on LLDV>HDR?
1. In LLDV > HDR sub-menu set it ON.
2. In HDR sub-menu, set LLDV sync or HDR option to AUTO
You might need to restart your source.
If you have the Arcana2 set so the ATV4K sends Dolby Vision LLDV instead of HDR10, the ATV skips the
DV to HDR conversion and directly tone maps the Dolby Vision source to LLDV. The result can be
amazingly better to have the Arcana output the LLDV from the ATV4K as HDR10 than have the ATV4K
sending HDR10 to your TV.
What is the difference in LLDV>HDR on and HDR auto vs LLDV sync
With LLDV>HDR ON. HDR Auto will send custom HDR for LLDV, but not for any other input. Colors
should always be correct. If you will send SDR, HDR10, or LLDV to the Arcana depending on the original
content type, it is best to leave HDR to Auto. If you only send LLDV to the Arcana then you can set HDR
to LLDV Sync. Refer to page 14 for more details on LLDV Sync option behavior.
If I have a less than full bandwidth 18Gbps display or PJ can I still view LLDV?
Yes as long it supports HDR. Most DV content is actually 4K24 so if you set Match Frame Rate to ON your
projector might be able to accept 4K24 422 12bit.
For example The Epson 6040 is limited to 4K60 4:2:0 8-bit. It can support 4K24 4:2:2 12-bit HDR (or LLDV
to HDR) as that signal is under the 10.2 Gbps limitation of the chipset used in the Epson 6040.
Also there is no such thing as 422 10-bit in the HDMI specs. And 444 10-bit is a higher bandwidth than
422 12-bit.
I have a display that supports HDR and Dolby Vision should i set the Arcana for LLDV to HDR
conversion?
No, it is not necessary to have the 8K Arcana convert LLDV to HDR10 if your display supports Dolby
Vision, except if it’s DV30 only and you want/need to overcome this limitation.
What series LG OLEDS support both full Dolby Vision and also LLDV?
The LG OLEDs from 7 series on support both full Dolby Vision and LLDV.
What is Maximum Luminance and MaxCLL value in Dolby Vision?
LLDV to HDR conversion for Maximum Luminance only affects LLDV output and not full Dolby Vision. The
Maximum Luminance value tells the player what the maximum brightness your TV is capable of. The
player takes that into account when tone mapping full Dolby Vision to LLDV.
There is a Maximum Luminance value in the Dolby Vision data block that can be adjusted in the LLDV-
>HDR settings. Its default value is 1000 nits and is used to tell the player what max luminance to use
when tone mapping the Dolby Vision content to LLDV. There is also a nits option value in the HDR
settings of the 8K Arcana. This value may or may not be used by the HDR TV when tone mapping HDR
input. The only way to determine how it is used is to adjust the value and check the results. Changing
Disclaimer: 3rd party and/or custom firmware providing extra features are not covered in this manual.
the HDR nits value should have an immediate effect, if any. Typically, lowering the nits value will result
in a brighter picture at the risk of clipping highlights. It might seem counter intuitive but telling the TV
that the content has a lower max luminance means that the TV does not need to use as much
compression to reduce the dynamic range of the content to fit the range that the TV is capable of
displaying. Too much compression is what results in an overly dark picture. If the HDR TV has Dynamic
Tone Mapping, the HDR metadata might not be used at all when tone mapping. So changing the
metadata nit values would make no difference in the result. You could turn off DTM and see if changing
nit values makes a difference in the resulting picture.
So basically, The HDfury Arcana2 tells the player what the max luminance is; the player then performs
tone mapping of the full Dolby Vision signal to LLDV taking the max luminance value into account. It is
not a simple brightness adjustment.
The Force 1000/2000/4000 nits options and the Boost option adjust the MaxCLL value in the HDR
metadata in the output. The Max Luminance value is not changed and is always output as 4000 nits. So if
your HDR TV uses Max Luminance in tone mapping the results after changing the HDR nits values may
be lessened. HDR Max Luminance is the maximum luminance of the HDR grading monitor used when
creating the HDR. Titles graded with a 4000 nit monitor are referred to as Mastered at 4000 nits.
MaxCLL represents the brightest pixel contained in any frame of the content. Most newer TV models use
MaxCLL and have less reliance on Max Lum. Changing the LLDV nits value may need a restart of the title
depending on the player. ATV4K is probably the worst player for testing different values since each time
an adjustment is made it requires a new test for Dolby Vision. This is because the Max Luminance value
is contained in the EDID presented to the player. The ATV4K recognized the EDID had changed and
wants you to test Dolby Vision again.
Why when I select a new EDID do the ATV4K want to retest Dolby Vision?
The ATV4K keeps a memory of successful EDIDs. If you configure a new EDID it will ask to retest Dolby
Vision and/or HDR. But the next time you configure that same tested EDID it won't ask to test again.
What value should the LLDV value for max Lum be set to for most users?
For most users, the default LLDV value for Max Lum of 1000 nits will be good. Most HDR TVs do a good
job of tone mapping 1000 nits. And if you set the HDR setting to LLDV Sync, the HDR MaxCLL metadata
value sent to the TV will always match the value set for LLDV.
Why do I have a red tint and colors that are too saturated?
If you set the DV primaries to DCI-P3 and send the LLDV to a display device that does not have a DCI-P3
color profile; the colors, when applying a BT2020 color profile instead, will appear more saturated
including a red tint noticeable on faces. The solution is to send BT2020 and not DCI-P3.
If you have a display that supports DCI-P3 but the fire stick 4k only supports RGB and YCbCr how can
you force it to output DCI-P3?
When you set the LLDV->HDR Primaries setting to DCI-P3, the Fire Stick is told that the TV wants DCI-P3
instead of BT2020. Even though the Fire Stick may not have a DCI-P3 color format output option, the
Dolby Vision to LLDV tone mapping performed by the Dolby provided software should output DCI-P3
colors. The ATV4K does not have a DCI-P3 output option and it does send DCI-P3 colors when the DV
EDID is configured to DCI-P3.
Disclaimer: 3rd party and/or custom firmware providing extra features are not covered in this manual.
How do you set the Oppo UDP 203/205 to output LLDV instead of Dolby vision?
In Oppo HDR Setting, set Dolby Vision Processing to Player-led. You can leave HDR to Auto if you only
want LLDV for Dolby Vision discs. If you want the Oppo to convert SDR and HDR10 to LLDV, set HDR to
Dolby Vision.
How do you tell if the Oppo UDP 203/205 is setup correctly and outputting LLDV?
Do a long press on the Oppo remote Information button. Scroll down to Output Information. You should
see: Format Dolby Vision and Color Space 12-bit. That is confirmation of LLDV output from the Oppo.
If I have a less than full bandwith 18Gbps projector can I still view LLDV?
It depends on the projector. Most DV content is actually 4K24 so if you set Match Frame Rate to ON
your projector might be able to accept 4K24 422 12bit.
For example The Epson 6040 is limited to 4K60 4:2:0 8-bit. It can support 4K24 4:2:2 12-bit HDR (or LLDV
to HDR) as that signal is under the 10.2 Gbps limitation of the chipset used in the Epson 6040.
Also there is no such thing as 422 10-bit in the hdmi specs. And 444 10-bit is a higher bandwidth than
422 12-bit.
Disclaimer: 3rd party and/or custom firmware providing extra features are not covered in this manual.
FAQ SONOS Arc
Audio cuts in and out, what could it be?
If the audio cuts in and out on a SONOS Arc, try power cycling it (unplug the power cord, wait a few
seconds, and then plug it back in).
It seems there is distortion or surround channel cutting in and out, what could it be?
If anything weird is happening with your video or audio, your FIRST step should be to make sure the
HDMI cables between your source and the Arcana2 and between the Arcana2 and your TV/PJ are known
to be good at full speed (We recommend Zeskit, Kabeldirekt or Cable Matters from Amazon). Even if you
sent 4K60 video with Atmos over the cables and the Arcana showed the full 600MHz speed, and even if
they pass the built-in Apple TV 4K Dolby Vision tests, there may still be intermittent errors, like
distortion or surround channels cutting in and out. Many users finally determined the problem to be
caused by a 1-foot cable between Arcana2 and their displays. Use only cables that are at least 6 feet/2
meters and max 12 feet/4 meters for copper. We recommend using SONOS supplied cable from Arcana2
eARC output to SONOS Arc.
Disclaimer: 3rd party and/or custom firmware providing extra features are not covered in this manual.
FAQ NVIDIA SHIELD
Why my Shield is not offering Atmos from all APPS?
There are several factors, the Shield model: Shield 2017 or Shield 2019/2020/Pro, the APP in use and the
TV maximum capabilities. Arcana offer dedicated Scaler mode that will advertise full 4K HDR/SDR or
LLDV at input even if your display is only 10.2Gbps or 1080p capable. However please understand that
sending HDR or LLDV signal to a SDR display will results in washed out colors. If your TV is only SDR
capable, only use a SDR scaler mode such as 4K60 444 8b SDR. Make sure to always reboot the Shield
after changing the scaler setting
Service/App - Title Played - Arc Audio reported in Sonos App (make sure to always restart the APP to
have accurate audio format reported)
4K SDR Display or Scaler set to 1080p SDR
Disney+ - The Mandalorian - Dolby Digital Plus 5.1
Disney+ will not output Atmos in 4K SDR > 1080 SDR on Shield 2017 and PRO.
Netflix - The Old Guard - Dolby Digital Plus 5.1 (Netflix playback screen displays Ultra HD 4k and 5.1) on
Shield 2017
Netflix will not output Atmos in 4K SDR > 1080p SDR on Shield 2017 but will do it on Shield
2019/2020/Pro.
4K HDR Display or Scaler set to 1080p HDR
Disney+ - The Mandalorian - Dolby Atmos (DD+)
Disney+ will output Atmos in 4K HDR > 1080p HDR on Shield 2017 and PRO.
Netflix - The Old Guard - Dolby Digital Plus 5.1 (Netflix playback screen displays HDR and 5.1)
Netflix will not output Atmos in 4K HDR > 1080p HDR on Shield 2017 but will do it on Shield
2019/2020/Pro
I can get Atmos from all sources and all apps but not from Netflix on Shield 2019 or ATV4K?
If you can get Atmos on Prime and Disney + from both devices no problem but never better than 5.1
from Netflix – simply go into your Netflix account setting on a Laptop and check your audio payback
setting and make sure it is set to high and not any lower and restart your source.
Prime APP on Nvidia Shield 2019 is not giving me Atmos?
Try turning off Dolby Audio processing.
Disclaimer: 3rd party and/or custom firmware providing extra features are not covered in this manual.

FAQ AUDIO
I hear an audio echo?
If anyone is having issues with echo on your audio, the problem may be that the audio channel being
sent to your TV is actually getting played through the built-in TV speakers (which is hard to notice when
your sound bar is right in front of or below your TV) and you're hearing two sets of speakers slightly out
of sync. Checking the sound-output setting on your TV will confirm if that is the cause. You can fix it by
setting your Arcana2 to eARC-only mode, so no audio gets sent to TV and you only hear audio from
eARC sound bar.
I’m experiencing lip-sync issue after installing 8K Arcana?
The only possible situation with HDMI source at Arcana input is that audio is AHEAD of pic. You can fix it
with SONOS APP delay or Arcana2 delay. AUDIO cannot be LATE (assuming you did not force delay
yourself via SONOS APP or Arcana2). For folks with an Apple TV, the Wireless Audio Sync feature will
automatically and very accurately take care of remaining (audio before video) sync. It didn't work before
Arcana because it can't delay video and got confused.
My TV displays unsupported audio format banner continuously, what can I do?
Some TV will go nuts/crazy if you send ATMOS signal to their input, probably the Atmos MAT metadata
of it that they don't like, in such case eARC ONLY must be selected under Arcana2 > Audio so NO ATMOS
is sent to the TV.
Actually anyone with any issue should try that especially if issue when playing Atmos only!
Verified/Affected models: Sony XF9005 - X900F and Samsung UN75NU6950FXZA
I cannot always get Atmos at startup?
Please ensure the source is connected to the Arcana's HDMI input and then pick and use a scaler mode
in Arcana2 OLED MENU > SCALER that is an appropriate match setting for your display. This has been
proven to fix the issue 100%. If you do not get Atmos from source at Arcana2 input with Scaler mode, it
is 100% Settings issue, GUARANTEED.
I cannot get any sound to a brand new/never used SONOS Arc from any source at Arcana input when
Arcana is connected to a non CEC capable projector/monitor or display
In order to get audio from any sources at Arcana2 input, users of brand new/never used SONOS Arc
must go through the APP setup process while connected to a CEC capable display, if you never when
through the SONOS APP setup process with your SONOS Arc soundbar yet, please connect it to any
HDMI display that offer CEC support and complete the SONOS APP setup process, once done you can
connect it back in your setup with a non CEC capable display, monitor or TV and you will be able to get
Full Audio from any source to SONOS Arc as expected. This SONOS restriction requires such initial setup
first with CEC capable display. If your SONOS Arc has been setup before, then there is no need to set it
up again after Arcana2 is connected and you can just proceed normally.
Disclaimer: 3rd party and/or custom firmware providing extra features are not covered in this manual.
FAQ VIDEO
I notice a short black screen / resync when starting a content that i didn't have or noticed when
connected direct to TV?
All that is normal, you will have the same if you insert any device in between, like an AVR, splitter,
matrix, switcher, video processor, and the more device you have in the same chain, the longer this will
take, the only way to have that nearly not noticeable is SOURCE > DISPLAY direct since signal goes
straight to panel driver.
If menu is 60Hz and content 24Hz then there will be a resync like for any video format change, if you
have SOURCE > TV, then sure you never noticed it but insert any device in between and you will have
the exact same, just normal, HDMI resync.
My TV brightness seems to fluctuate, what can I do?
Some TV will go nuts/crazy if you send ATMOS signal to their input, probably the Atmos MAT metadata
of it that they don't like, in such case eARC ONLY must be selected under Arcana > Audio so NO ATMOS
is sent to the TV.
Actually anyone with any issue should try that especially if issue when playing Atmos only!
Verified/Affected models: Sony XF9005 - X900F and Samsung UN75NU6950FXZA
I have loss of sync, drop or black screen playing high bandwidth signals?
This is a cable issue, replace cables by Zeskit, Cable Matters or KabelDirekt from Amazon in
min6ft/max12ft and you will be fine. If you need fiber cable for high bandwidth in 30ft(10m) or
60ft(20m), please visit this page.
Disclaimer: 3rd party and/or custom firmware providing extra features are not covered in this manual.
FAQ ARC or eARC <> HDMI input switching How to use Arcana2 when retrieving ARC sound from display? Always use the display remote (or the display remote IR codes with a universal remote) to switch between TV HDMI input and TV APPS. It is mandatory and extremely important to use your TV remote or TV remote IR codes to switch between TV APPS (ARC sound) and the TV HDMI input where Arcana2 is connected. Whenever you click TV remote APP selection or input channel selection there will be a multitude of CEC commands flying. Arcana2 capturing these are essential to switching the audio. Please verify this is the case carefully so it is consistent and ok. We expect this to be one of the main issues due to the flakiness of CEC implementations overall in consumer video. Also verify TV other inputs to make sure audio flows through TV ARC into Arcana2 and then to SONOS. Please note that if you don’t use CEC and ARC sound retrieval, then the above is irrelevant. How I can switch between TV ARC and HDMI INPUT? For HDMI/ARC switching to work, when you use your TV remote and select APPS on TV, then ARCANA2 should switch to ARC(From TV) on the main OLED page, when you use your TV remote and select HDMI input where Arcana2 is connected, then Arcana2 OLED should report eARC HDMI INPUT. As long as this does not work correctly it means that ARC/CEC is not working as it should and you should try new update when they comes out and report back via our discord support server: here. When TV sees a source it asks the source what it is. The source responds it is “audio system”. Then TV starts ARC and turns off its own TV speakers and allows TV remote volume control to pass as CEC commands. Now all audio either from TV apps or routed to TV via TV HDMI inputs will flow back via ARC. To enable HDMI audio from Arcana2 input then Arcana2 must be instructed to switch to its own input audio rather than use the ARC from TV. This happens with two ways: TV remote is used to select the input where Arcana is connected OR the Arcana2 input source issues routing change -message which happens when you press Menu button on ATV4K for example When Arcana2 is rebooted this entire sequence is interrupted and all start from scratch and again the timing when SONOS Arc tells “audio system” vs when ATV4K source send its routine message is random. Arcana play no role in that, Arcana2 only listens to these commands and they come randomly after power up. Sometimes TV is first and sometimes ATV4K is first so the startup selection by Arcana will be random It is only in sequence if you never reboot Arcana2. If you see "eARC/ARC not active" on Arcana OLED > click Netflix or APPS on TV remote to enter ARC mode and then click HDMI (or wherever Arcana is) to have TV select HDMI input. On some TVs you might need to set MENU > AUDIO > AUTO (instead of eARC ONLY Disclaimer: 3rd party and/or custom firmware providing extra features are not covered in this manual.
FAQ TV Remote for Volume Control on SONOS Arc
How to use TV remote for controlling SONOS Arc volume?
Please note that this DOES NOT apply to SOURCE REMOTE for volume control.
In basic principle the only way that TV remote can start working is that TV enters "system audio" mode
(it’s a different mode from "audio system"). The only possible way for a TV to enter a "system audio"
mode is by receiving a certain command via CEC. In "system audio" mode TV mutes its own speakers
and starts controlling external products via CEC commands. The only equipment issuing this command is
SONOS Arc. No other device can control TV to enter this mode. Anyone having issue where TV remote
does not work then it means SONOS Arc has not yet issued the command or TV have not yet reacted to
it. As long as TV does not mute its TV speaker, then TV remote control for volume will not work.
Solution could be:
1) Turn TV CEC OFF>ON or CEC SCAN
Some TVs might have delay after CEC ON to detect equipment.
2) SONOS HDMI cable unplug/replug
Some TVs might have delay after SONOS replug to detect it and switch to "system audio" mode.
3) SONOS power cord remove/reconnect
Some TVs might have delay after SONOS replug to detect it and switch to "system audio" mode.
4) TV Power cord unplug, wait 3min, replug
Some TVs might have delay after power cord unplug/replug to switch to "system audio" mode.
5) Some order or power up sequence might need to be found in particular setup.
6) Unplug/replug Arcana2 HDMI Out or Arcana > FW/RESET > Factory Default.
It can help if luckily that is corresponding to option number 5 above in your setup.
Disclaimer: 3rd party and/or custom firmware providing extra features are not covered in this manual.
Highlight Features:
Arcana 2 VRR Exclusive: 8K FRL5 40Gbps/1200MHz + Full HDMI and ARC/eARC Audio out
Arcana 2 was designed for SONOS Arc or Beam2 (eARC sound system) as well as any HDMI, ARC or eARC
sound system. Its main purpose is to extract up to full audio from HDMI source and feed any sound
system with the best possible audio from any HDMI source thus bypassing possible limitations in AV
setup (Limited video pass-through support in AVR, ARC capable display or non-ARC capable display).
Buying a new AVR or an eARC display is not needed anymore to get full audio from HDMI source with
SONOS Arc or similar eARC only and HDMI sound system.
1 HDMI input, 2 HDMI video outputs with scaling option and 1 dedicated HDMI full audio eARC output,
OLED/MENU Control, RS232, OLED display and a rotary switch button on the side allowing to enter/exit
and perform change in the device system menu. The HDMI input is capable of 8K
HDR/HLG/DV/LLDV/HDR10+ up to 40Gbps for video and support any sound format in existence today,
HDMI video outputs are capable of outputting 40Gbps and all sound formats as well.
Arcana 2 is always running in automatic mode by default to ensure your setup remains always optimized
at its best capabilities.
HDR Booster
Arcana 2 is capable of injecting and modding HDR metadata at any resolution in real time. Easy control
allows quick change to HDR metadata, translate HLG>HDR, replace or boost value from any metadata on
the fly or simply disable HDR metadata for display with dedicated HDR mode.
LLDV -> HDR10
Display DV content on HDR/HDR10 display from LLDV capable sources.
Using Arcana 2 will allow any HDR10 display without DV support to finally render DV content from LLDV
capable source.
Down Scaler when needed
Always feeding best capabilities HDMI signal to connected sink devices, automatically or manually. No
matter if you have HDMI first generation or second generation equipment, any devices always get the
best possible signal in FHD(1080p) or UHD(2160p) or FUHD (4320p) GUARANTEED. Featuring Upscale,
Downscale and Pass-through mode as well as Chroma Conversion, Color Space and Color Depth
modification on the fly at 8, 10 and 12bit.
Extract up to Atmos over DD+ from TV ARC Input to ANY eARC sound system
ARC (for up to DD+/Atmos over DD+ bitstream) is possible from TX0 HDMI video out.
Max Audio capabilities and format extracted from any HDMI sources to feed any HDMI, ARC or eARC
sound system
Thru 2 dedicated HDMI outputs (eARC and HDMI), any HDMI sound format from any incoming signal is
automatically extracted and forwarded via eARC to feed any eARC sound system or via HDMI to feed
older AVR.
OLED Menu
Controlling your HDfury has never been so easy, fast and elegant. With a single up/down/click 3
functions rotary switch, you can navigate and select any options in the embedded OLED menu. Firmware
Disclaimer: 3rd party and/or custom firmware providing extra features are not covered in this manual.
update are made easier with no need of any driver installation or hassle of any kind. Simply copy the
firmware update file on a FAT32 formatted USB stick and plug it in Arcana update port.
HDMI Explorer (OSD/OLED)
Signal and setup info is everywhere and always available at first sight. Enhance your AV knowledge thru
exact signal timing report with up to 3 digits decimals accuracy on frame rate. Display source name,
resolution, chroma, colordepth, colorspace, hdcp, cst1, VIC, eotf, colorimetry, primaries, white point,
max/min lum, maxCLL, maxFall, range. Our new generation hardware is bringing HDMI explorer to
another level; simply anything that travels thru is intercepted and exposed to the user via OLED display
or On Screen Display.
RS232 Control
All Arcana2 controls are also available via RS232 in order to ensure a total control from any serial based
computer.
HDMI/CEC TOTAL COMMANDER
HDfury Arcana2 offers a unique CEC command manager, with CEC compatible equipment.
CEC commands allow a HDMI device to send commands to connected HDMI devices.
Arcana unique solution allows control between source, TV and eARC sound system in all directions.
Unique HDCP Doctor
Providing a total of 6 HDCP 1.4 and 2.2 engines for decryption/encryption, HDfury Arcana2 offers a total
HDCP workaround solution including HDCP 2.2 > HDCP 1.4 and HDCP 1.4 > HDCP 2.2 both ways
conversion within the same unit. It is capable of connecting any HDCP1.x or HDCP2.x source devices to
any HDCP1.x or HDCP 2.x sink devices. RX block decrypts the input first whether its 1.x or 2.x. Then
output port can individually encrypt it to 1.4 or 2.2 or not encrypt it at all if it was not encrypted initially.
Display HDCP 2.2 Content with Non-HDCP2.2 Compliant Devices
HDCP 2.2 is the new copy-protection scheme for 4K UHD content. Source devices, including media
servers and head-ends like Netflix, will encode their 4K content with this new scheme. TVs must be
HDCP 2.2-enabled to play it, and everything in the video chain including switches and receivers must be
compliant as well, or the display will go dark and/or display a HDCP error message. Bad news for
consumers who have purchased expensive, high-bandwidth, processor-rich switchers, receivers and
displays to accommodate 4K. Once Arcana2 is an active part of your setup such issue will not bother you
ever again.
Disclaimer: 3rd party and/or custom firmware providing extra features are not covered in this manual.
Main Specifications
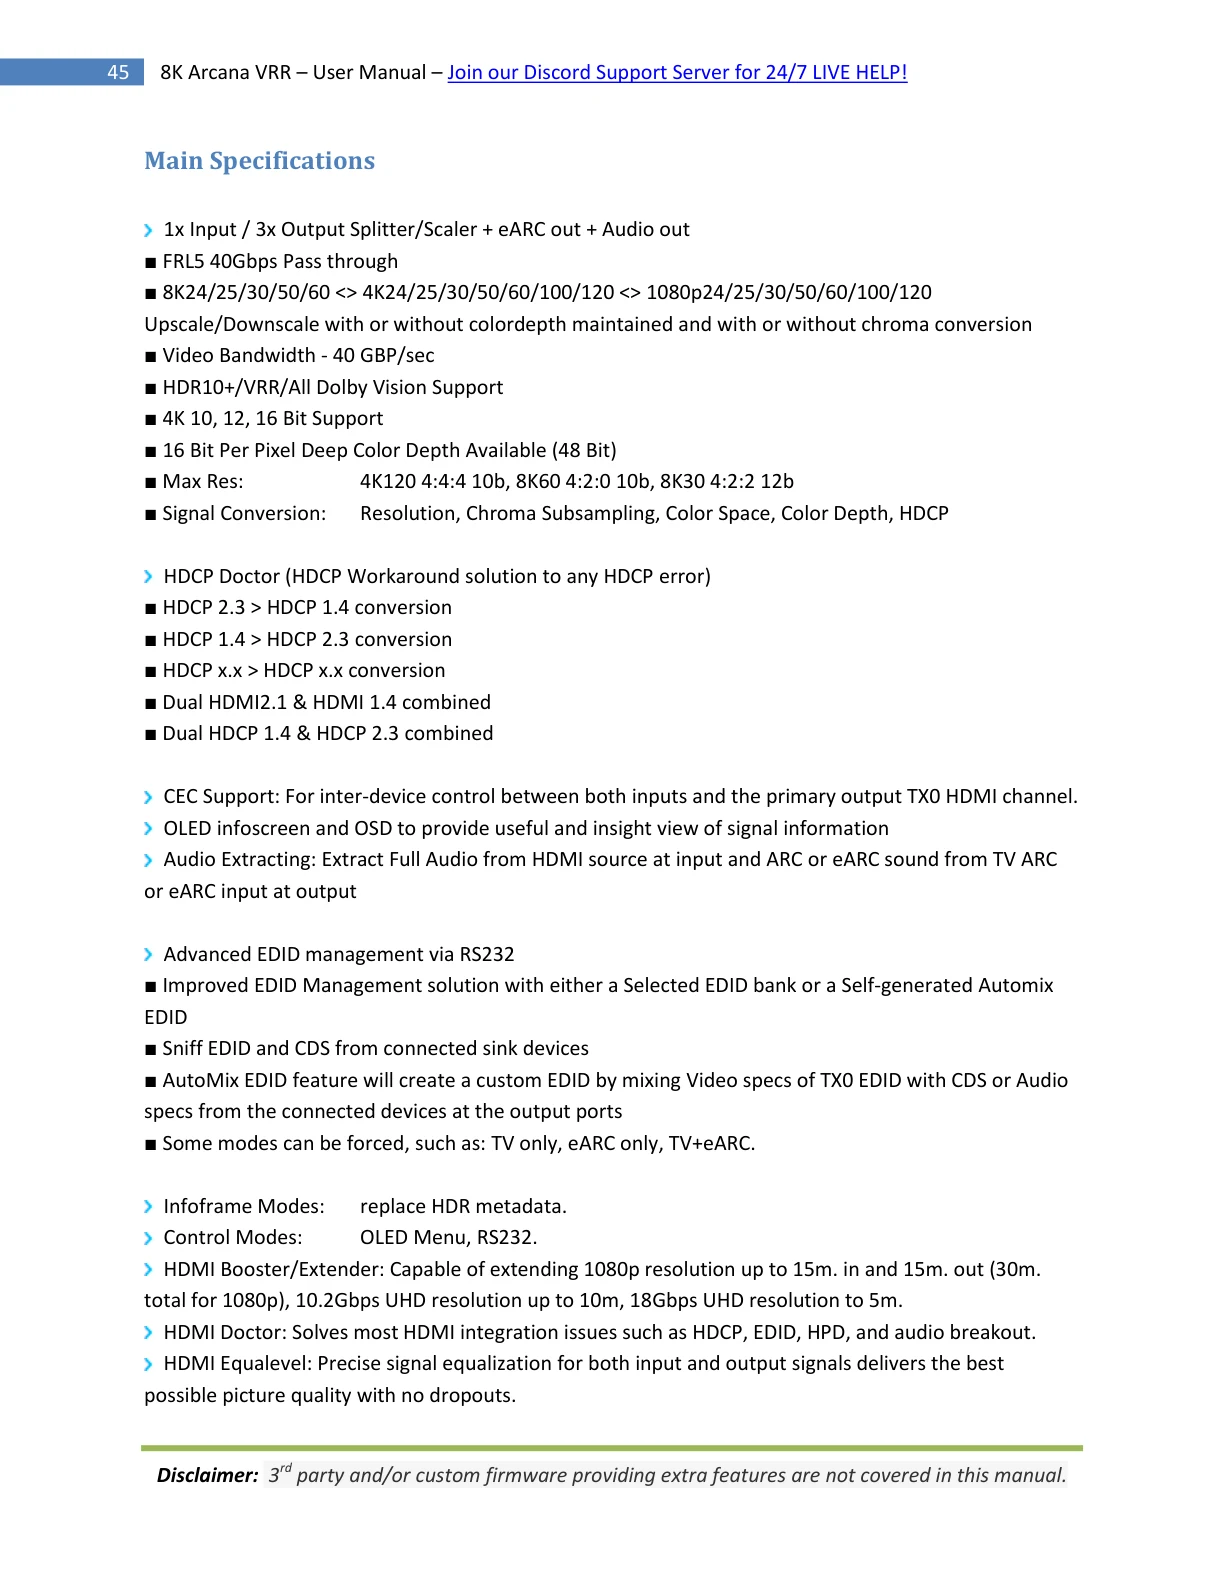
1x Input / 3x Output Splitter/Scaler + eARC out + Audio out
■ FRL5 40Gbps Pass through
■ 8K24/25/30/50/60 <> 4K24/25/30/50/60/100/120 <> 1080p24/25/30/50/60/100/120
Upscale/Downscale with or without colordepth maintained and with or without chroma conversion
■ Video Bandwidth - 40 GBP/sec
■ HDR10+/VRR/All Dolby Vision Support
■ 4K 10, 12, 16 Bit Support
■ 16 Bit Per Pixel Deep Color Depth Available (48 Bit)
■ Max Res: 4K120 4:4:4 10b, 8K60 4:2:0 10b, 8K30 4:2:2 12b
■ Signal Conversion: Resolution, Chroma Subsampling, Color Space, Color Depth, HDCP
HDCP Doctor (HDCP Workaround solution to any HDCP error)
■ HDCP 2.3 > HDCP 1.4 conversion
■ HDCP 1.4 > HDCP 2.3 conversion
■ HDCP x.x > HDCP x.x conversion
■ Dual HDMI2.1 & HDMI 1.4 combined
■ Dual HDCP 1.4 & HDCP 2.3 combined
CEC Support: For inter-device control between both inputs and the primary output TX0 HDMI channel.
OLED infoscreen and OSD to provide useful and insight view of signal information
Audio Extracting: Extract Full Audio from HDMI source at input and ARC or eARC sound from TV ARC
or eARC input at output
Advanced EDID management via RS232
■ Improved EDID Management solution with either a Selected EDID bank or a Self-generated Automix
EDID
■ Sniff EDID and CDS from connected sink devices
■ AutoMix EDID feature will create a custom EDID by mixing Video specs of TX0 EDID with CDS or Audio
specs from the connected devices at the output ports
■ Some modes can be forced, such as: TV only, eARC only, TV+eARC.
Infoframe Modes: replace HDR metadata.
Control Modes: OLED Menu, RS232.
HDMI Booster/Extender: Capable of extending 1080p resolution up to 15m. in and 15m. out (30m.
total for 1080p), 10.2Gbps UHD resolution up to 10m, 18Gbps UHD resolution to 5m.
HDMI Doctor: Solves most HDMI integration issues such as HDCP, EDID, HPD, and audio breakout.
HDMI Equalevel: Precise signal equalization for both input and output signals delivers the best
possible picture quality with no dropouts.
Disclaimer: 3rd party and/or custom firmware providing extra features are not covered in this manual.
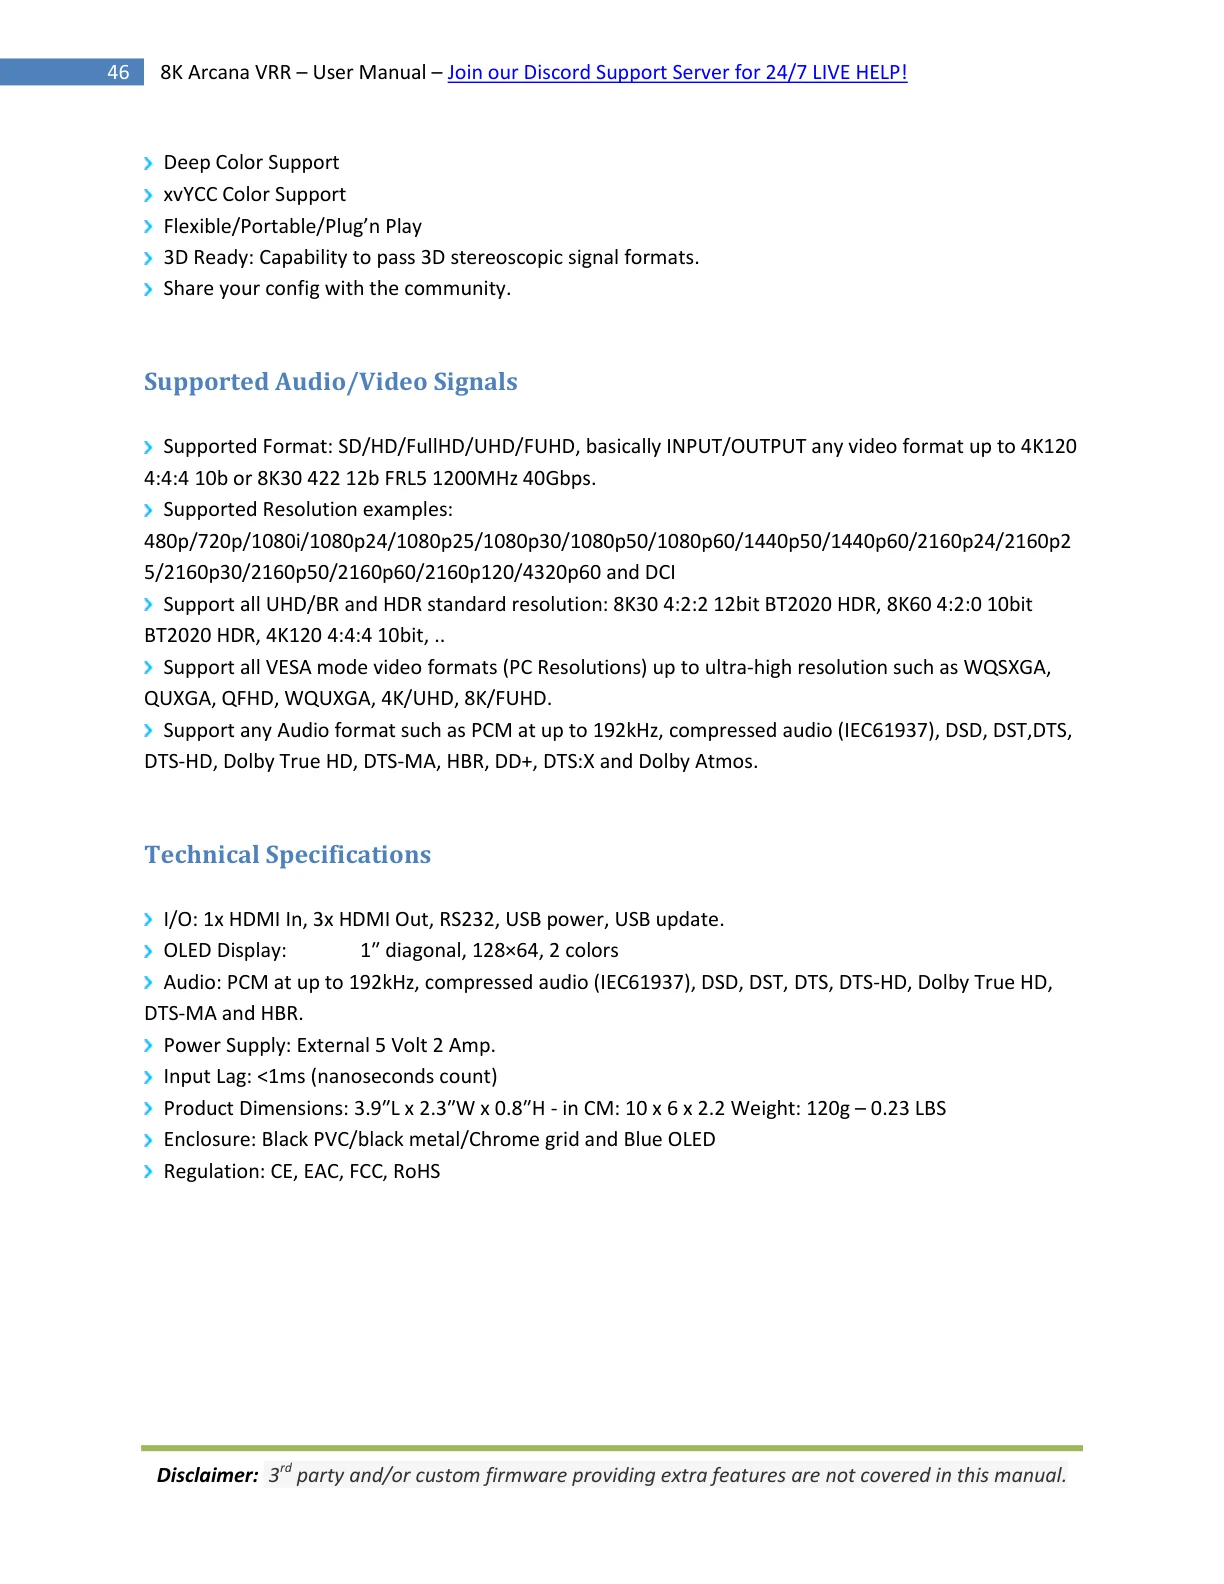
Deep Color Support
xvYCC Color Support
Flexible/Portable/Plug’n Play
3D Ready: Capability to pass 3D stereoscopic signal formats.
Share your config with the community.
Supported Audio/Video Signals
Supported Format: SD/HD/FullHD/UHD/FUHD, basically INPUT/OUTPUT any video format up to 4K120
4:4:4 10b or 8K30 422 12b FRL5 1200MHz 40Gbps.
Supported Resolution examples:
480p/720p/1080i/1080p24/1080p25/1080p30/1080p50/1080p60/1440p50/1440p60/2160p24/2160p2
5/2160p30/2160p50/2160p60/2160p120/4320p60 and DCI
Support all UHD/BR and HDR standard resolution: 8K30 4:2:2 12bit BT2020 HDR, 8K60 4:2:0 10bit
BT2020 HDR, 4K120 4:4:4 10bit, ..
Support all VESA mode video formats (PC Resolutions) up to ultra-high resolution such as WQSXGA,
QUXGA, QFHD, WQUXGA, 4K/UHD, 8K/FUHD.
Support any Audio format such as PCM at up to 192kHz, compressed audio (IEC61937), DSD, DST,DTS,
DTS-HD, Dolby True HD, DTS-MA, HBR, DD+, DTS:X and Dolby Atmos.
Technical Specifications
I/O: 1x HDMI In, 3x HDMI Out, RS232, USB power, USB update.
OLED Display: 1″ diagonal, 128×64, 2 colors
Audio: PCM at up to 192kHz, compressed audio (IEC61937), DSD, DST, DTS, DTS-HD, Dolby True HD,
DTS-MA and HBR.
Power Supply: External 5 Volt 2 Amp.
Input Lag: <1ms (nanoseconds count)
Product Dimensions: 3.9″L x 2.3″W x 0.8″H - in CM: 10 x 6 x 2.2 Weight: 120g – 0.23 LBS
Enclosure: Black PVC/black metal/Chrome grid and Blue OLED
Regulation: CE, EAC, FCC, RoHS
Disclaimer: 3rd party and/or custom firmware providing extra features are not covered in this manual.
Certifications Arcana CE Certification Arcana RoHS Certification Arcana FCC Certification Disclaimer: 3rd party and/or custom firmware providing additional features are not covered in this manual.
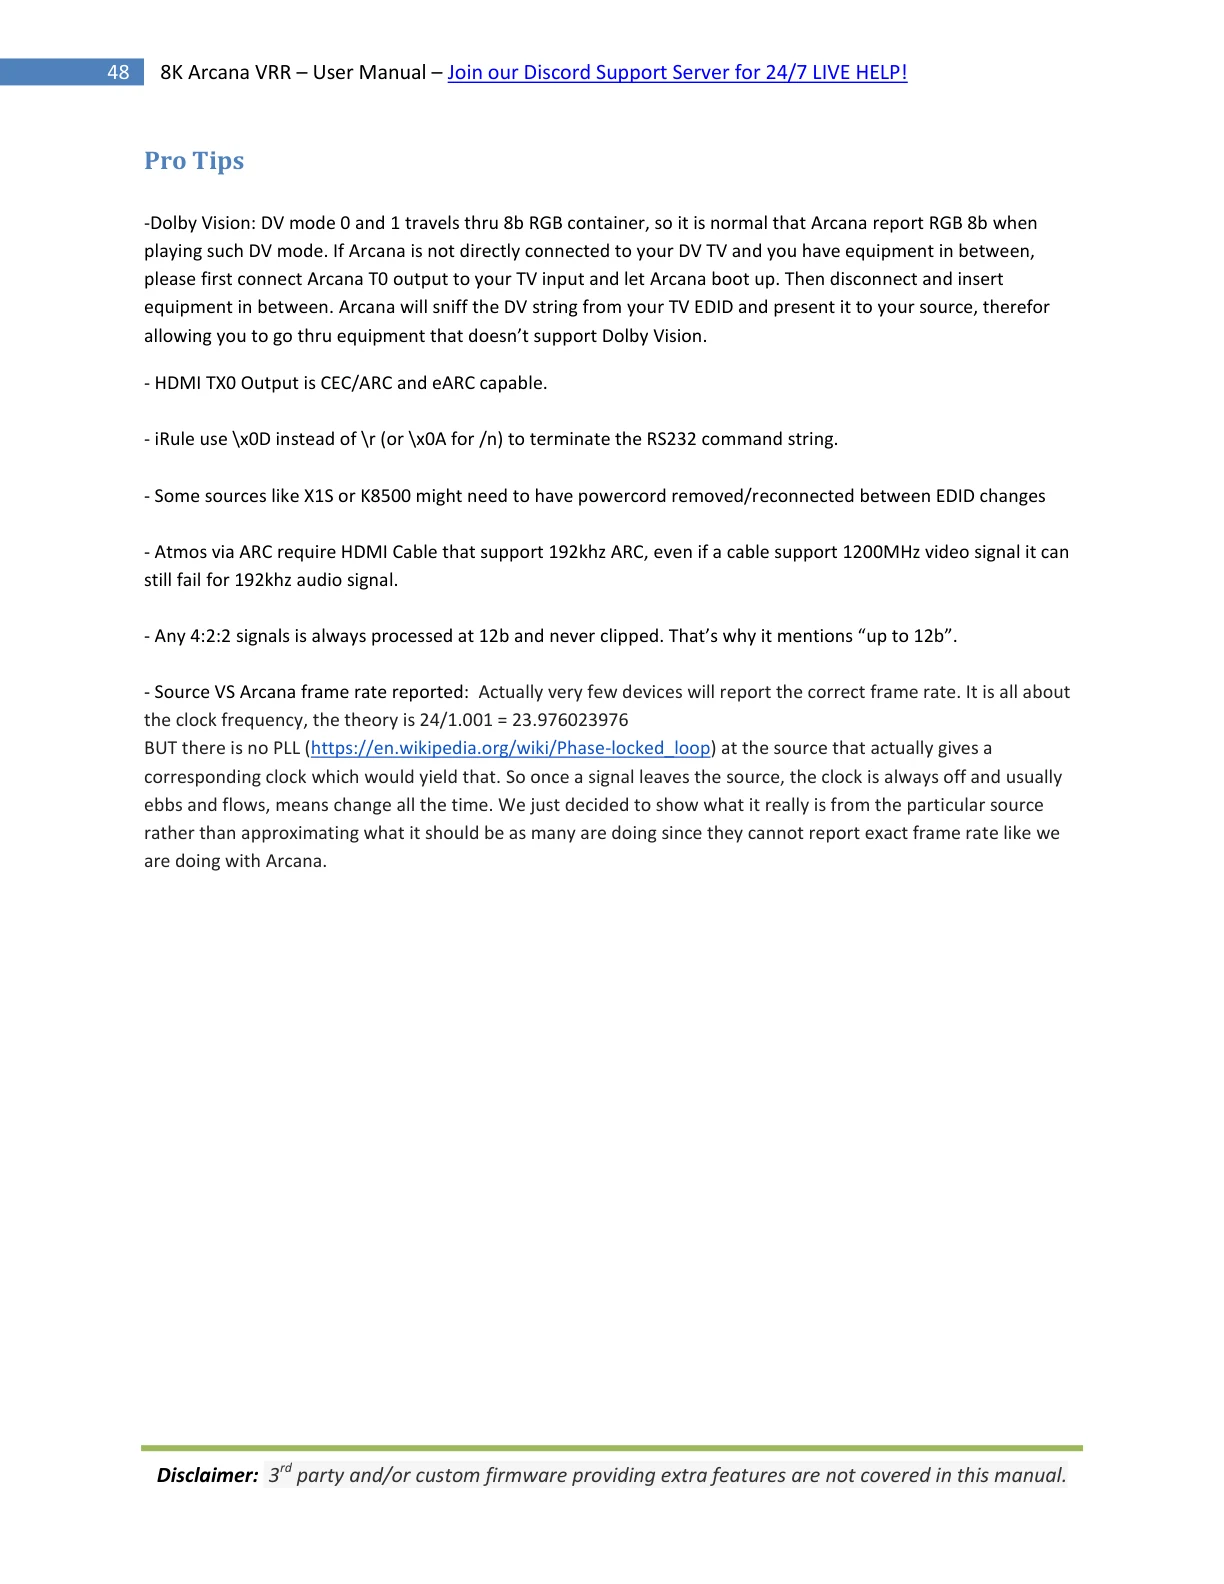
Pro Tips
-Dolby Vision: DV mode 0 and 1 travels thru 8b RGB container, so it is normal that Arcana report RGB 8b when
playing such DV mode. If Arcana is not directly connected to your DV TV and you have equipment in between,
please first connect Arcana T0 output to your TV input and let Arcana boot up. Then disconnect and insert
equipment in between. Arcana will sniff the DV string from your TV EDID and present it to your source, therefor
allowing you to go thru equipment that doesn’t support Dolby Vision.
- HDMI TX0 Output is CEC/ARC and eARC capable.
- iRule use \x0D instead of \r (or \x0A for /n) to terminate the RS232 command string.
- Some sources like X1S or K8500 might need to have powercord removed/reconnected between EDID changes
- Atmos via ARC require HDMI Cable that support 192khz ARC, even if a cable support 1200MHz video signal it can
still fail for 192khz audio signal.
- Any 4:2:2 signals is always processed at 12b and never clipped. That’s why it mentions “up to 12b”.
- Source VS Arcana frame rate reported: Actually very few devices will report the correct frame rate. It is all about
the clock frequency, the theory is 24/1.001 = 23.976023976
BUT there is no PLL (https://en.wikipedia.org/wiki/Phase-locked_loop) at the source that actually gives a
corresponding clock which would yield that. So once a signal leaves the source, the clock is always off and usually
ebbs and flows, means change all the time. We just decided to show what it really is from the particular source
rather than approximating what it should be as many are doing since they cannot report exact frame rate like we
are doing with Arcana.
Disclaimer: 3rd party and/or custom firmware providing extra features are not covered in this manual.
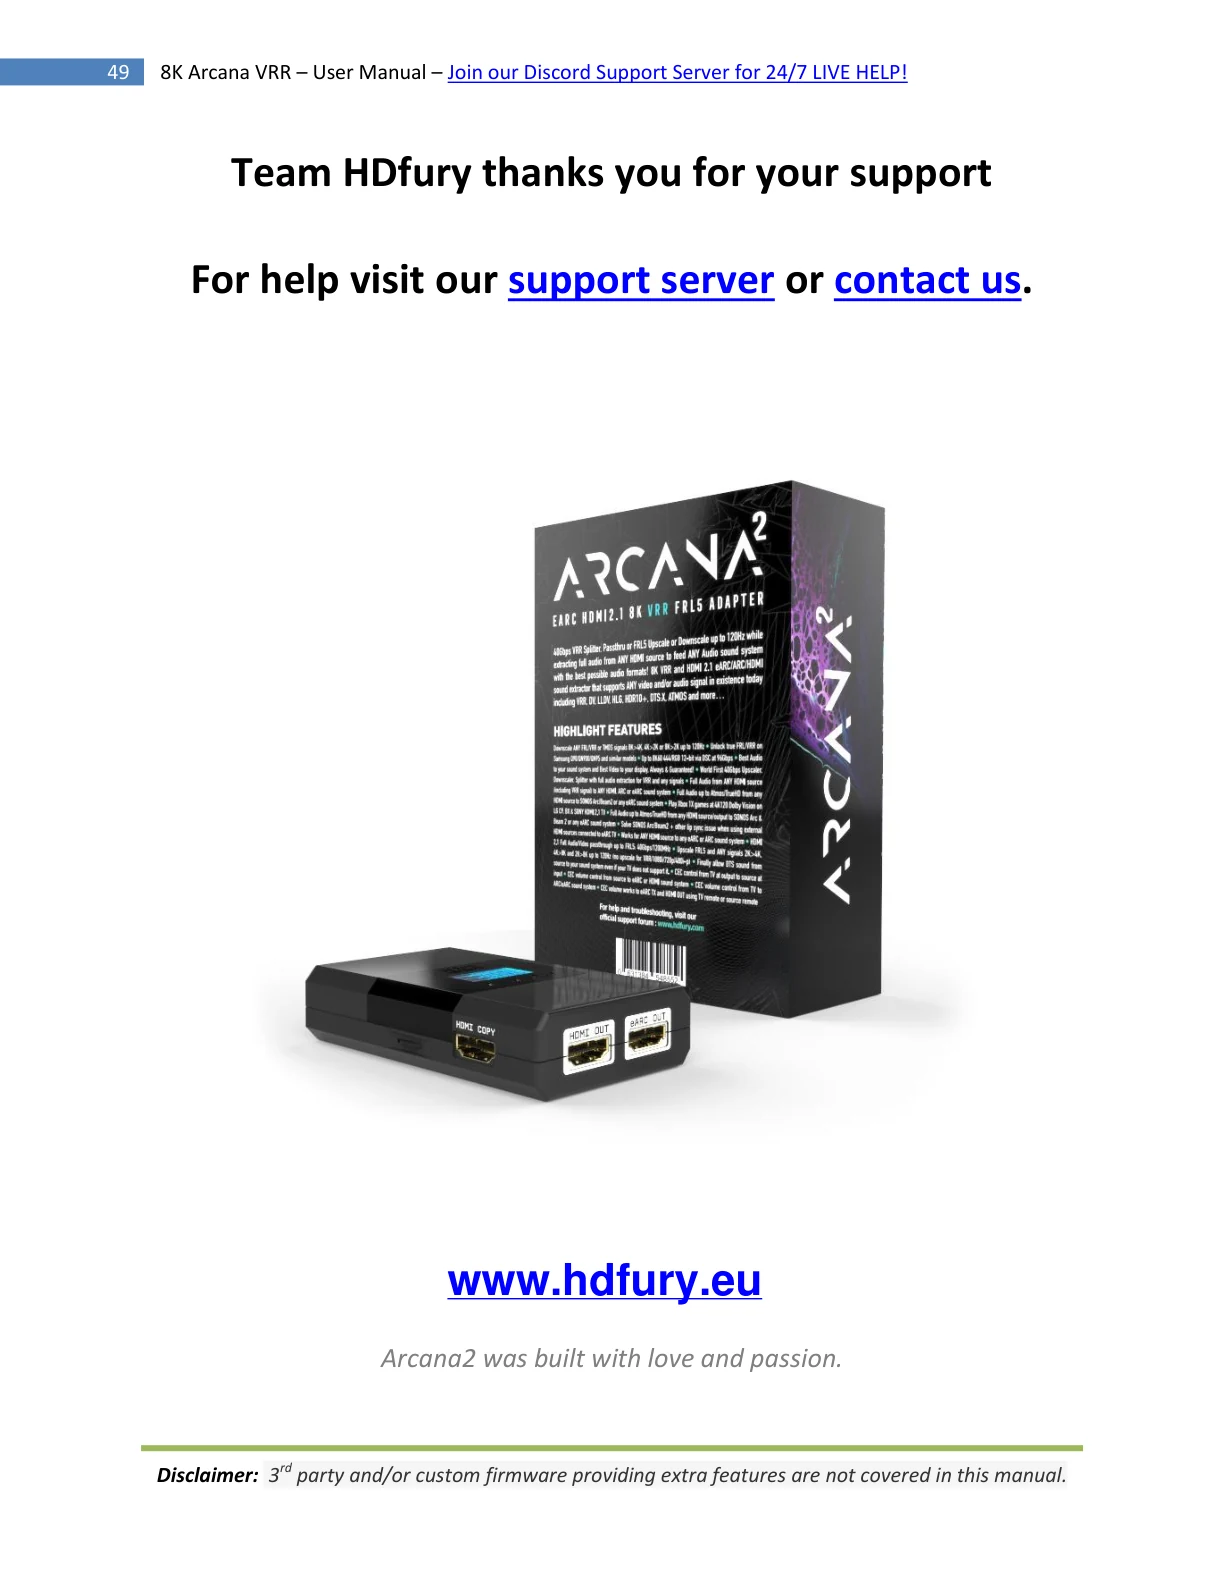
Team HDfury thanks you for your support For help visit our support server or contact us. www.hdfury.eu Arcana2 was built with love and passion. Disclaimer: 3rd party and/or custom firmware providing additional features are not covered in this manual.